Compiling UE5 From Source

In order to package UE5 dedicated server builds you must use a version of Unreal Engine 5 that is installed from source. It is not possible to do so using a binary build from the Epic Games Launcher. Building UE5 from source essentially means downloading the engine source code from Epic Games’ github repository and compiling the binaries yourself using Visual Studio. This will take quite some time, depending on the power of the hardware being used.
Before you can install Unreal Engine from source, you need to install VisualStudio.
For this guide, we used VisualStudio Community 2019.
Note
This might not be possible with future versions of the Engine so you may need VisualStudio Community 2022. But you can also install UE5.2 with VS 2019.
To install Visual Studio correctly, follow the Visual Studio section of the guide here from Epic Games. This covers the requirements in more detail.
In summary, we need to have the following workloads enabled:
- .NET desktop development
- Desktop development with C++
- Game Development with C++
In the Individual components section, makes sure you also select:
- C++ profiling tools
- C++ AddressSanitizer
- Windows 10 SDK (our version is 10.0.19041.0)
- Unreal Engine Installer
- NuGet targets and build tasks
- C# and VB Rosyln compilers
- .NET framework 4.6.2 targeting pack
- .NET framework 4.5 target pack
Next, you will need to install the latest version of the Windows SDK from the Microsoft site here.
You will only need to select “Debugging tools for Windows” during the installation.
Lastly, you also need to have the C++ redistributables installed, which you can download from here.
You will next need to link your Epic Games and Github accounts. This will give you access to the Unreal Engine repository on the official Epic Games Github account. We will be describing the steps to install the engine from a Windows machine.
Navigate to the releases section in the repo and find the latest full release of the Engine.
At the time we created this tutorial it is currently 5.2. Clicking on this release will then show you a zip file of the release ready for you to download.
Unzip the files into the directory, where you want your engine install to live.
Note
For clarity you can name the install directory UE_
Alternatively, you can fork and clone the repo in which case check-out the latest release tag.
When you have downloaded the engine source code, run the setup.bat file.
To run this file, simply double click it in your file browser or navigate to the downloaded files using command prompt and run it using the line.
Setup.batRemember that you might need the appropriate administration permissions in order to run this in your command line.
This will download any required dependencies and install them.
Keep an eye out for a Windows permissions pop-up window dependency installation. The program will wait until you accept the pop-up.
This setup can take quite some time.
Once setup is complete your directory should look something like the image below:
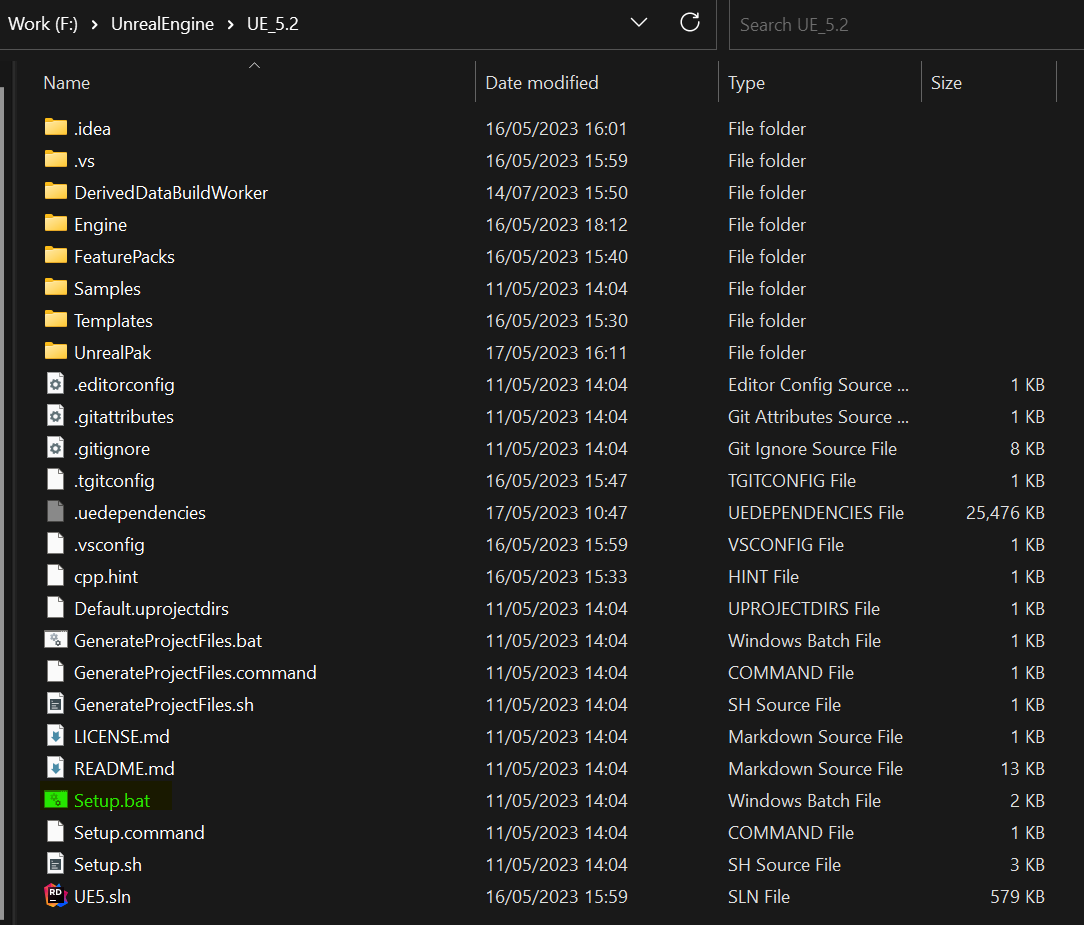
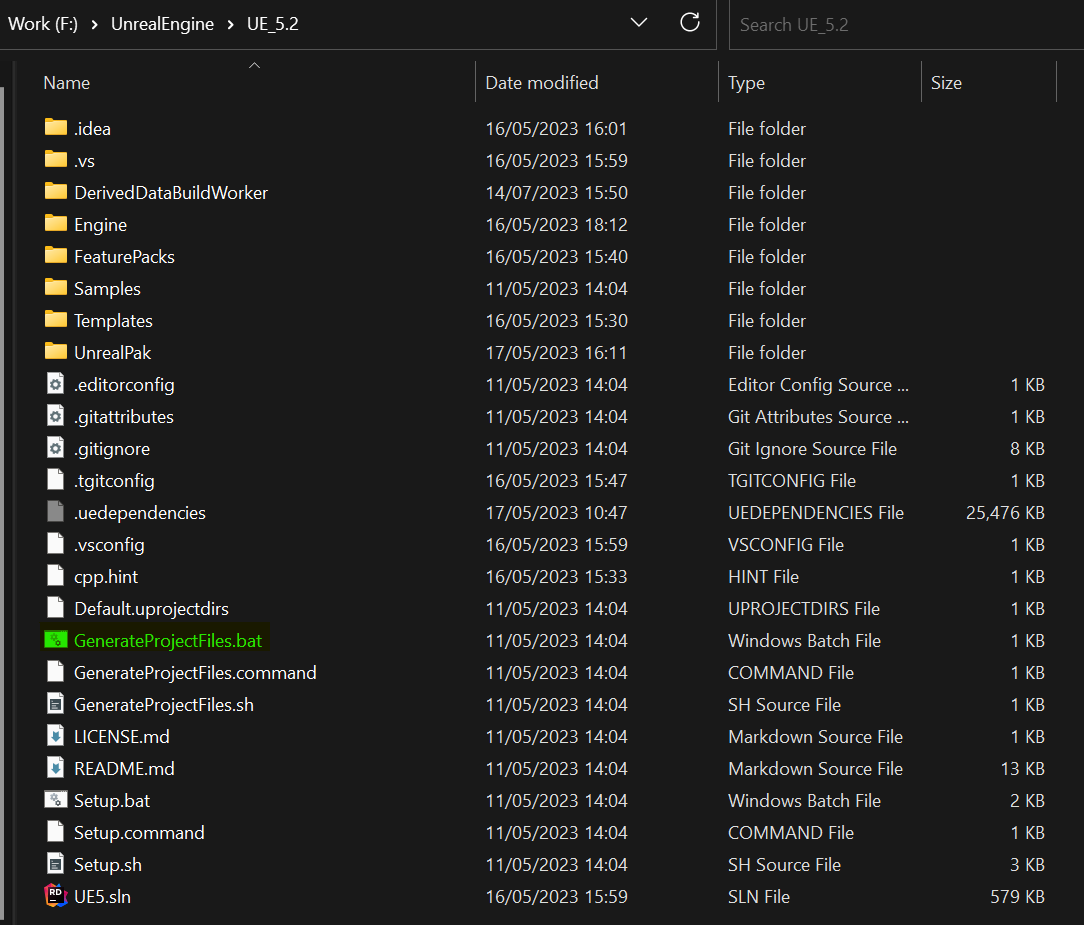
Next we need to run GenerateProjectFiles.bat the same way as the Setup.bat file.
This will create the .sln (VS project) files we will need to open the project with Visual Studio.
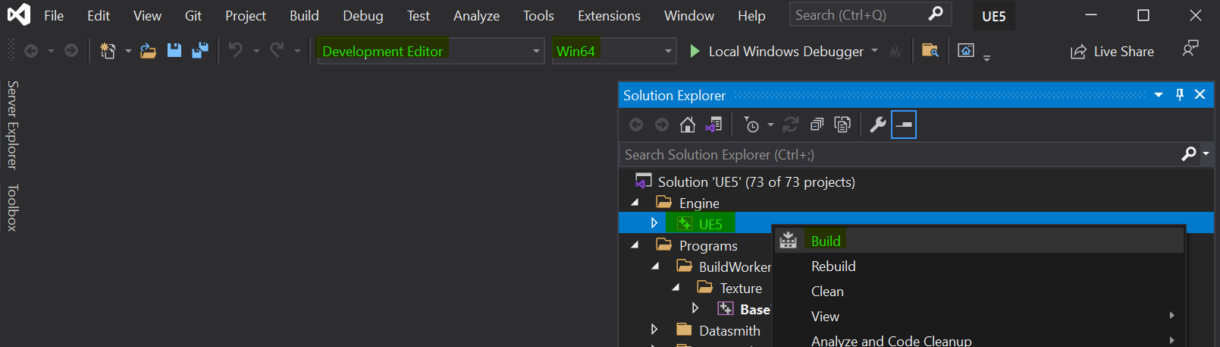
When this is finished, open the .sln file named UE5.sln.
Ensure that the Development Editor is your selected configuration and that the platform is correct.
For this example, the platform is Win64.
Right-click on Engine/UE5 in the Solution Explorer and click “Build”.
This will open an output tab where you can see the Engine being built.
Note
This can take a long time depending on your local machine’s hardware. Be prepared to wait as long as 2 hours before the build process is completed.
When this process is complete you will have an Editor.exe file which we need to open the editor.
You can find this file in your root directory at the path:
“…\UE_5.2\Engine\Binaries\Win64\UnrealEditor.exe”
Summary
In this section we were able to compile the UE5 engine from source.
We also waited around for a long time while that was happening.
In the next section we will create a simple UE4 multiplayer project which we will later use to create server builds from to host on AWS GameLift.