Retool Workflows
Preparing the App
A workflow chains together blocks of SQL and JavaScript to query and transform data, perform API requests, create cron jobs and send custom alerts. They can be triggered by a webhook or executed on schedule.
Retool Workflows Product Demo: Automate custom alerts, cron jobs, and ETL tasks
This tutorial is intended to demonstrate how a workflow can be managed by a Retool application
First, we will convert our main container into a tabbed container. Right-click on the main container and select ‘Switch to…’ then select ‘Tabbed Container’.
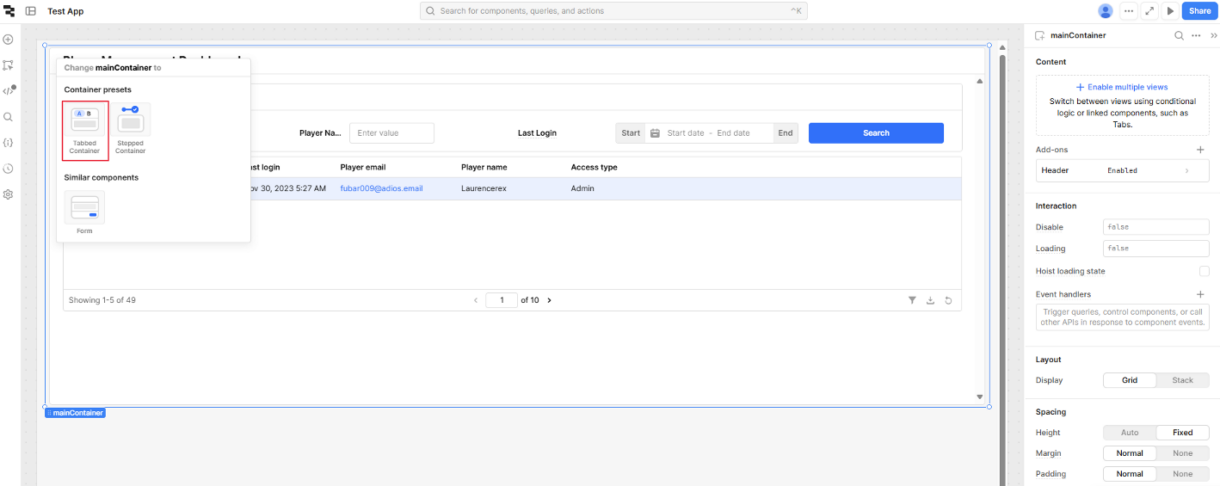
This component could be used, for example, to have Admin actions separated from Customer Service actions. Access to the Admin tab could be restricted by account-level permissions so that they are not available to non-admins.
Name the two views ‘Players’ and ‘Workflows’ by clicking the default Views on the right of the component content.
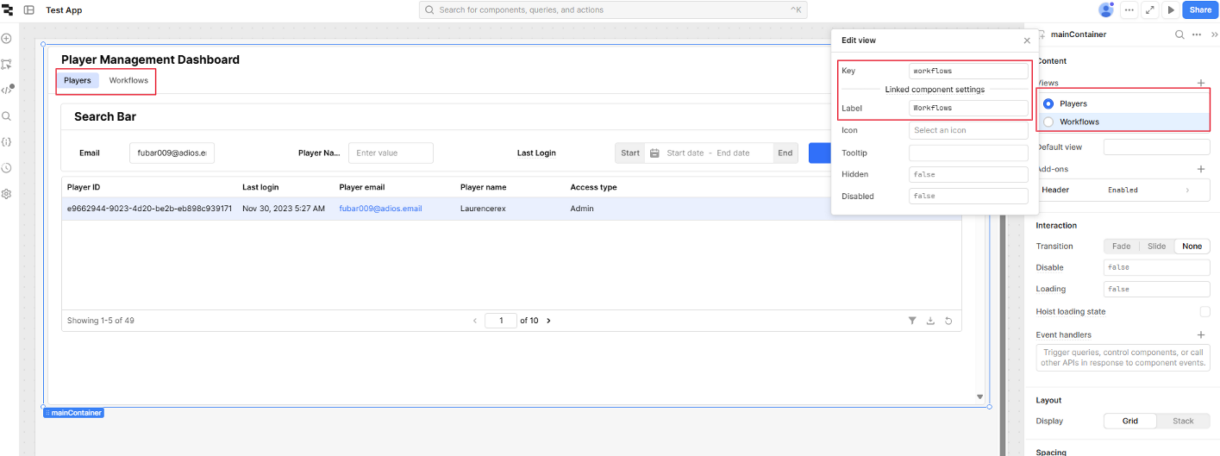
We will be adding the button and date components later but first we will set up the workflow.
Create a new Retool database table called ‘workflow_target’. Add a row with a single column called ‘time_stamp’ with type ‘Date + Time’.

Setting up a Workflow
On the top-left of the dashboard, open ‘Workflows’ in a new tab.
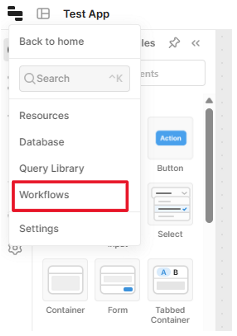
Create a new workflow called ‘timestamp_workflow’.
Change the code block to a ‘Resource query’ block and set the resource type to ‘Retool Database’, then add the following SQL statement.
UPDATE workflow_target
SET time_stamp = CURRENT_TIMESTAMP
Click ‘Triggers’ and enable the ‘Webhook’ trigger’ and copy the endpoint URL. The webhook can be manually disabled here to cut off the workflow if required.

To hit the webhook, create a REST API called ‘run_workflow_webhook’. Paste the webhook endpoint URL into the ‘Base URL’ and add a ‘X-API-Key’ to Headers with the Api Key value.
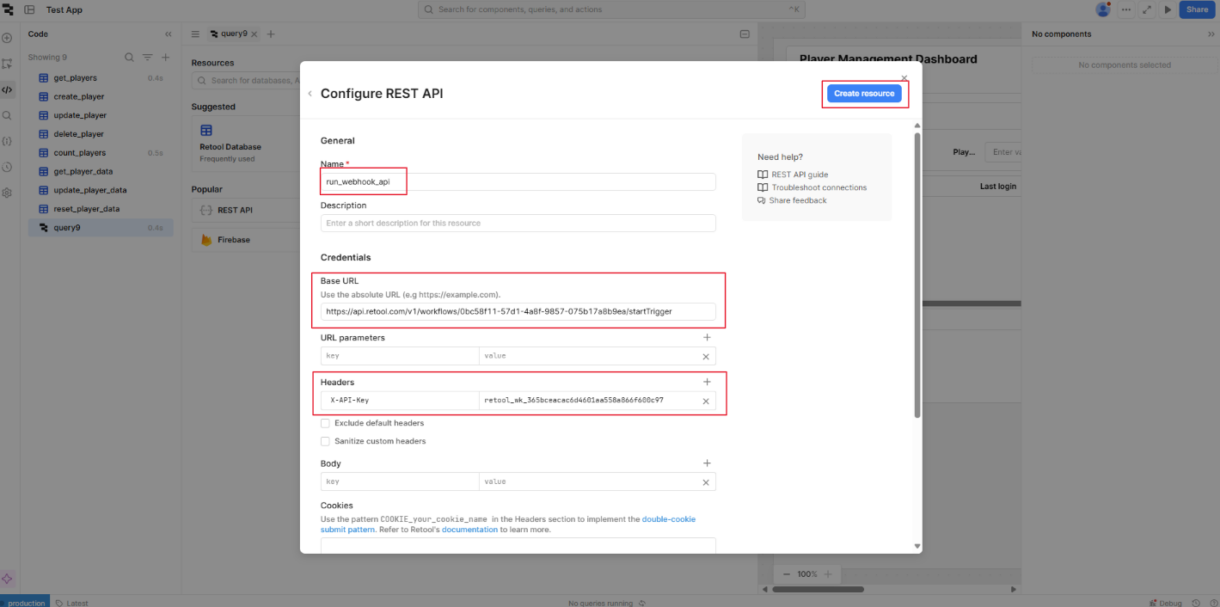
This has created a Retool ‘Resource’ which can be used across different applications. We can also name it ‘run_webhook_api’ and set a ‘Confetti’ success handler.
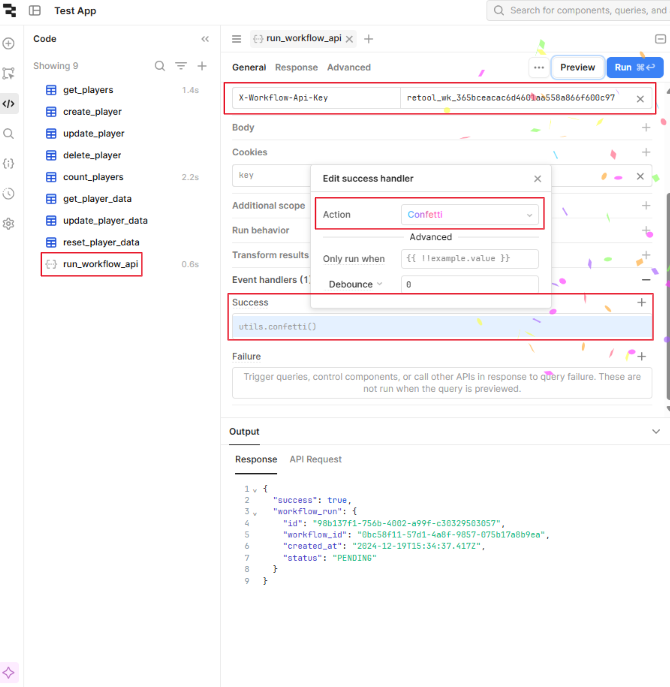
In the app on the Workflows tab, add two buttons and a datetime input. Add ‘Trigger Workflow’ and ‘Get Latest’ to each button text. Change the datetime label to ‘Workflow Timestamp’.
Create a new query called ‘workflow_current_time’ and add the following SQL statement.
SELECT time_stamp from workflow_target where ID = 1Add a Retool Database query to fetch from the table, assign the query result to the ‘Workflow Timestamp’ component and add a click event to the ‘Get Latest’ button.
Add a click event to the ‘Trigger Workflow’ button in the app.
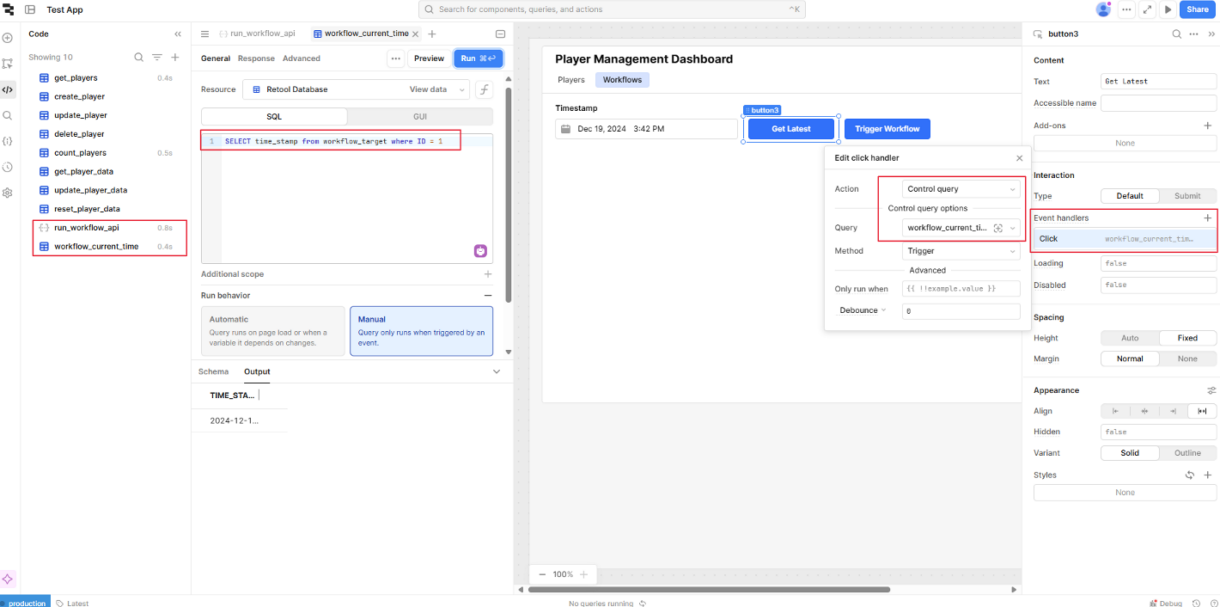
Add a reference to the query result to the date-time component.
{{ workflow_current_time.data.time_stamp[0] }}Click the button to trigger the workflow and confirm it ran successfully by clicking ‘Get Latest’.
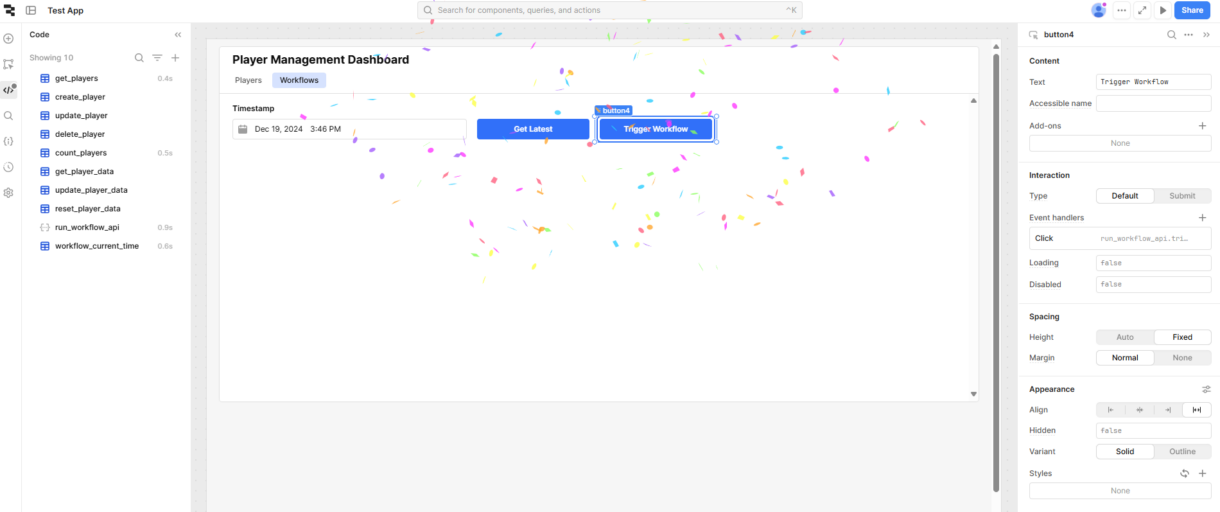
Summary
Now we have implemented a simple Retool Workflow to trigger a database update. This is demonstrative but more advanced use cases would have a similar set up with the workflow performing more complex tasks.
From here, we will look at using Retool to send emails to our players.
