GameLift Fleet Setup
Introduction
In this section we will set up the bare minimum required to successfully launch your dedicated server builds on GameLift fleets in the AWS cloud.
We will also be taking a look at how we can run these builds locally with GameLift Anywhere fleets. Anywhere fleets make it a lot easier to test your server code, by allowing you to connect a local server to the GameLift service
One thing to note is that just because your server runs locally and connects to GameLift successfully does not mean it will work the same once deployed to a GameLift instance. We will go into some additional requirements relating to this later, however, it is the quickest way to test your server code iterations as you develop locally.
We will be initialising the SDK, registering the callback functions and notifying GameLift that our server processes are ready.
In order to keep this example brief we will set this up in the default GameMode C++ script which comes with the 3rd person UE5 template. You can modify this to fit your own level loading patterns in your own project.
Note
This tutorial is part of a series of tutorials on deploying UE5 multiplayer builds with AWS GameLift.You can see Part 3 of this tutorial below.
Setup
First thing we need to do is to install the GameLift Server SDK plugin.
Copy the plugin folder from the zip into the Plugins folder in your project. This is the folder that is found in the SDK download folder at:
“GameLift-Unreal-plugin-5.1.0\GameLiftServerSDK”
The GameLiftServerSDK folder should at this point contain the aws-cpp-sdk-gamelift-server.dll and aws-cpp-sdk-gamelift-server.lib.
If your project doesn’t yet have a Plugins folder, create one.
This should be at the same directory level as the Content folder.
Next, we need to add and enable the plugin in our Project.uproject file.
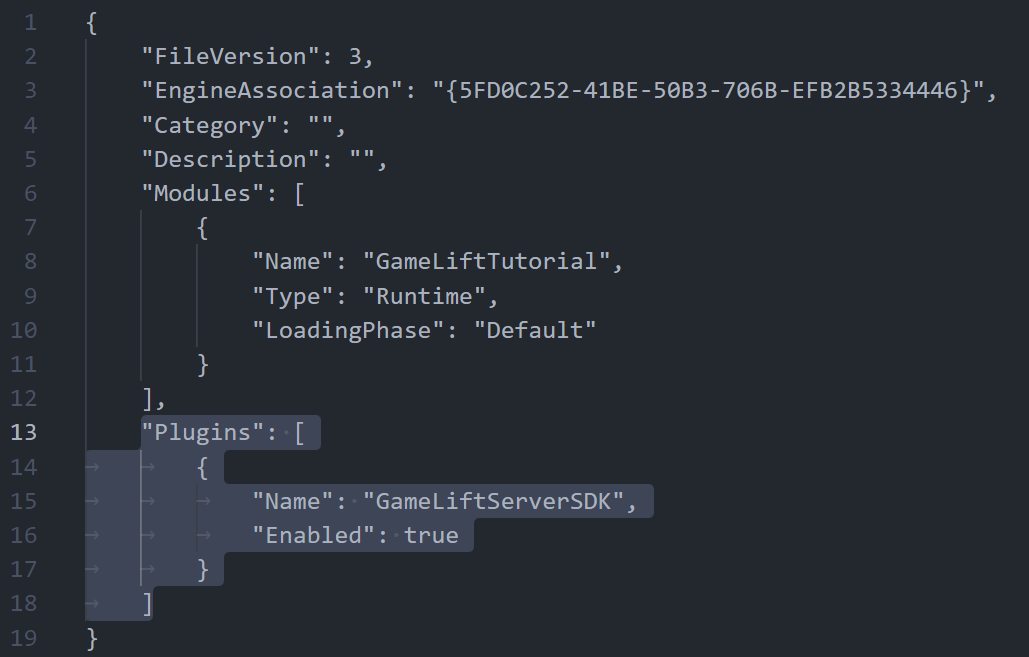
Open your project file in your IDE and add a Plugins list with an entry for the GameLift Server SDK…
"Plugins": [
   {
      "Name": "GameLiftServerSDK",
      "Enabled": true
   }
]
Below is an example of how that looks within the overall file.
If you already have a Plugins list just add the entry for the Server SDK.
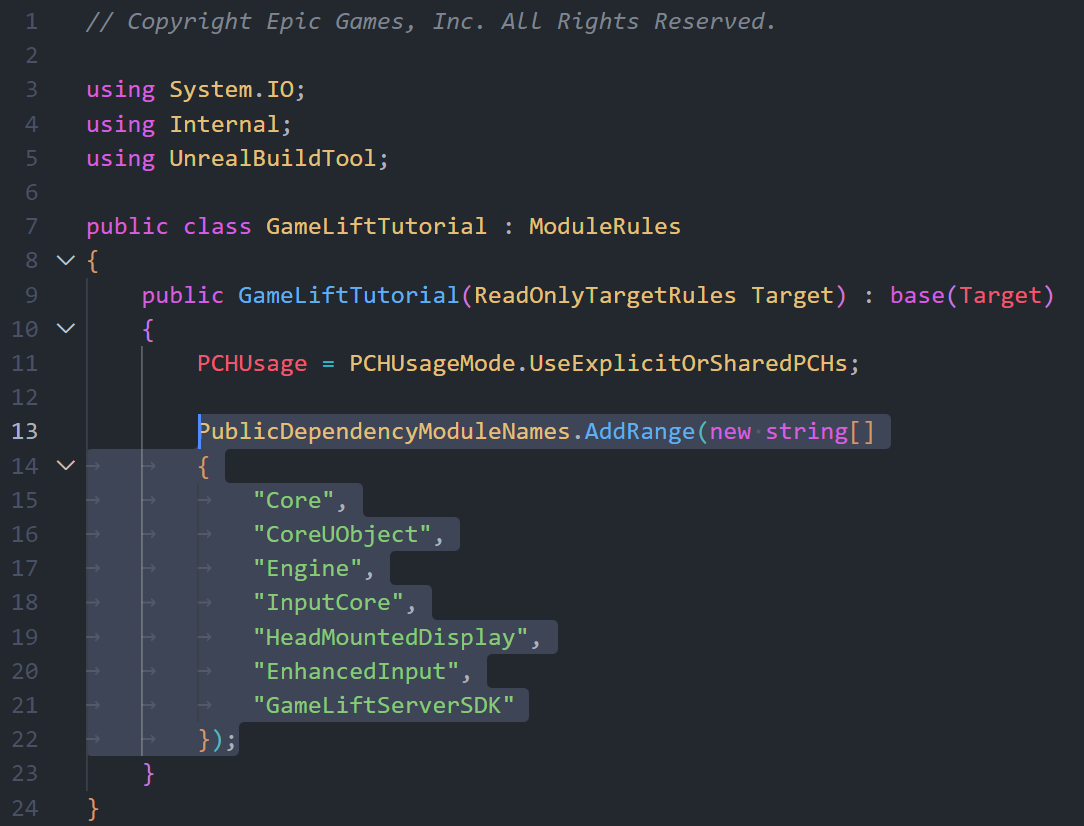
We then need to add the Server SDK as a dependency to our <ProjectName>.Build.cs file. You can find this file in your “Source/<ProjectName>” folder with the name “<ProjectName>.Build.cs”.
Open this file and add “GameLiftServerSDK” to the list of PublicDependencyModuleNames.
This allows us to use the GameLiftServerSDK in both our games .h and .cpp files.
Tip
It is a good idea to separate your header and cpp files into Public and Private folders in the “Source/[ProjectName]” folder.This isn’t strictly necessary but we will be doing it in this tutorial.
At this point, you can close your IDE.
Generate the Visual Studio project files and rebuild the Development Editor and Server targets the same way we have done in previous steps [link].
This will make sure that your editor is up to date with the plugin we just integrated.
When you next launch your project, navigate to “Edit/Plugins” and you’ll see the GameLiftServerSDK listed under Project.
We can now start writing some GameLift server code.

Server Code
Our GameLift server code will live in the <ProjectName>GameMode.h and <ProjectName>GameMode.cpp files. These files exist by default in your project source folder.
Your code should match our example below for each class.
<ProjectName>GameMode.h:
#pragma once

#include "CoreMinimal.h"
#include "GameFramework/GameModeBase.h"
#include "GameLiftServerSDK.h"
#include "GameLiftTutorialGameMode.generated.h"


// Custom Log categories
DECLARE_LOG_CATEGORY_EXTERN(GameLift, Log, All);

DECLARE_LOG_CATEGORY_EXTERN(GameMode, Log, All);

UCLASS(minimalapi)
class AGameLiftTutorialGameMode : public AGameModeBase
{
   GENERATED_BODY()

public:
   AGameLiftTutorialGameMode();

protected:
   // GameModeBase override functions
   virtual void BeginPlay() override;

private:
   // Initialisation functions
   void InitGameLift();

   FGameLiftServerSDKModule* gameLiftSdkModule;
   FProcessParameters* processParameters;
   FServerParameters* serverParameters;
};
<ProjectName>GameMode.cpp:
#include "GameLiftTutorialGameMode.h"

#include "GameLiftServerSDK.h"
#include "GameLiftTutorialCharacter.h"
#include "UObject/ConstructorHelpers.h"

// Custom Log category
DEFINE_LOG_CATEGORY(GameLift);
DEFINE_LOG_CATEGORY(GameMode);

AGameLiftTutorialGameMode::AGameLiftTutorialGameMode()
{
   UE_LOG(GameMode, Log, TEXT("AGameLiftTutorialGameMode()"));
   // set default pawn class to our Blueprinted character
   static ConstructorHelpers::FClassFinder<APawn> PlayerPawnBPClass(TEXT("/Game/ThirdPerson/Blueprints/BP_ThirdPersonCharacter"));

   if (PlayerPawnBPClass.Class != NULL)
   {
      DefaultPawnClass = PlayerPawnBPClass.Class;
   }

   UE_LOG(GameMode, Log, TEXT("Enabling ticking..."));
   PrimaryActorTick.bCanEverTick = true;
}

void AGameLiftTutorialGameMode::BeginPlay()
{
   UE_LOG(GameMode, Log, TEXT("BeginPlay()"));
   Super::BeginPlay();

#if WITH_GAMELIFT
   InitGameLift();
#endif
}


void AGameLiftTutorialGameMode::InitGameLift()
{
   UE_LOG(GameLift, Log, TEXT("InitGameLift()"))

   serverParameters = new FServerParameters();

   FParse::Value(FCommandLine::Get(), TEXT("-authtoken="), serverParameters->m_authToken);
   FParse::Value(FCommandLine::Get(), TEXT("-hostid="), serverParameters->m_hostId);
   FParse::Value(FCommandLine::Get(), TEXT("-fleetid="), serverParameters->m_fleetId);
   FParse::Value(FCommandLine::Get(), TEXT("-websocketurl="), serverParameters->m_webSocketUrl);

   serverParameters->m_processId = FString::Printf(TEXT("%d"), GetCurrentProcessId());

   UE_LOG(GameLift, Log, TEXT("Server Parameters: "));
   UE_LOG(GameLift, Log, TEXT("------------------------------------------------"));
   UE_LOG(GameLift, Log, TEXT("Host Id: %s"), *serverParameters->m_hostId);
   UE_LOG(GameLift, Log, TEXT("Fleet Id: %s"), *serverParameters->m_fleetId);
   UE_LOG(GameLift, Log, TEXT("Process Id: %s"), *serverParameters->m_processId);
   UE_LOG(GameLift, Log, TEXT("Web Socket Url: %s"), *serverParameters->m_webSocketUrl);
   UE_LOG(GameLift, Log, TEXT("Auth Token: %s"), *serverParameters->m_authToken);
   UE_LOG(GameLift, Log, TEXT("------------------------------------------------"));

   UE_LOG(GameLift, Log, TEXT("Initialising the GameLift Server..."));
   gameLiftSdkModule = &FModuleManager::LoadModuleChecked<FGameLiftServerSDKModule>(FName("GameLiftServerSDK"));
   const FGameLiftGenericOutcome initSdkOutcome = gameLiftSdkModule->InitSDK(*serverParameters);

   if (initSdkOutcome.IsSuccess())
   {
      UE_LOG(GameLift, Log, TEXT("InitSDK succeeded"));
   }
   else
   {
      UE_LOG(GameLift, Log, TEXT("ERROR: InitSDK failed"));
      const FGameLiftError gameLiftError = initSdkOutcome.GetError();
      UE_LOG(GameLift, Log, TEXT("ERROR: %s"), *gameLiftError.m_errorMessage);
      return;
   }

   // Define functions to handle GameLift events: OnStartGameSession, OnTerminate, OnHealthCheck
   auto onGameSession = [=](Aws::GameLift::Server::Model::GameSession gameSession)
   {
      FString gameSessionId = FString(gameSession.GetGameSessionId());
      UE_LOG(GameLift, Log, TEXT("GameSession Initializing: %s..."), *gameSessionId);
      gameLiftSdkModule->ActivateGameSession();
   };

   auto onTerminate = [=]()
   {
      UE_LOG(GameLift, Log, TEXT("Game Server Process is terminating..."));
      gameLiftSdkModule->ProcessEnding();
   };

   auto onHealthCheck = []()
   {
      UE_LOG(GameLift, Log, TEXT("Performing Health Check..."));
      return true;
   };

   // Define log file location
   TArray<FString> logfiles;
   logfiles.Add(TEXT("GameLiftTutorial/Saved/Logs/GameLiftTutorial"));

   // Define server port
   const auto worldPort = GetWorld()->URL.Port;
   UE_LOG(GameLift, Log, TEXT("World Port: %d"), worldPort);

   // Assign process parameters
   processParameters = new FProcessParameters();
   processParameters->OnStartGameSession.BindLambda(onGameSession);
   processParameters->OnTerminate.BindLambda(onTerminate);
   processParameters->OnHealthCheck.BindLambda(onHealthCheck);
   processParameters->port = worldPort;
   processParameters->logParameters = logfiles;

   UE_LOG(GameLift, Log, TEXT("Calling Process Ready..."));
   FGameLiftGenericOutcome processReadyOutcome = gameLiftSdkModule->ProcessReady(*processParameters);
   if (processReadyOutcome.IsSuccess())
   {
      UE_LOG(GameLift, Log, TEXT("Process Ready Succeeded"));
   }
   else
   {
      UE_LOG(GameLift, Log, TEXT("ERROR: Process Ready Failed"));
      const auto processReadyError = processReadyOutcome.GetError();
      UE_LOG(GameLift, Log, TEXT("ERROR: %s"), *processReadyError.m_errorMessage);
   }

   UE_LOG(GameLift, Log, TEXT("Finished initialising GameLift"));
}
You can find the specific version of these files in the supporting repo here.
This puts the most basic implementation of the required GameLift Server calls in place, as well setting up the callbacks that are needed by the GameLift service.
This is the current flow on the server from a high-level overview:
- Collect server parameters from command line arguments
- Create the GameLift SDK module
- Initialise the SDK using the server parameters
- Configure the callback functions required by GameLift
- Configure the server port
- Configure the log parameters
- Inform GameLift that the process is ready for game sessions by providing the process parameters
You can now re-package your server. This is all of the code required for your server to activate successfully on GameLift.
Anywhere Server – Local Testing
At this point we can test our server locally using an Anywhere fleet.
Anywhere Fleets require some AWS setup in the GameLift portal.
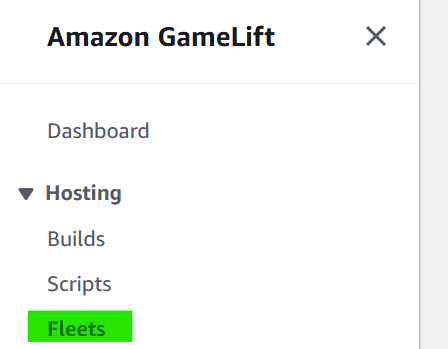
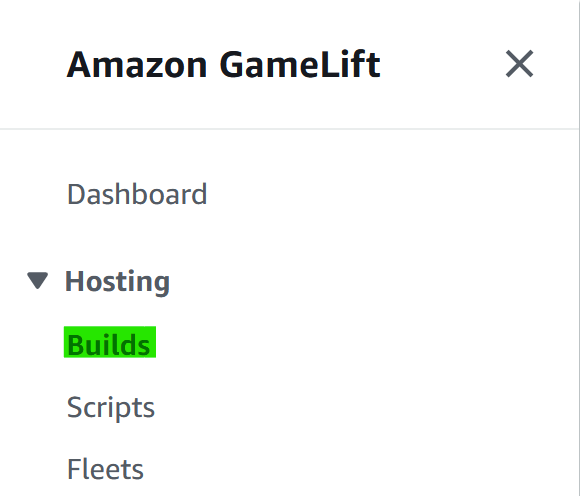
1. In the GameLift portal, head to fleets in the sidebar
2. Click on the “Create fleet” button

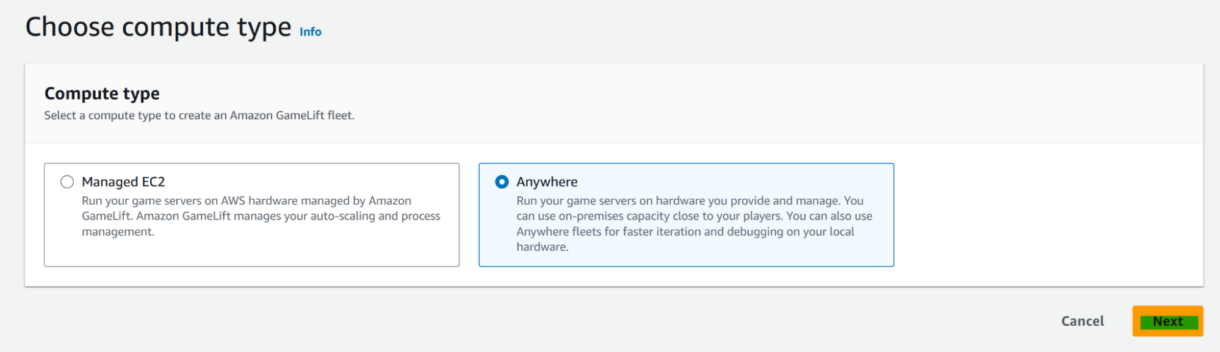
3. Select “Anywhere” and click the “Next” button
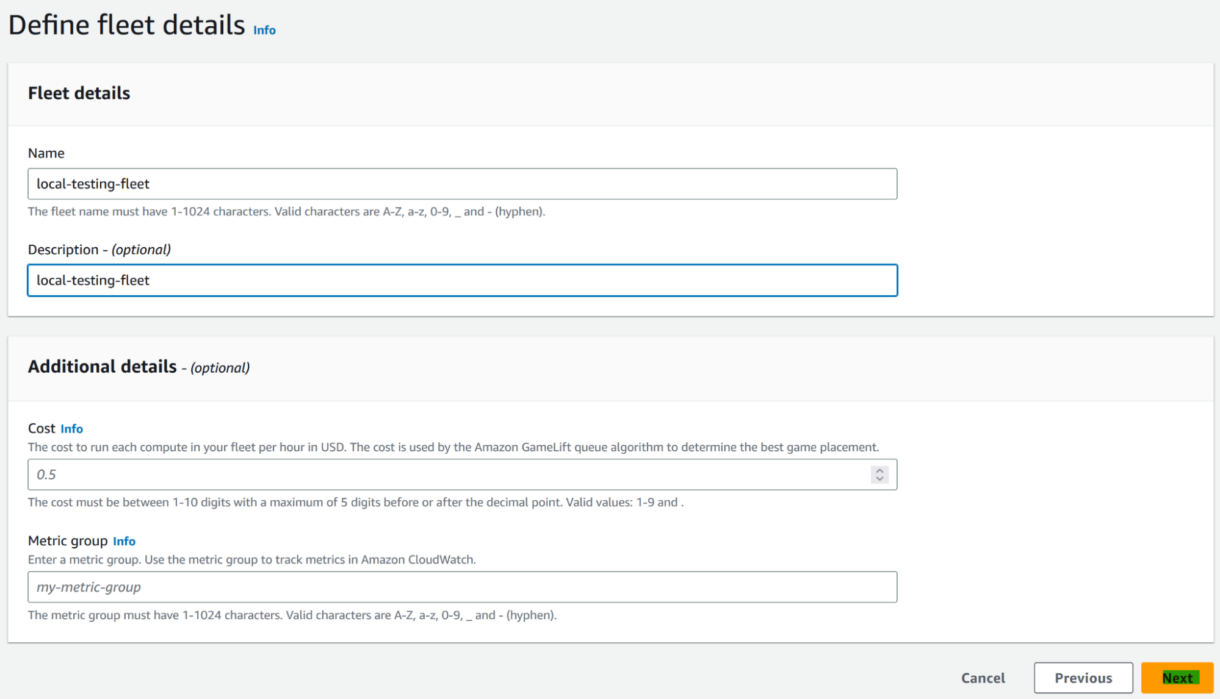
4. Give your fleet a name & description and click the “Next” button
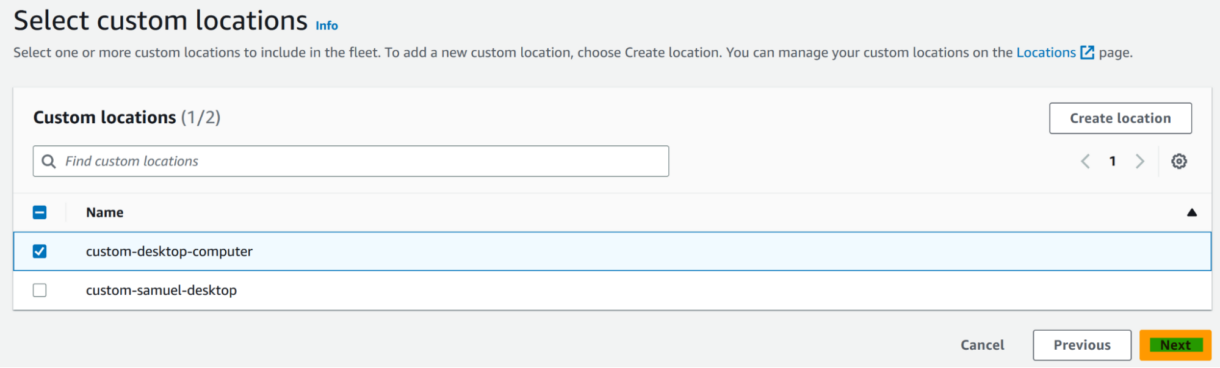
5. Select a custom location to associate with the fleet
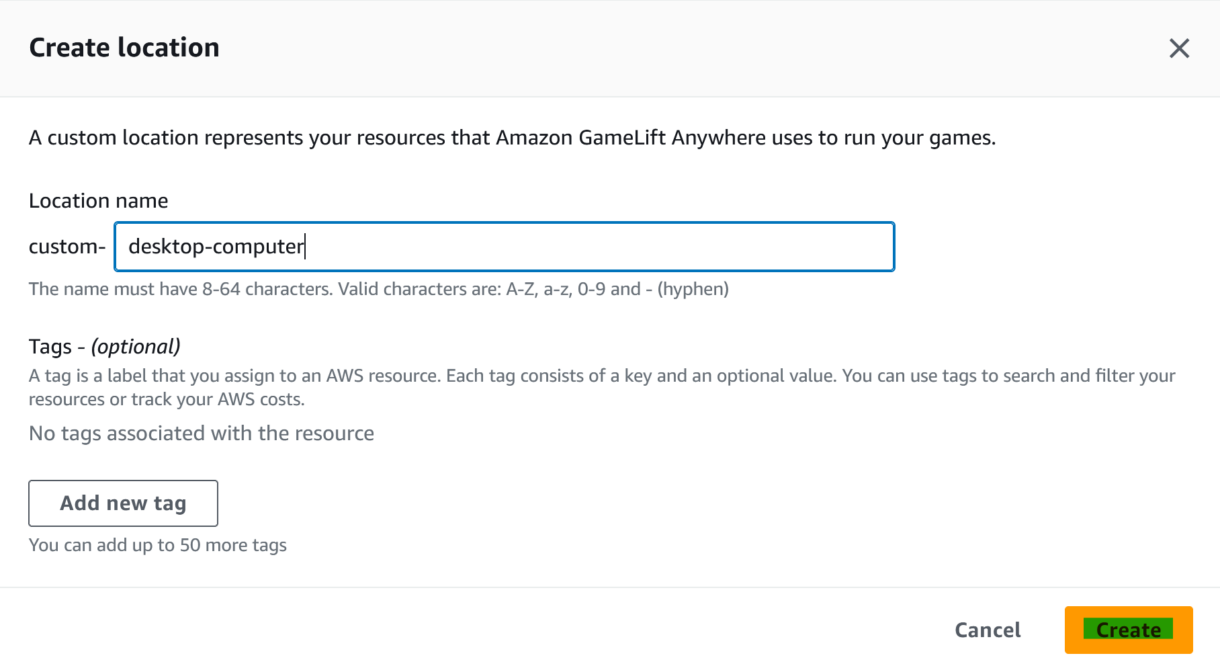
If you don’t have a custom location, create a new one by clicking Create location, filling out the name and tags and clicking the “Create” button.
6. Select the locations you want to use and click the “Next” button
7. Add any tags you want to the fleet, and finish the creation process
Tip
We always recommend adding tags to any AWS resources you need to deploy. It makes it easy to track usage, cost and project-based resources both in AWS and external products and takes little extra time to add. We recommend at minimum adding the developer name and the project.
This anywhere fleet can now be used to connect GameLift and your local machine.
Anywhere Server – Registration & Authentication
Before we can use the anywhere fleet, we need to register our local machine with GameLift.
You can do this using the AWS CLI. Make sure that you have the AWS CLI installed on your machine and that it is configured correctly with a user that has permission to access and modify GameLift. You will find a tutorial on how to set that up here.
To register your machine use the command:
aws gamelift register-compute \
	--compute-name local-testing-fleet \
	--fleet-id fleet-678ac147-1b09-4d6a-a9cf-76a0d5e14xxx \
	--ip-address 127.0.0.1 \
	--location custom-desktop-computer
This registers the local host IP address to the “custom-desktop-computer” location on the local testing fleet we created earlier.
We can now authenticate with GameLift to run our server using custom server parameters.
Run the following command:
aws gamelift get-compute-auth-token \
	--fleet-id fleet-678ac147-1b09-4d6a-a9cf-76a0d5e14xxx \
	--compute-name local-testing-fleet
This will return an authentication response that looks like the following…
{
	"FleetId": "fleet-678ac147-1b09-4d6a-a9cf-76a0d5e14xxx",
	"FleetArn": "arn:aws:gamelift:eu-west-1:<acountId>:fleet/fleet-678ac147-1b09-4d6a-a9cf-76a0d5e1xxx",
	"ComputeName": "local-testing-fleet",
	"ComputeArn": "arn:aws:gamelift:eu-west-1:<acountId>:compute/local-testing-fleet",
	"AuthToken": "5964a177-bb2f-472c-a53d-964efb1f2xxx",
	"ExpirationTimestamp": "2023-07-31T16:16:27+01:00"
}
We will then use these details to connect to the local fleet in the following section.
Anywhere Server – Launching Your Server
The easiest way to run your server locally using the Anywhere Fleets is by launching it from the command line.
Using your shell of choice, navigate to the directory where your packaged server build lives.
We will provide some additional arguments for launching the server from the shell.
Our command will look like this:
./<ProjectName>Server.exe \
-log \
-port=7777 \
-hostid=local-testing-fleet \
-websocketurl=wss://eu-west-1.api.amazongamelift.com \
-fleetid=[your-fleet-id]fleet-678ac147-1b09-4d6a-a9cf-76a0d5e1xxx \
-authtoken=[your-auth-token]142810e2-9e7e-45b7-a692-7926db6ffxxx
Note
The FleetID and Auth-Token in the above example are not valid, they are just there to let you know what those fields should look like.
Lets take a quick look at what we are supplying to this command as it might be useful for your testing once we get everything set up for you.
Arguments
- -log
This is the same as we used above to run the server with a live log console - -port
This lets us set the server world port, which will then be sent to gamelift on process readying. - -hostid
This is simply the name of your Anywhere Fleet - -websocketurl
This is the WebSocket address of the region that your fleet is hosted in. Make sure to exchange the eu-west-1 with whatever region you are using. - -fleetid
The fleet id of the Anywhere fleet. - -authtoken
This is the authtoken we generated earlier with the get-compute-auth-token CLI command. It is the “AuthToken” value of the response.
This command should open a new window of the server running and in its logs, you should see the GameLift SDK being initialised and activated.
You will also see your server process in the Fleets portal on AWS with the custom location having an “Active” server process.
You should also see some metrics about this in the fleet’s metrics tab.
In your server’s logs, the GameLift service is periodically calling our server’s health check function. It should be doing so roughly once per minute.

Now let’s also make sure that we can create Game Sessions with GameLift and that they get activated by our custom server.
Use the following CLI command:
aws gamelift create-game-session \
--fleet-id fleet-678ac147-1b09-4d6a-a9cf-76a0d5e14xxx \
--maximum-player-session-count 10 \
--name test-game-session \
--location custom-desktop-computer
This will create a game session on our local server which should get automatically activated with GameLift.
In the game session response, you’ll also see the local host IP and the port that we assigned when starting the server returned.
Congratulations!
Your basic GameLift UE5 server is ready to be hosted on GameLift in an EC2 fleet.
GameLift – EC2 Fleet Setup
Before our dedicated server build is ready to be uploaded to GameLift and used with an EC2 fleet there are some additional requirements we need to handle first.
Dependencies
The GameLift Server SDK has some runtime dependencies that we will need to include in our final packaged build.
More specifically, it requires the following DLLs:
- libcrypto-3-x64.dll
- Libssl-3-x64.dll
These dependencies are required at server run-time and must be included in the build’s “WindowsServer/<ProjectName>/Binaries/Win64” directory.
You can get these files from your OpenSSL installation directory. In our case this was located at:
“C:\Program Files\OpenSSL-Win64\bin”
Copy and paste the files into your project directory so we have easy access to them at packaging time. For this example we created a new folder at the project root and called it “GameLiftFiles” but you can name it as you please.
To automatically include these files during server packaging, we can then add the following lines to our <ProjectName>.Build.cs file constructor:
const string outputBinDir = "$(TargetOutputDir)";
const string gameLiftFilesDir = "$(ProjectDir)/GameLiftFiles";
RuntimeDependencies.Add($"{outputBinDir}/libcrypto-3-x64.dll", $"{gameLiftFilesDir}/libcrypto-3-x64.dll");
RuntimeDependencies.Add($"{outputBinDir}/libssl-3-x64.dll", $"{gameLiftFilesDir}/libssl-3-x64.dll");
When you run a fresh build, these DLLs will now be copied over into the correct packaged directory.
Make sure that your gameLiftFilesDir points to the correct directory if you chose a name other than “GameLiftFiles”.
The $(ProjectDir) and $(TargetOutputDir) strings are output path variables provided by Unreal Engine. You can find a complete list of them here.
Prerequisites
When the GameLift service tries to install your uploaded build, we have the option to provide an installation script that will be run ahead of running any server processes.
For running a UE5 server on an EC2 Windows server we need to install some additional prerequisites before the server can run successfully.
For Windows builds we can provide an install.bat file at the build folder root that will be run before the server tries to run. You can read more about this here.
Our install.bat file will run two installers:
- VC_redist.x64.exe
- UEPrereqSetup_x64.exe
VC_redist.x64.exe installs Microsoft C and C++ runtime libraries.
These are required to run a UE5 Windows server.
UEPrereqSetup_x64.exe installs additional features that are required by the engine.
You can download the VC_redist.x64.exe installer here.
UEPrereqSetup_x64.exe will be included in the packaged build when we package the server.
You’ll be able to see the installer in the packaged directory at: “/Engine/Extras/Redist/en-us/UEPrereqSetup_x64.exe”.
If you cannot see this file in your packaged builds, make sure that you have enabled Include prerequisites installer.You can do this in the Editor from the “Edit/ProjectSettings/Packaging/Prerequisites” menu.
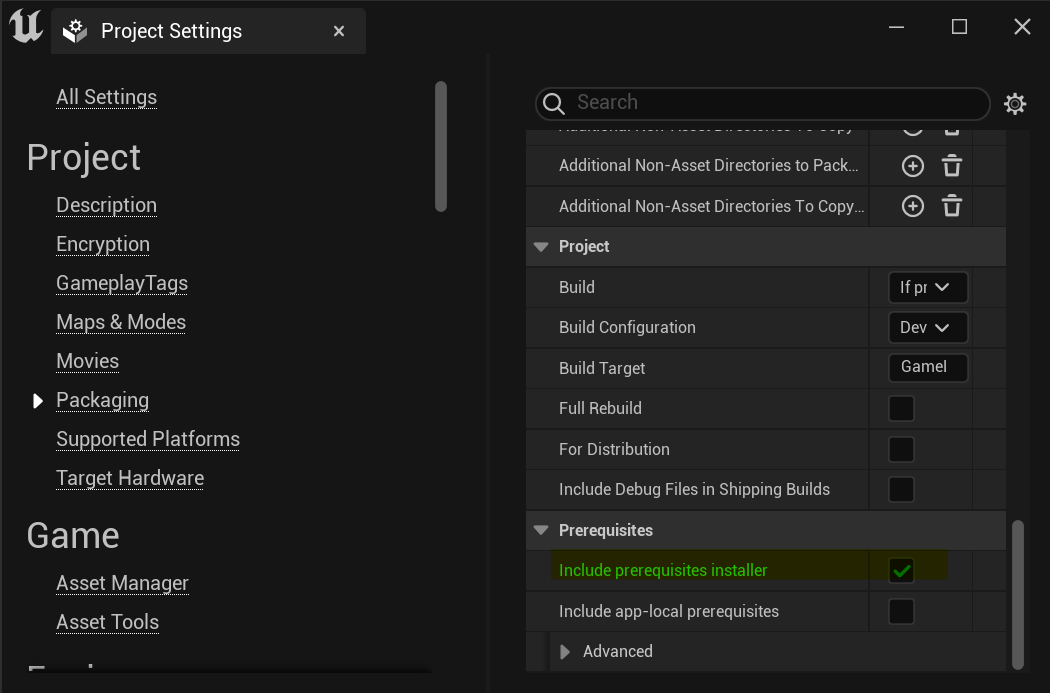
Create a new file called install.bat at the root of the “WindowsServer” folder.
Edit this using a text editor to contain the following lines below.
Save this file once you are done!
VC_redist.x64.exe /q
Engine\Extras\Redist\en-us\UEPrereqSetup_x64.exe /q
As you can see, this install script requires VC_redist.x64.exe to be at the same directory level as the installation script.
So we can copy that downloaded file into the root of WindowsServer as well.
This script, when run, will first install VC_redist.x64.exe and then UEPrereqSetup_x64.exe.
We are now ready to upload our server to GameLift.
GameLift – Upload Build
Using your shell of choice, navigate to the folder where you have packaged your server builds . Using the AWS CLI we can now run this command to upload the WindowsServer folder to GameLift:
aws gamelift upload-build \
--name GameLiftTutorial_Server \
--build-version 1.0.0 \
--build-root ./WindowsServer \
--server-sdk-version 5.1.0 \
--operating-system WINDOWS_2016
Lets take a quick look at what we are supplying to this command as it might be useful for your testing once we get everything set up for you.
Arguments
- name
The name of the build, which can be whatever makes sense for your project. - build-version
The server build version, which is not for this example project but you can iterate your version number here if you are new builds for testing, staging and production. - build-root
This is where the folder to upload from is located relative to where the shell session is. - server-sdk-version
The version of the GameLift server SDK. This argument is now a requirement for the GameLift server to know what version of the SDK the server is using. - operating-system
The OS that our server should run on. Windows Server 2016 is the most recent version of Windows Server available to use with GameLift as of the time we are writing this guide (September 2023).
This will take some time to upload.
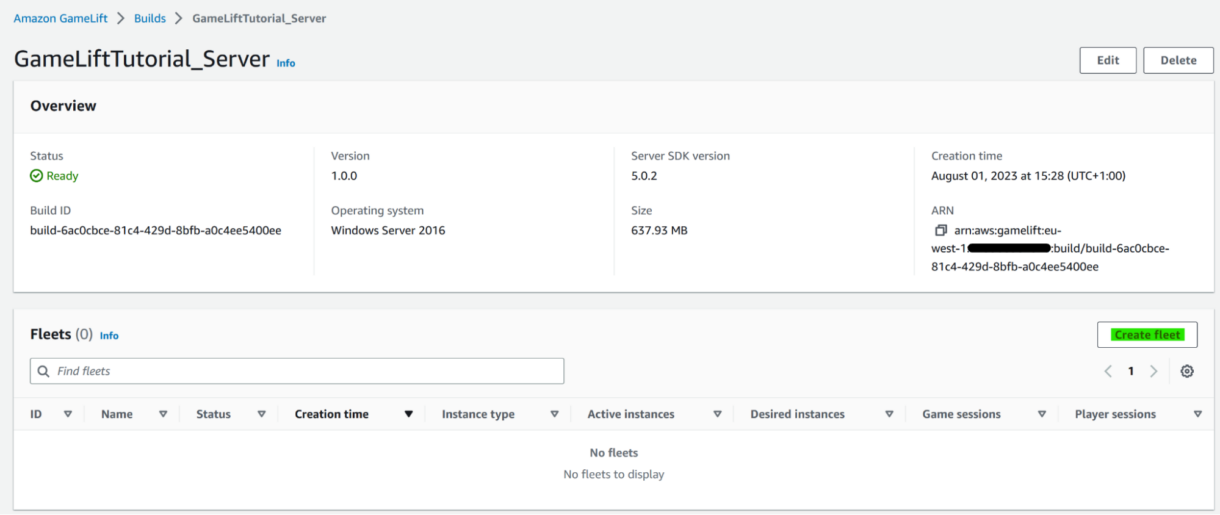
When it is finished you will see your build in the AWS GameLift portal in the “Builds” section.

GameLift – Launching The Fleet
Let’s launch our EC2 fleet with the build we just uploaded.
1. Navigate to the AWS GameLift portal and click on “Builds” in the sidebar
2. Click on the ID of the build we just uploaded

3. In the Fleets section, click on the “Create fleet” button
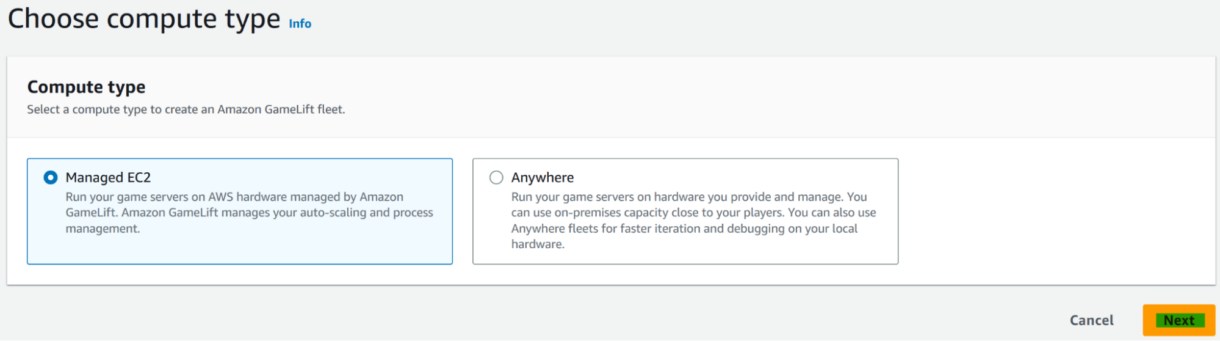
4. Select the Managed EC2 fleet option and click on “Next” button
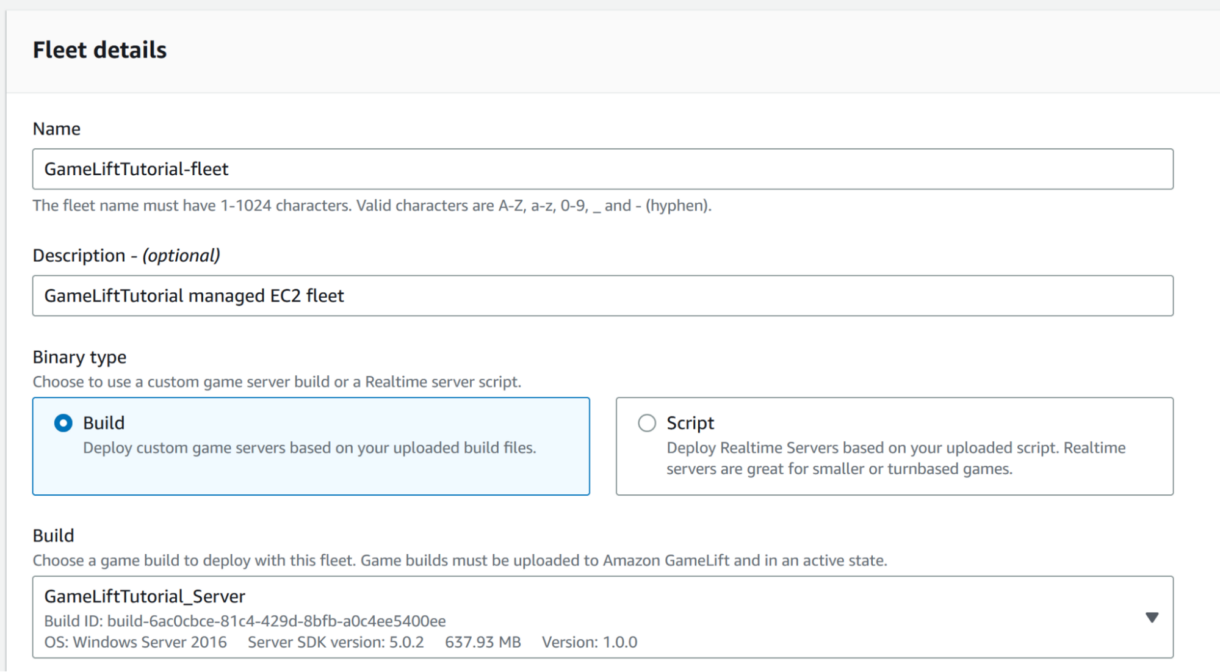
5. Give your fleet a name & description
Make sure that the correct build is selected if you are creating the fleet from the “Fleet” menu instead of going through the build.
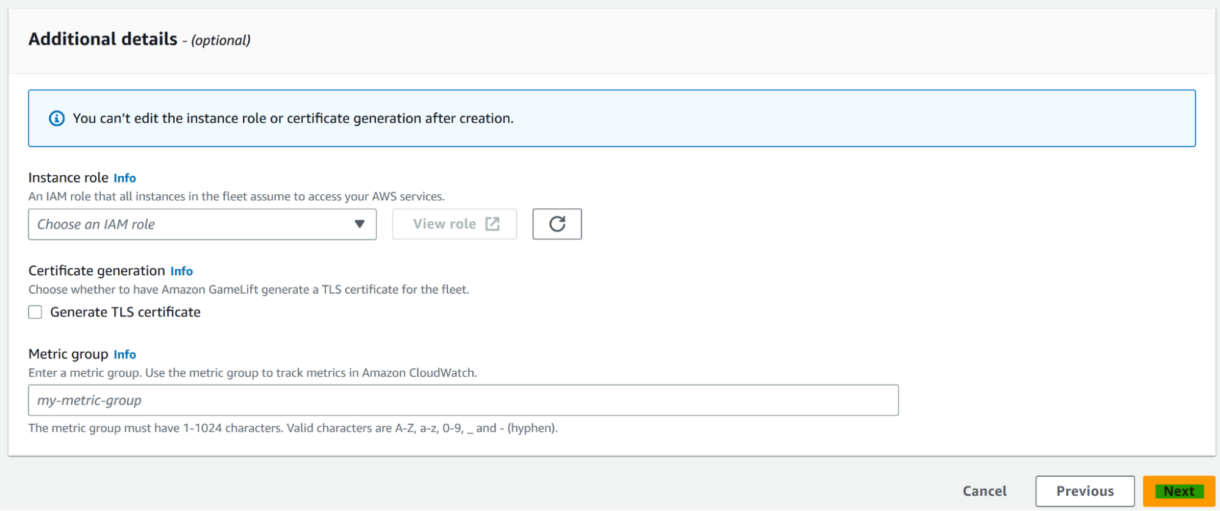
6. You can leave the Additional Details section the default and click on “Next” button
7. Select the regions that you want to deploy into and then click on the “Next” button
For our project we are exclusively hosting the fleet in our home region which is eu-west-1.
Be aware that your home region may be set to another region by default.
For testing purposes, it is best to deploy your test builds in a region closest to your developers and play-testers.
Keep in mind that If you select more than one region, they will activate independently from each other.
Note On Regions
The home region of a fleet will always be the region it is created in.
Multi-location fleets are only available in certain home regions.
Fleets that are created in the following AWS Regions support multiple locations at the time of writing this tutorial are:
- us-east-1 (N. Virginia)
- us-west-2 (Oregon)
- eu-central-1 (Frankfurt)
- eu-west-1 (Ireland)
- ap-southeast-2 (Sydney)
- ap-northeast-1 (Tokyo)
- ap-northeast-2 (Seoul)
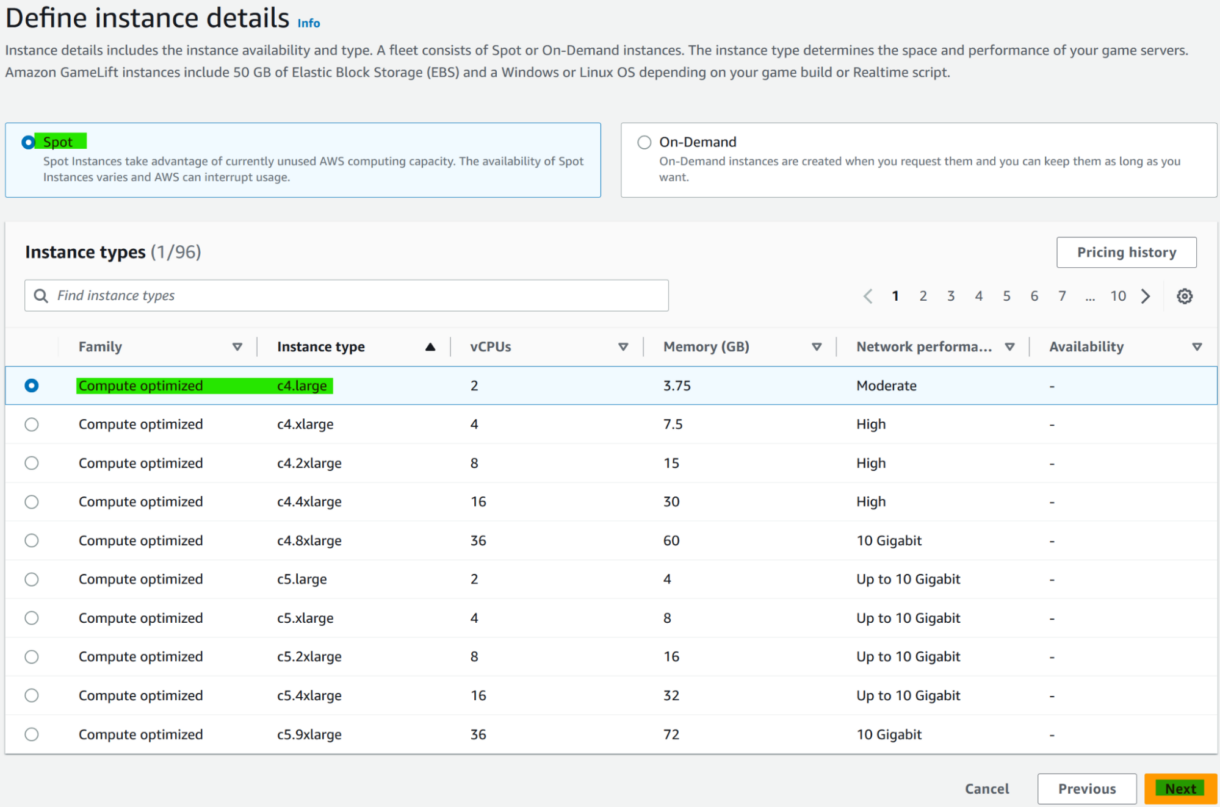
8. Select the instance family and type
We are using Spot instances with the cheapest instance type of c4.large for this example
We won’t cover the differences between Spot and On-Demand instances in this tutorial but there is plenty of documentation on the AWS docs site explaining when and how to use both types of instances. The key difference is that, while Spot instances can be much cheaper than On-Demand instances, they can also be shut down when AWS needs the spare capacity.
This happens very rarely however, so they are ideal for testing and burst capacity on your production fleets.
9. We need to set our server’s Launch path
It is recommended that you use the executable that is nested at the path
“[ProjectName]/Binaries/Win64/[ProjectName]Server.exe”
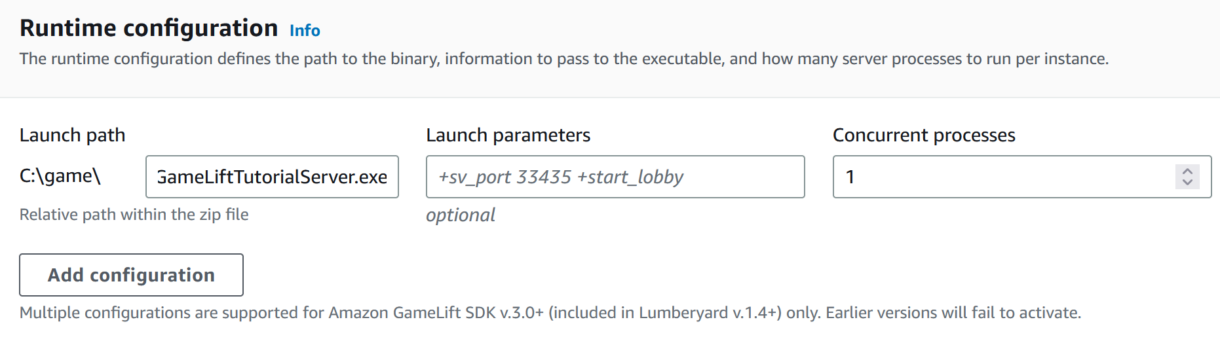
At the time of writing this tutorial, there was seemingly a problem with leaving the Launch parameters blank even though they are optional.To get around this, you can just add -port=7777
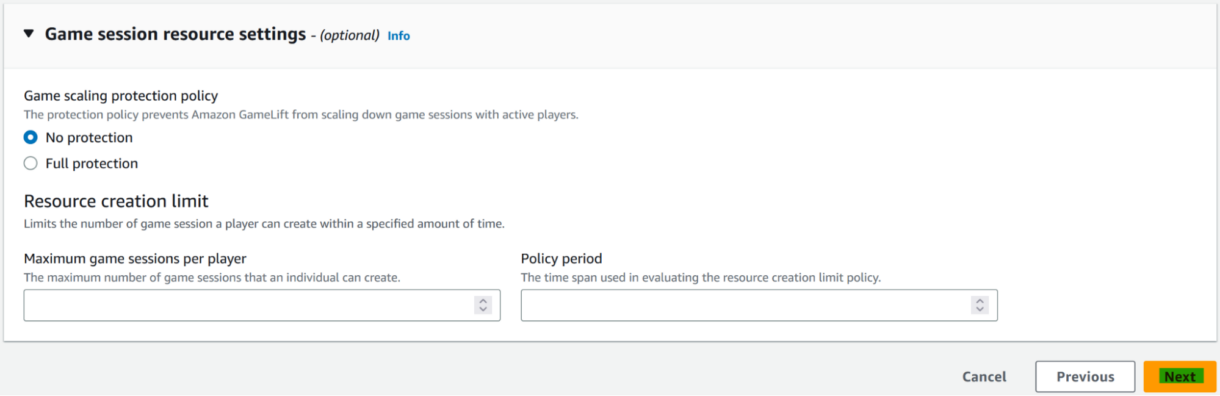
10. Leave the game session settings as the default
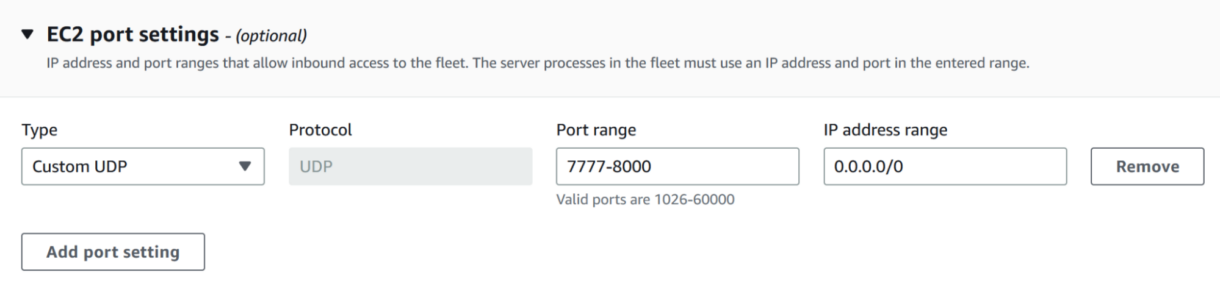
11. In the EC2 port settings, make sure that you open the correct UDP port that is used by the Unreal Engine server
This server port defaults to 7777 for Unreal servers, unless it is overridden when you set up your process launch parameters (we will see this later).
For this example we will be opening the range of ports from 7777 to 8000 for all IP addresses.
12. Leave the “Game session resource settings” as default and click the “Next” button
13. Add any metadata tags you like, review your configuration and click the “Submit” button to create the fleet
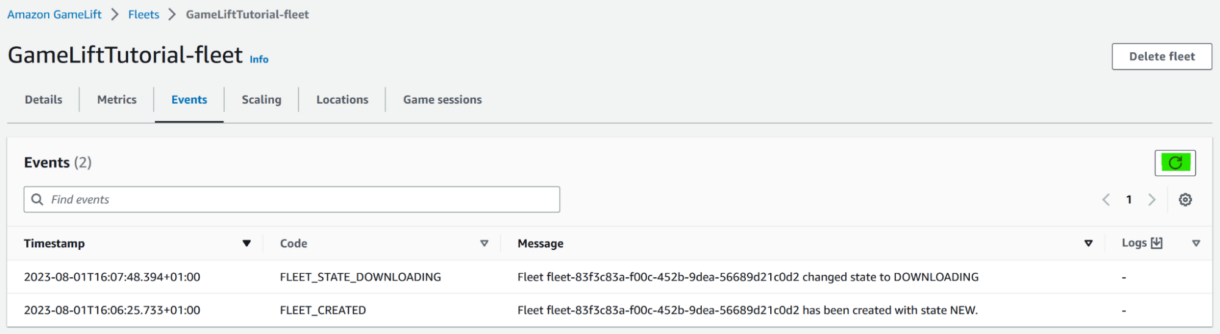
Your fleet will now take some time to be deployed, downloaded and activated.
To see the progress of your fleet navigate to the Fleets portal events page.
You will see the latest events as they occur if you use the refresh button.
Something went wrong!
At some point you may encounter problems with something going wrong during the launching of your fleet. Or you might run into runtime issues with your server that you didn’t expect.
We will briefly discuss how we can debug our server running on a remote EC2 instance in the AWS cloud.
In the latest version of GameLift (5.1.0 at the time of writing this guide), the remote access and debugging flow has changed slightly. We will cover the basics of getting remote access to the instances that are running our server and how to access the server logs.
Make sure that you have the AWS Session Manager plugin for the AWS CLI installed and is accessible on the PATH environment variable. You can find some details on it here.
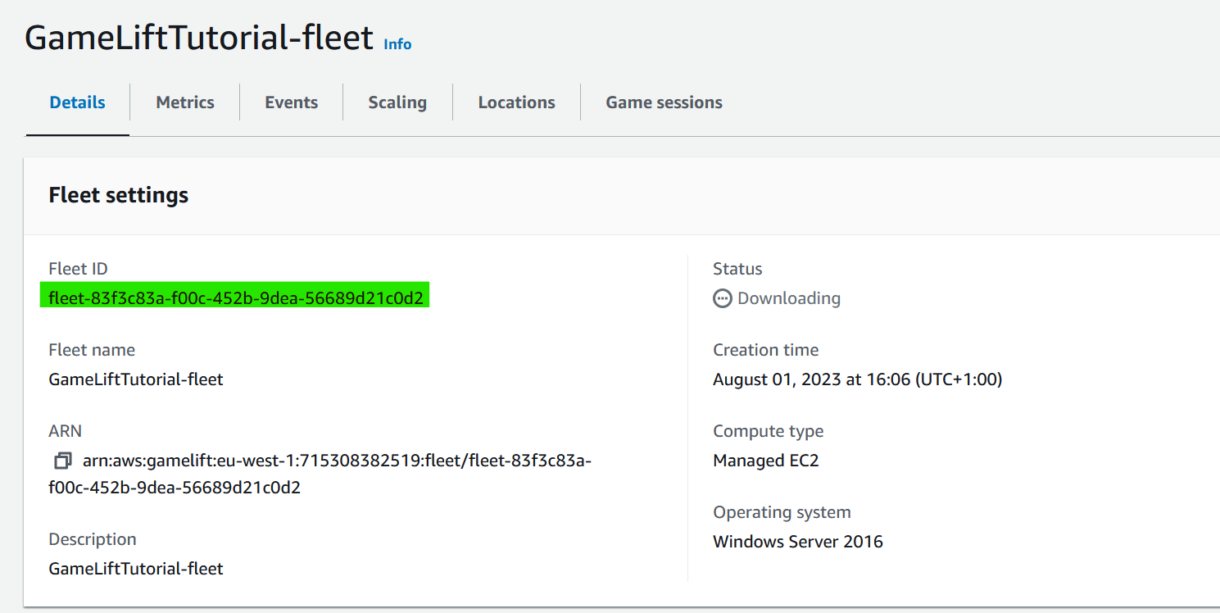
First we need to find your fleet’s id in the Fleets portal Details pane.
Next we will find all instances that are associated with this fleet using the command. You can execute these commands from your shell of choice.
aws gamelift describe-instances \
--fleet-id fleet-6127165e-259b-4c92-8e5a-41c8d2cc9xxx
This will return a list of instances that are currently running from the fleet.
An example response for this will look like this:
{
	"Instances": [
    	{
        	"FleetId": "fleet-c0ce3618-fa76-4ee3-b5b8-863054f59xxx",
        	"FleetArn": "arn:aws:gamelift:eu-west-1:<acountId>:fleet/fleet-c0ce3618-fa76-4ee3-b5b8-863054f59xxx",
        	"InstanceId": "i-0ff1163fe6353fxxx",
        	"IpAddress": "54.216.179.97",
        	"DnsName": "ec2-54-216-179-97.eu-west-1.compute.amazonaws.com",
        	"OperatingSystem": "WINDOWS_2016",
        	"Type": "c4.large",
        	"Status": "Active",
        	"CreationTime": "2023-09-01T12:10:06.699000+01:00",
        	"Location": "eu-west-1"
    	}
	]
}
Copy the InstanceId of the instance you want to debug and run the command.
aws gamelift get-compute-access \
--fleet-id fleet-6127165e-259b-4c92-8e5a-41c8d2cc9xxx \
--compute-name i-02547fba5b06d9xxx
This will then return credentials we can use with the Session Manager to connect to the instance.
Make sure that you save the AccessKeyId, SecretAccessKey and SessionToken we just received into variables. This process will differ depending on your shell, but for Git Bash run:
export AWS_ACCESS_KEY_ID=<AccessKeyId>
export AWS_SECRET_ACCESS_KEY=<SecretAccessKey>
export AWS_SESSION_TOKEN=<SessionToken>
Now we can use the following command to start a shell session in the instance with the credential we are providing in the variables.
For this example we are using eu-west-1 as our region, but yours might be different so make sure to use the correct region.
You can see a list of region codes based on AWS regions here.
aws ssm start-session --target i-02547fba5b06d9xxx --region eu-west-1Next we need to navigate to the servers directory. More specifically the location of the log files.
Starting session with SessionId: FleetsService-GetComputeAccess-bf667aee-cbeb-450b-95d0-c552e3e64-021b26867b03f2xxx
This session is encrypted using AWS KMS.
PS C:\Windows\system32> cd ..
PS C:\Windows> cd ..
PS C:\> cd ..
PS C:\> cd .\Game\GameLiftTutorial\Saved\Logs\
PS C:\Game\GameLiftTutorial\Saved\Logs> ls


	Directory: C:\Game\GameLiftTutorial\Saved\Logs


Mode            	LastWriteTime     	Length Name
----            	-------------     	------ ----
-a----     	8/1/2023   3:34 PM      	65915 GameLiftTutorial.log
The easiest way of viewing the logs is using the more command:
more .\GameLiftTutorial.logThis will now show you the text of the log file and you can scroll down by holding enter.
Good luck with your debugging!
Summary
In this section we set up our GameLift fleet settings and configured it to allow players to join and get connection to servers.
In the next section we will create a hub-world environment which will allow us to create lobbies which connect GameLift and allocate players into these servers.