Jenkins Controller Setup
Introduction
In this section, we will discuss setting up the Jenkins controller on AWS EC2.
First, we will touch on the AWS steps involved when launching the instance and then how to configure the instance once it is ready to be used.
Note
This tutorial is part of a series of tutorials on building UE5 projects using Jenkins and AWS CodePipline.You can see Part 1 of this tutorial below.
Set Up AWS Components
Controller Security Group
We will need to configure a security group for the controller instance. This will control what network traffic will be allowed in and out of the instance.
- Head to the EC2 dashboard in the AWS web portal.
- In the sidebar, click on the Security Groups option and click “Create security group” on the top right corner of the window

3. Give the security group a name and description.
We can leave the VPC the default value.
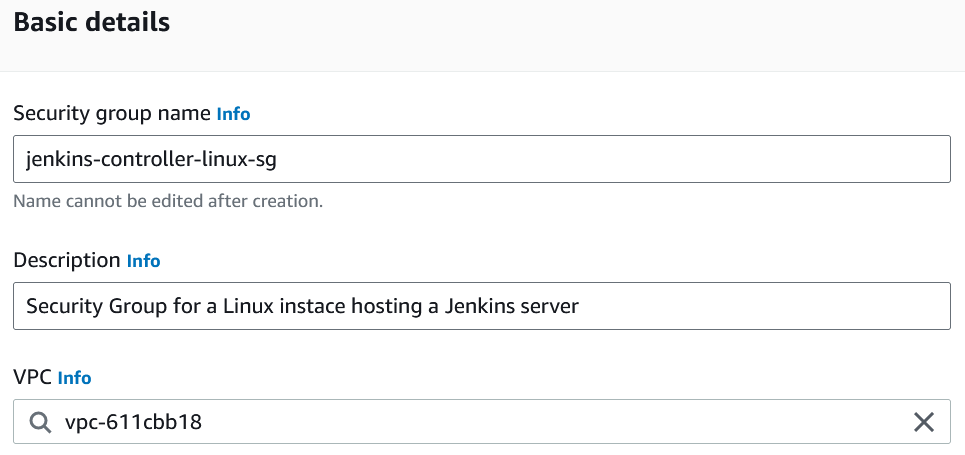
4. We need to add two Inbound rules to the security group.
First, expose TCP for Port 8080 to any IPv4 address. This will allow us to access the Jenkins portal from the browser of any PC.
Next, expose TCP for Port 22 from “My Ip”. This will allow us remote access into the instance, specifically from your personal public IP address. If other people require SSH access to the instance, you can add their IP addresses from here later.

Note
It is not recommended that you leave SSH open to any IP address. When you expose SSH access to the public internet, your instance becomes a target for brute force attacks, automated scans, and other malicious activities.
5. We can leave the default Outbound settings to allow all outbound traffic and we can add some tags.
Once you are done, click “Create security group”.

Elastic IP
We will make use of an Elastic IP address for our Jenkins controller instance.
This means that if we want to stopped the instance to save on costs, when we launch it again we will have the same IP address assigned to it.
This will be handy for accessing the Jenkins web portal from a consistent place.
- Head to the Elastic IPs section in the EC2 dashboard and click “Allocate Elastic IP address”.

2. Keep the default IP address settings.
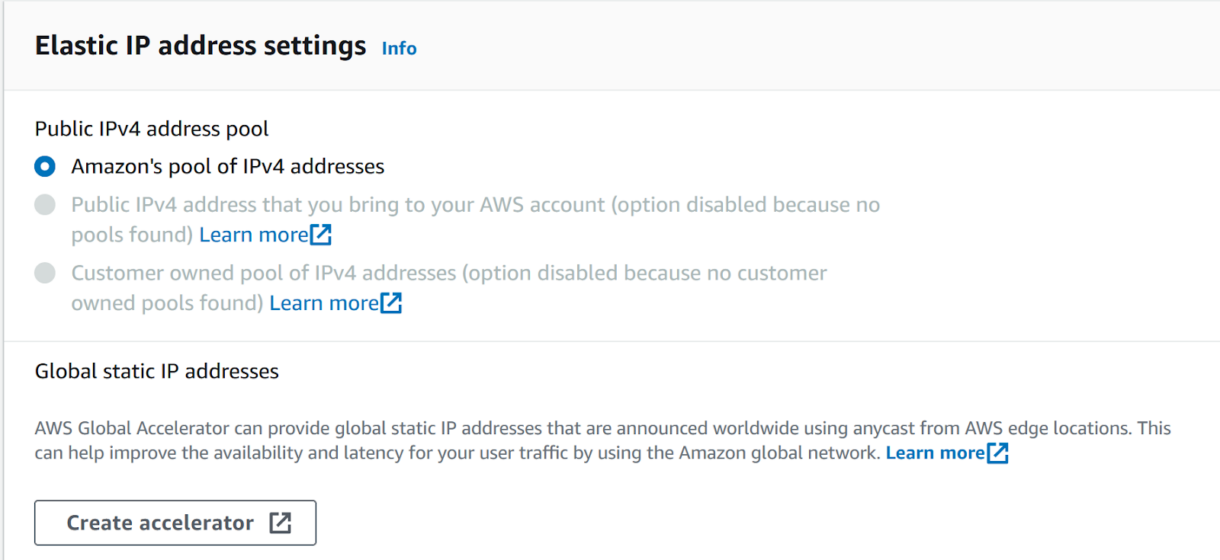
3. Add some tags and click “Allocate”.

Custom IAM Policies
We will need to create two custom IAM policies that we will later attach to our Jenkins Controller IAM role.
The first is a custom role that allows the Jenkins controller to pass IAM roles to the EC2 instances it launches.
The second is a GameLift full-access policy. This will be needed by whatever instance ends up polling GameLift in the CI/CD pipeline.
Important
To keep things simple we are granting our pipeline full-access to GameLift while we get things set up. This would not be the case for the final pipeline and, once set up, you should always review your policies to make sure you lock down the policy to the minimum permissions needed to complete your builds.
IAM PassRole Policy
- Set the policy permissions to look as below. It should allow the IAM action PassRole for any role on your AWS account.
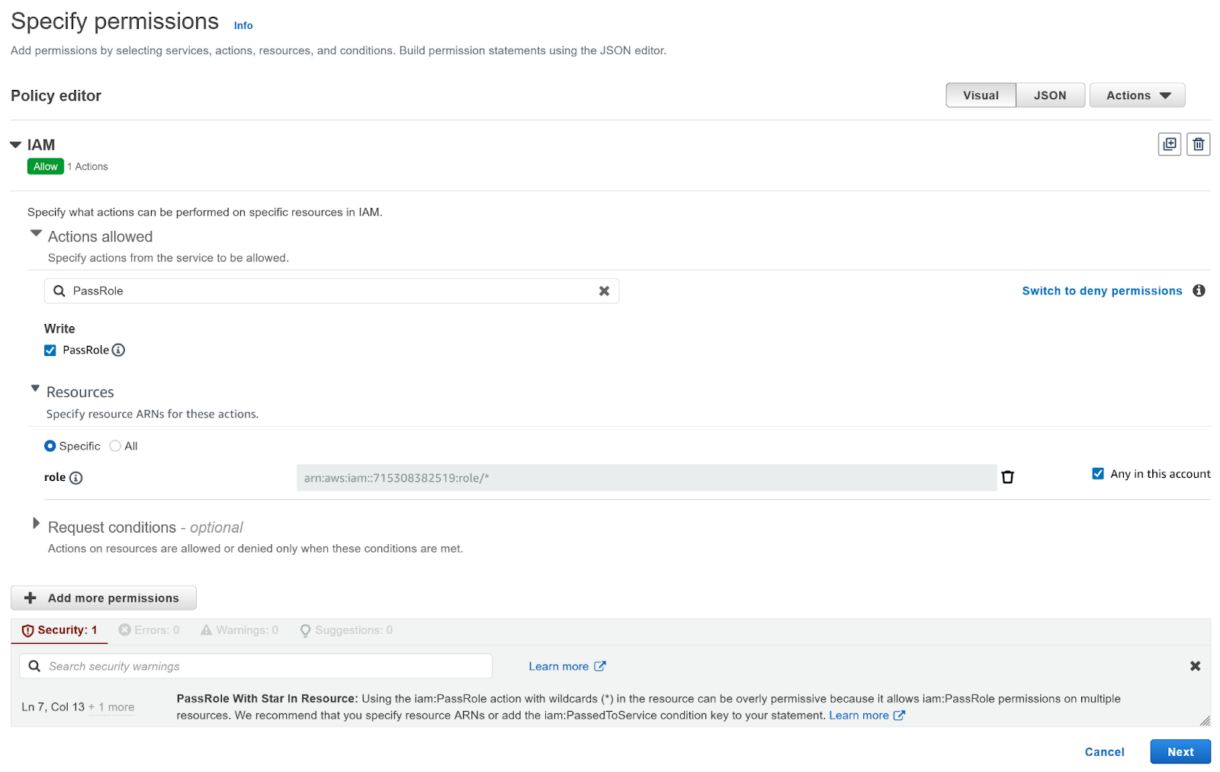
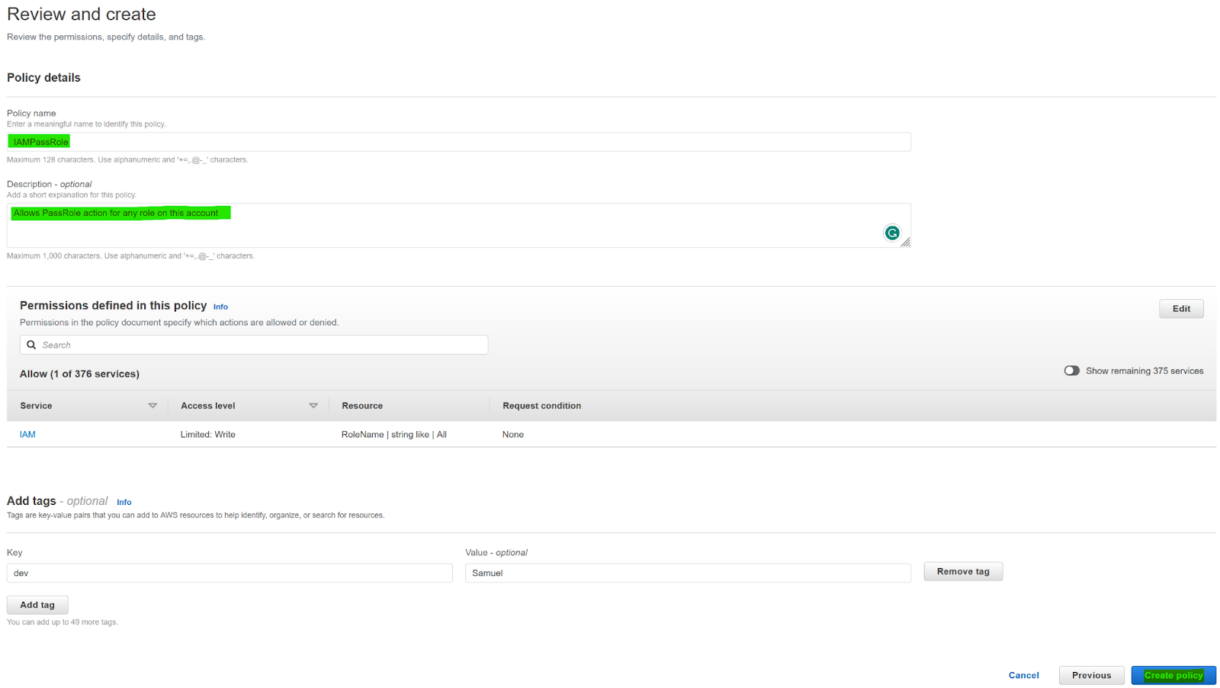
2. Give the role a name and description.
Add any tags you wish and then click “Create policy”.
GameLift Full Access Role
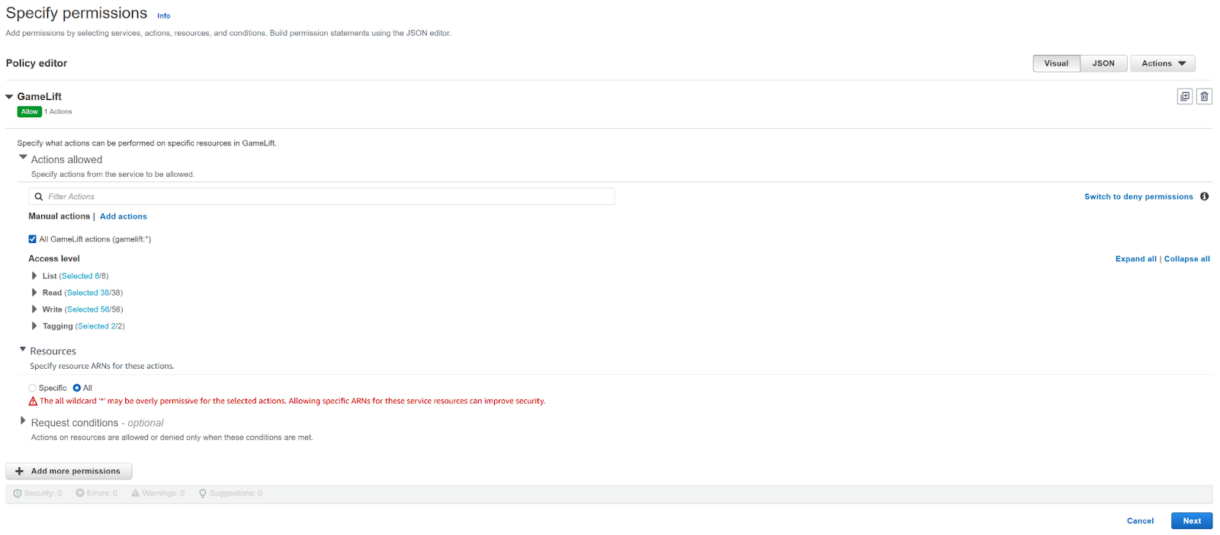
1. Set the policy permissions to look like the example below.
Allow all actions for the GameLift service for all Resources.
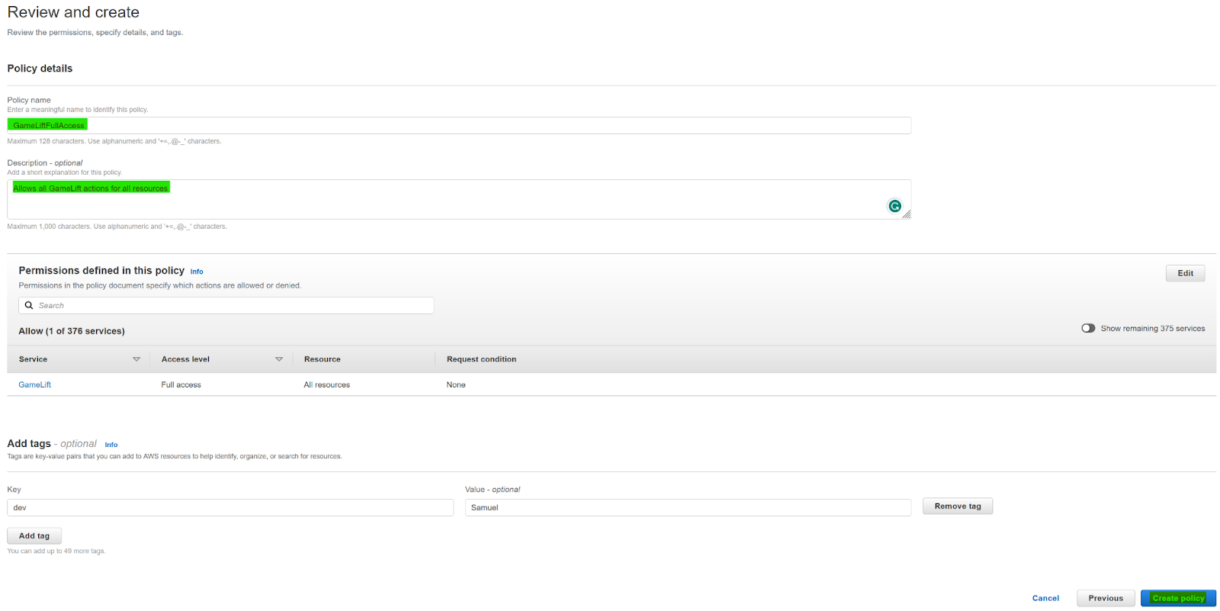
2. Give the role a name and description.
Add any meta-data tags and click “Create policy”.
Controller IAM Role
Lastly, before launching the instance, we will put together an IAM role for the controller instance.
This will be attached to the instance and will give it certain permissions for what AWS service(s) it is allowed to call.
Navigate to the IAM dashboard and select the Roles option in the sidebar.
Click on the “Create role” button.

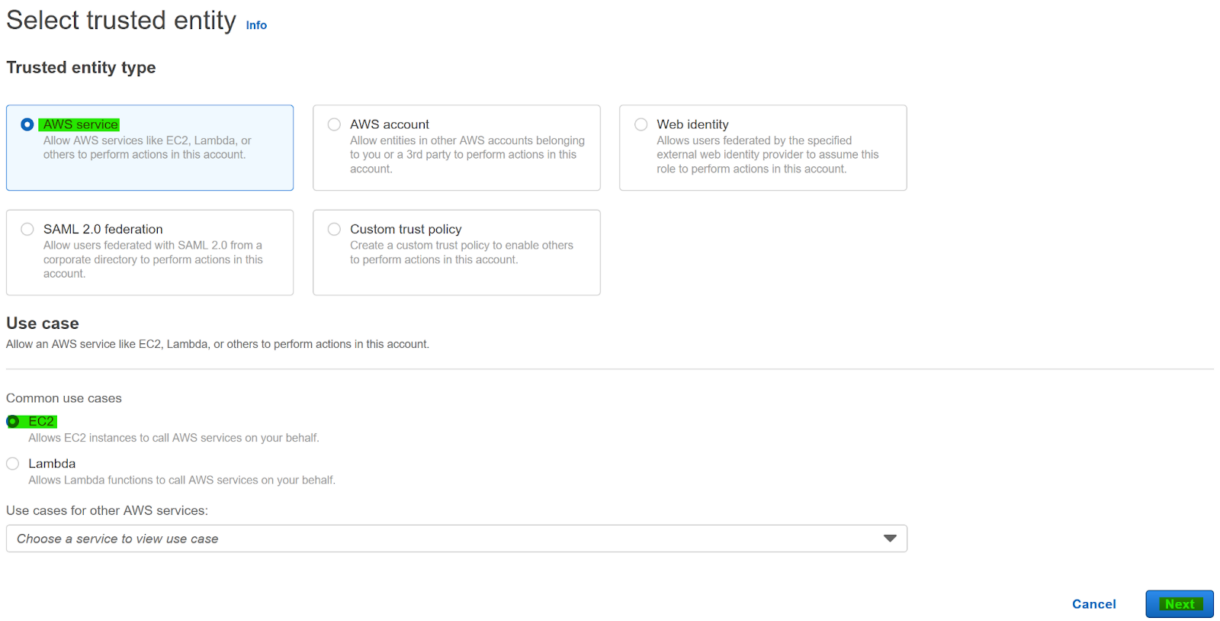
2. Select AWS service as the trusted entity type and then select EC2 as the use case.
Now click “Next” button.
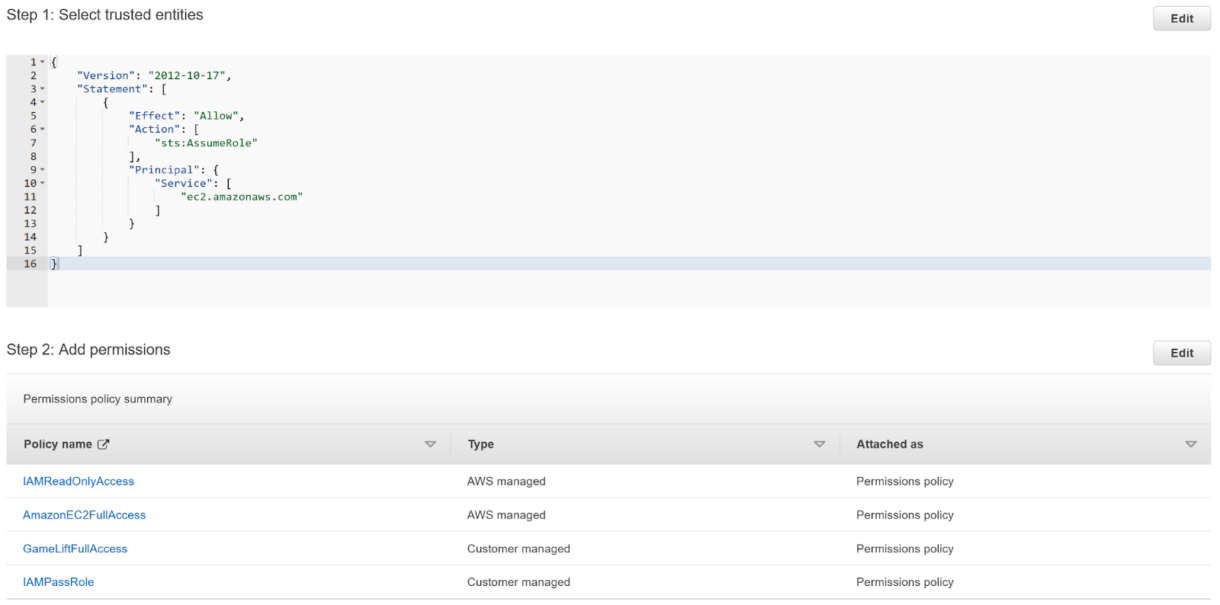
- We will add 4 policies to the role.
We will add the two custom policies we created earlier, along with two additional AWS-managed policies which are:a. AmazonEC2FullAccess
b. IAMReadOnlyAccess
- Give your role a descriptive Name and Description.

Your role should look like the example below…
6. Add any tags you might need and click the “Create role” button.

Launching Our Jenkins Instance
Now that we have all of the prerequisites in place we can launch our Jenkins controller instance.
1. Back in the EC2 dashboard, select “Instances” in the sidebar and click on “Launch instance” button.

2. Give your instance a name and add any tags nessesary.

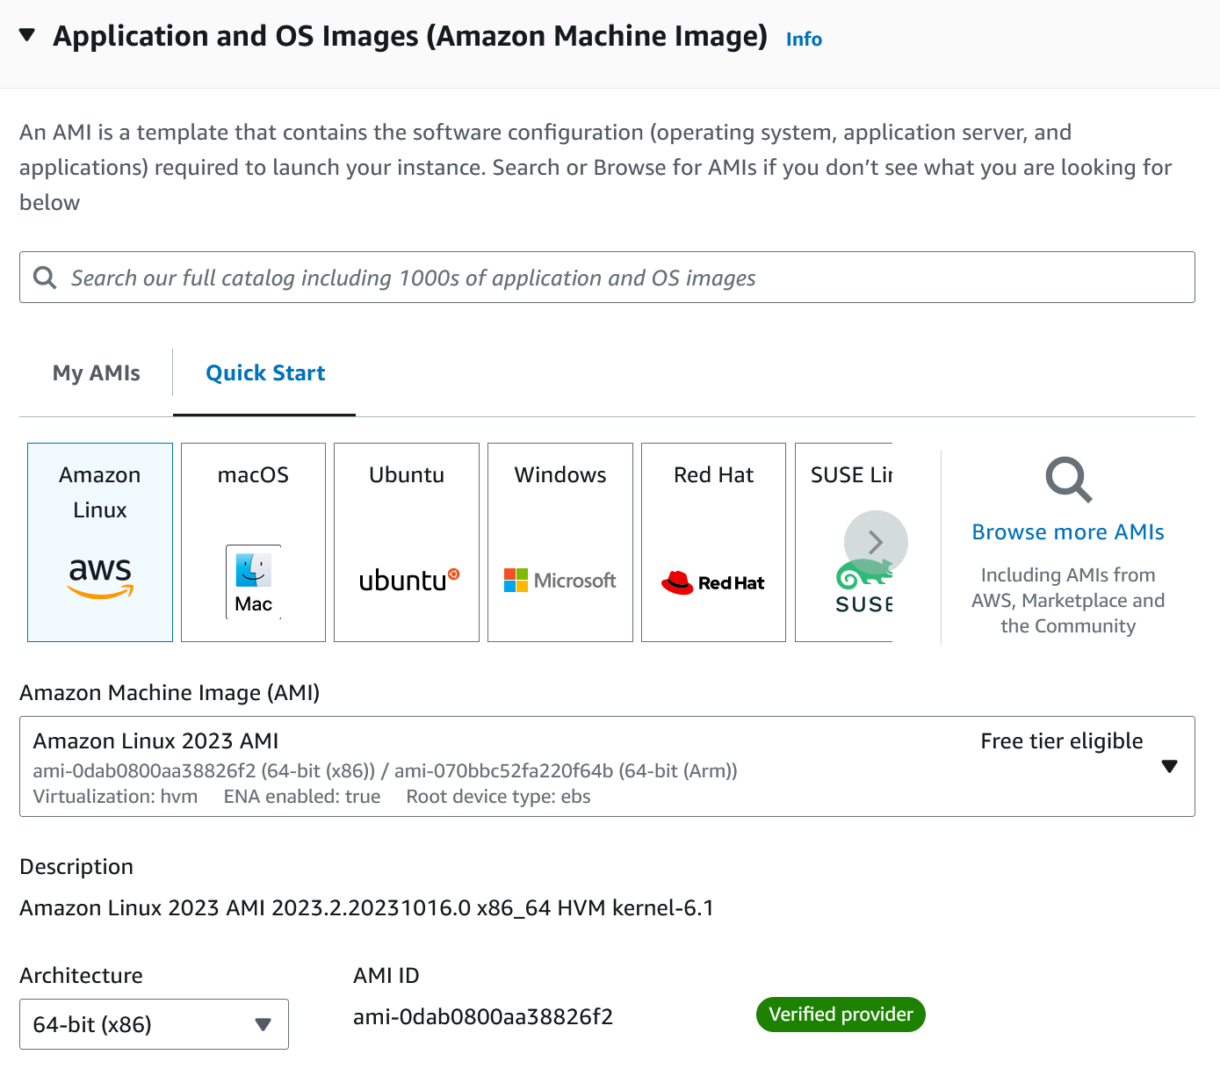
3. Select the Amazon Linux 2023 AMI as your OS image.
4. Now select your instance type.
In our case, we selected a t3.micro instance. This is a very small instance but it will be plenty powerful for our Jenkins server.
Keep in mind that you can always swap this out later for a more powerful instance.

5. Now we need to select a key-pair for the instance.
You can create a new key-pair at this stage and reuse it for other steps in setting up the pipeline.
In the case of this instance it will be needed in order to connect to the instance using SSH (we will see this later on).
Important
Once generated, make sure to save the generated .pem file securely.We will need it later and you will not be able to download it again once it was created.

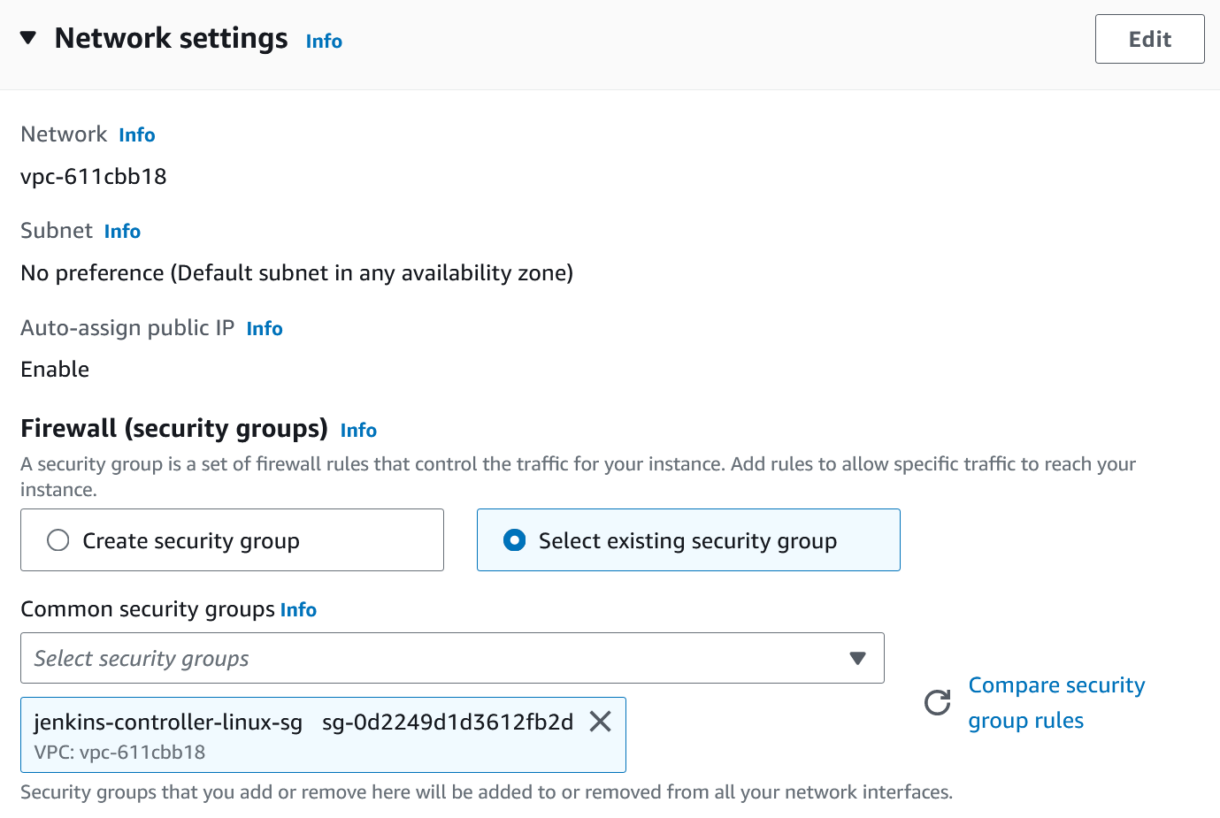
6. Under the Network settings tab, select the security group we created earlier.
7. You can keep the default settings in the storage section. We won’t need to grab any large files with the controller, so no additional volumes are required.

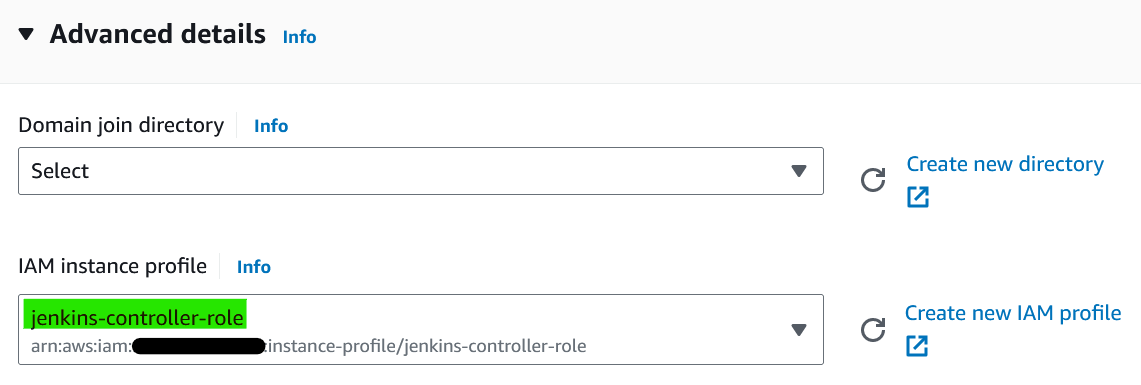
8. In the Advanced details section, select the IAM role we created in the IAM instance profile section.
9. Then click Launch instance.
You should now see the instance starting up in your Instances section of the EC2 dashboard.

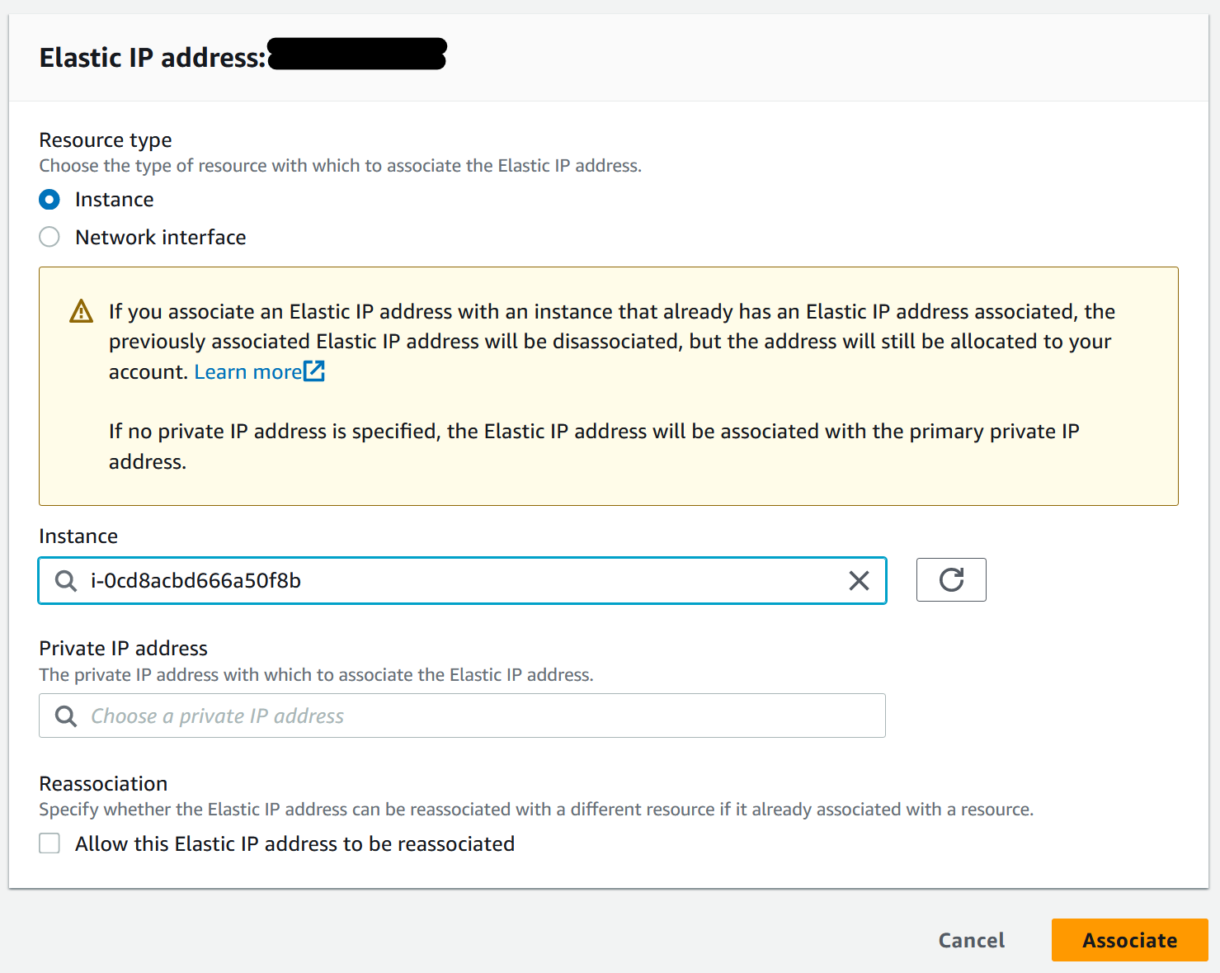
10. The last thing we need to do is attach the Elastic IP address we created earlier to the launching instance.
Go to the Elastic IPs section in the sidebar of the EC2 dashboard and select the IP we created earlier.
In the Actions menu click “Associate Elastic IP Address”.

- Select the instance we just launched and click Associate.
That’s it, you have now fully created the Jenkins controller instance.
Next, we will customise the instance.
Configuring The Controller Instance
This section will discuss configuring the controller instance we just created. This will include connecting to it using SSH. Configuring Jenkins and exposing the web portal.
We will then discuss adding the required plugins to set up an AWS cloud to dynamically launch and utilise EC2 agents.
Connecting to the instance
Since we are working from a Windows computer for this tutorial we will use PowerShell to run all of the following commands.
PowerShell comes with a built-in SSH client that allows you to connect securely to a remote server even through an unsecured network.
If you don’t have access to a shell with an SSH client you can use the AWS Instance Connect and use their shell from within your web browser.
- Using PowerShell, navigate to the directory where you saved your .pem file. The .pem file will have downloaded automatically when we created our key-pair earlier.
cd F:\work\aws\key-pairs2. Next, we need to update the .pem file’s permissions to be exclusive to the user we are signed in with.
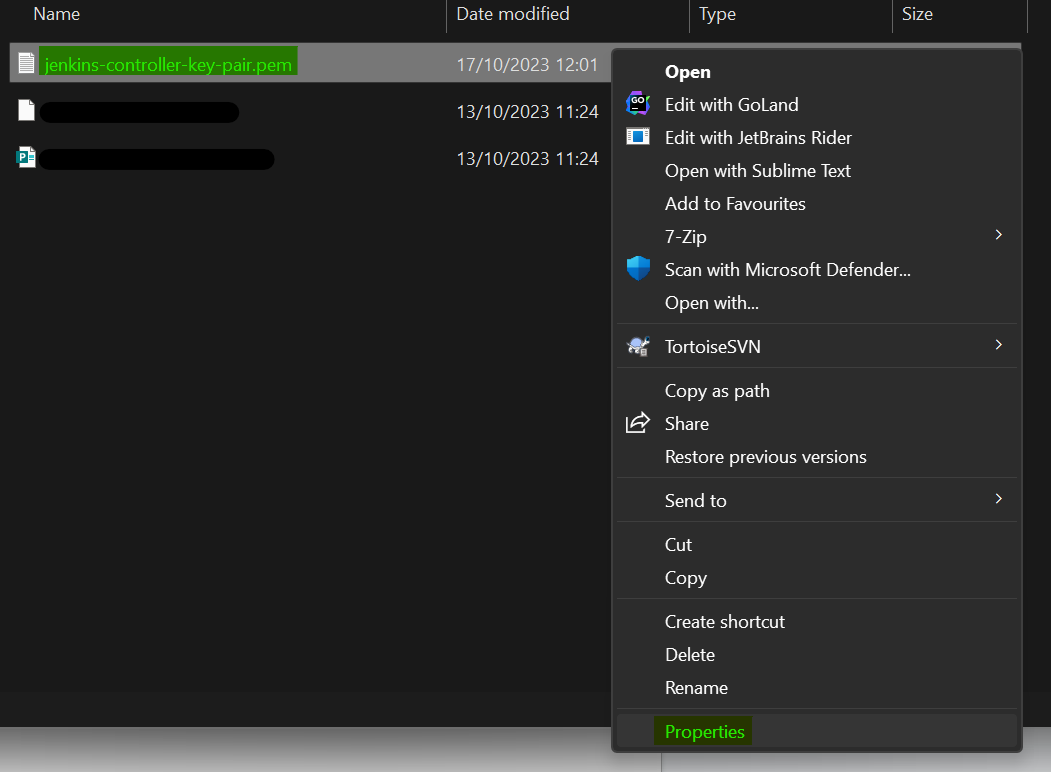
Right-click on the .pem file and select “Properties”.
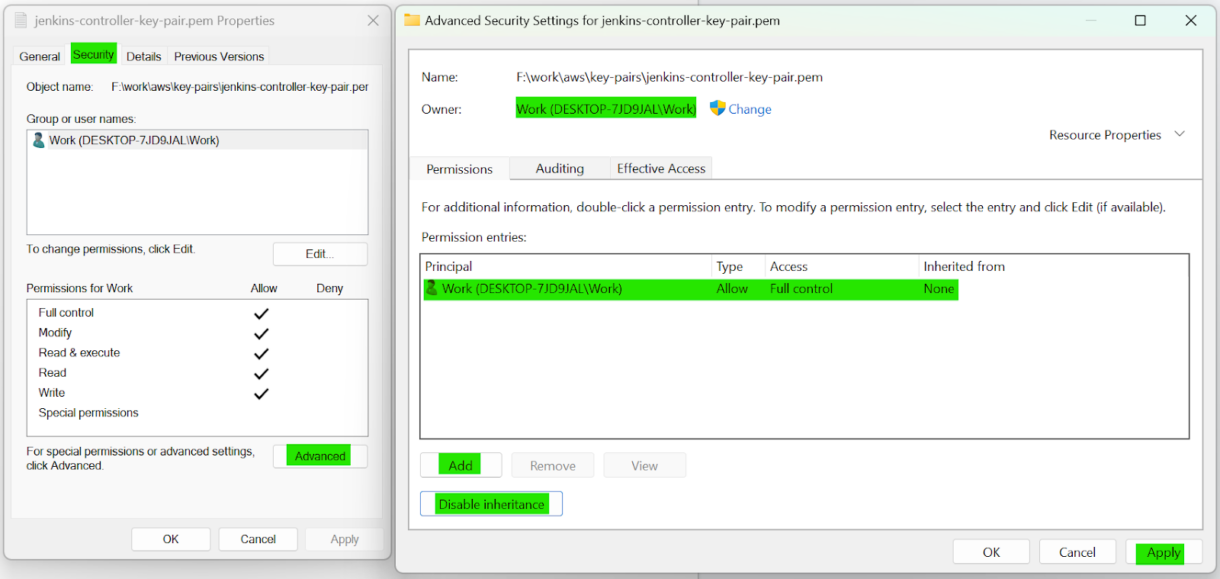
3. Head to the Security tab and click on the “Advanced” button.
Make sure that your user account is the owner of the file.
Make sure to click on Disable inheritance.
Remove all other permission entries, then click on the “Add” button and give your Windows user “Full control” access.
Then click the “Apply” button.
4. Using Powershell we can now connect to our Jenkins controller instance using the command below with the ec2-user that is set up by default by Amazon Linux.
You can use either your instance public IP (the elastic IP we set up earlier) or its Public IPv4 DNS name.
ssh -i "jenkins-controller-key-pair.pem" ec2-user@255.255.142.xxxInstalling Jenkins
Now that we are connected to the EC2 instance, we need to install Jenkins and configure it on the machine. All commands below are run on the EC2 Jenkins controller instance to which we are now connected to using SSH.
Installing Jenkins
Jenkins has a great tutorial on how to install Jenkins on an Amazon Linux instance here.
For the first section of the configuration we will essentially be following the same commands as you’ll find in that tutorial.
- First, we will update the instance’s dependencies.
sudo yum update -y2. Next, we will download the Jenkins repo to a specific local file path using wget.
The -O flag specifies the download location.
sudo wget -O /etc/yum.repos.d/jenkins.repo \
    https://pkg.jenkins.io/redhat-stable/jenkins.repo
3. To verify the repository we just downloaded, we will import a GPG key from Jenkins.
sudo rpm --import https://pkg.jenkins.io/redhat-stable/jenkins.io-2023.key4. Now we will upgrade installed packages to their latest available versions.
sudo yum upgrade5. Jenkins requires Java to be installed on the system to be able to run.
We will install a distribution of the Open Java Development Kit (OpenJDK) provided by Amazon called Amazon Corretto. Specifically, Java version 17 which we will also use on any Jenkins agents later in this tutorial.
sudo dnf install java-17-amazon-corretto -y6. You can check that the previous command ran successfully with the command below.
You should see your Java versions listed.
java --version7. We can now install Jenkins.
sudo yum install jenkins -y8. We want Jenkins to launch automatically when we reboot or stop and relaunch the instance.
We can enable this using the following command.
Keep in mind the Jenkins server is not yet running so we will do that next.
sudo systemctl enable jenkins9. Let’s start the Jenkins server.
sudo systemctl enable jenkinsJenkins is now installed on the instance and running.
We can now access the Jenkins portal using our web browser at the address: http://<your-public-IP>:8080
Configuring Jenkins
1. Navigate to http://<your-public-IP>:8080 in your web browser and should now see the Jenkins server web portal.
We will need to retrieve the initial administrator password from the file path provided.
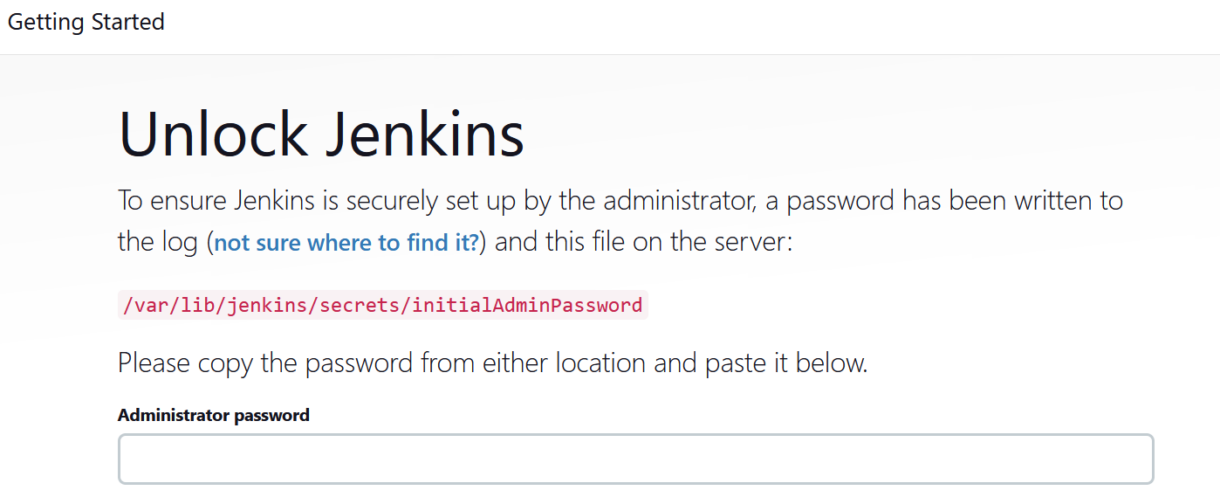
2. Still connected to the controller instance using SSH, we can use the following command to display the initial admin password.
Copy the password and enter it in the portal.
sudo cat /var/lib/jenkins/secrets/initialAdminPassword- Click Install suggested plugins. We won’t need all of the plugins this installs but it is easier than custom-picking everything. You can always uninstall unneeded plugins later.
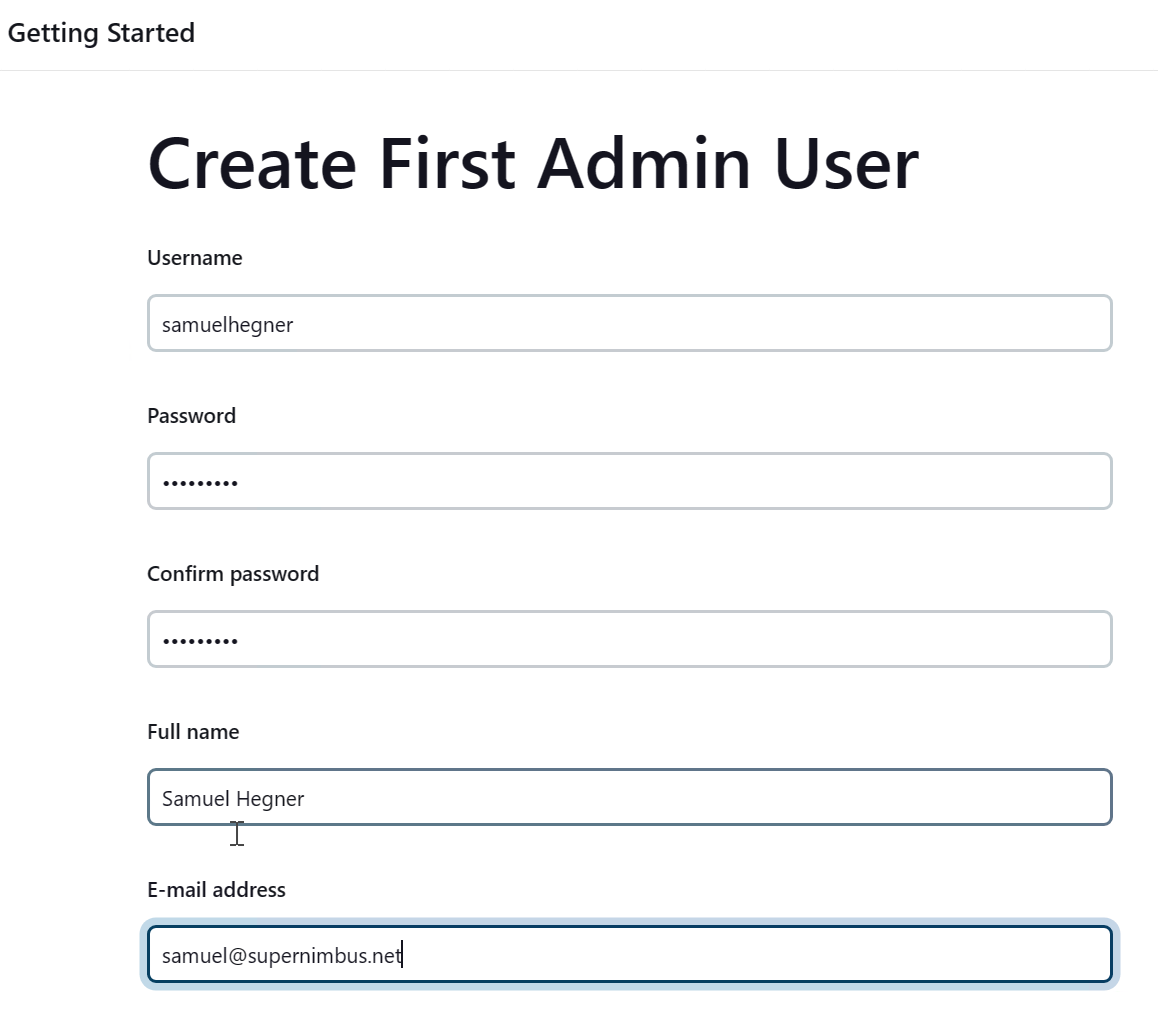
- Create your first Admin user. This will be used to log into the web portal from now on.
5. Keep the Jenkins URL the default and click Save and Finish.
Jenkins Plugins
EC2 Plugin
The EC2 plugin will be used to dynamically launch Jenkins agents for us.
We will configure the basics of it now and then return to it later when we add our agent AMIs.
We will be doing this part from the web portal rather than connecting to the instance through RDP.
1. Select the Manage Jenkins tab from the side-bar and click “Manage Plugins”.

2. Click on the “Available plugins ” tab and search for EC2.
Tick the Amazon EC2 plugin and click “Install”.

3. When the installation of the plugin and its dependencies is complete, return to the Manage Jenkins tab and click on “Clouds”.

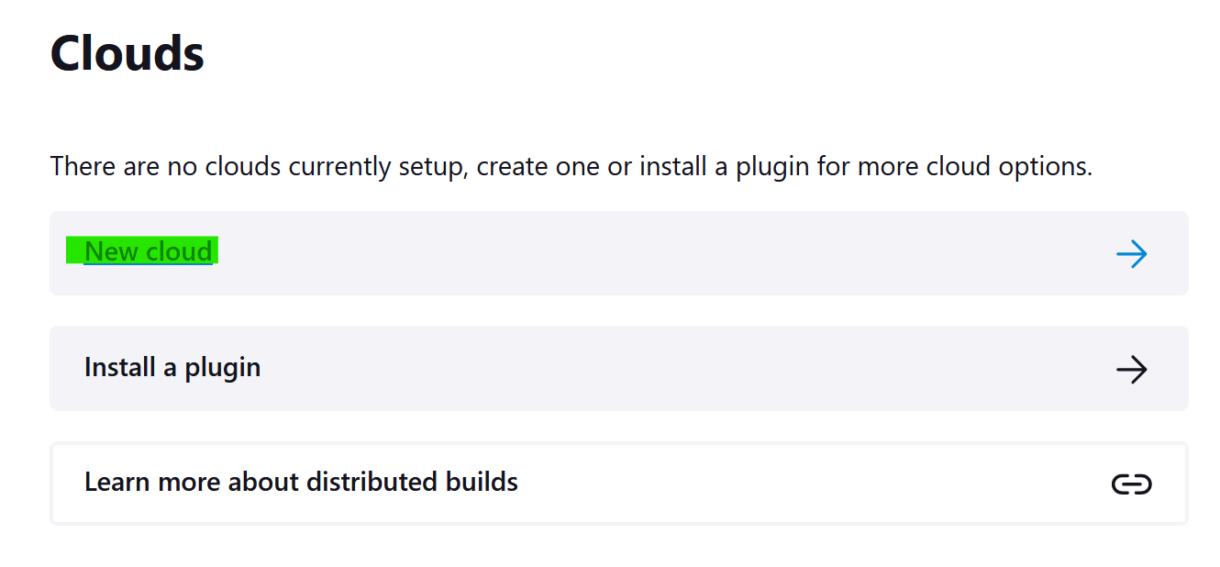
4. Click on “New cloud”.
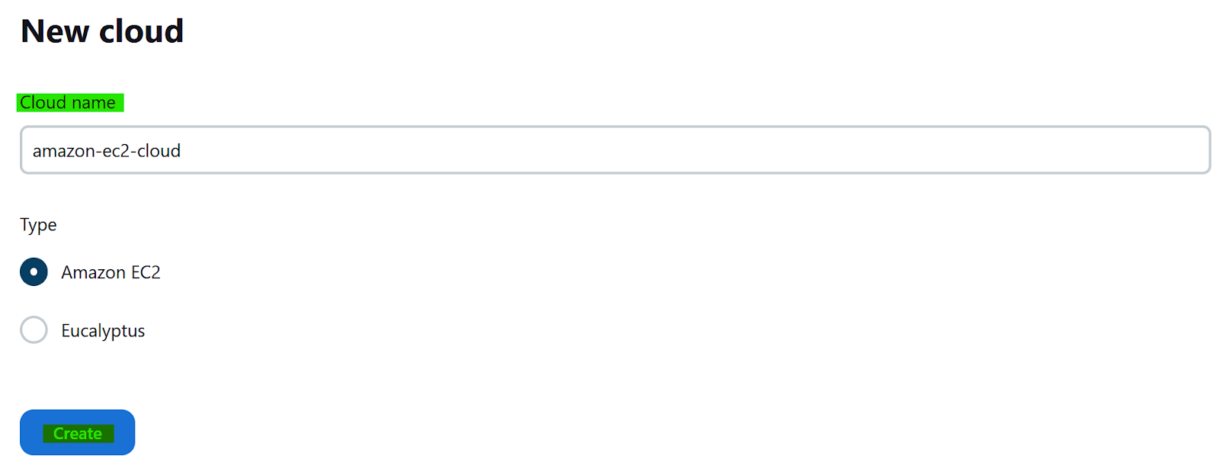
5. Name the cloud, select the Amazon EC2 plugin we just installed and then click “Create”.
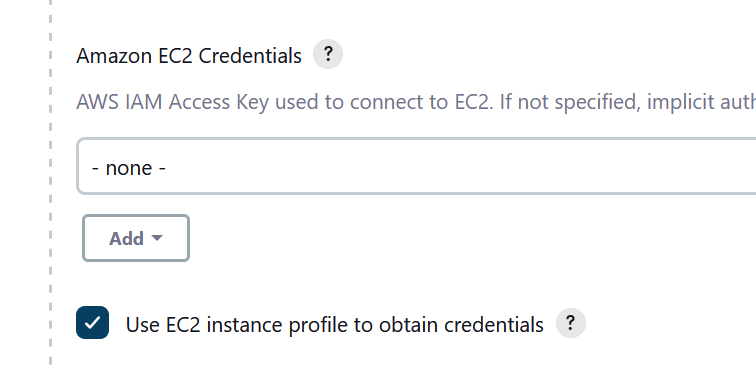
6. You can leave the credentials blank and select Use EC2 instance profile to obtain credentials.
This will use the IAM role we created and assigned to the controller instance.
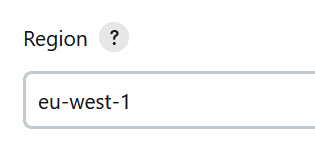
7. Select the region in which you want to launch EC2 agents.
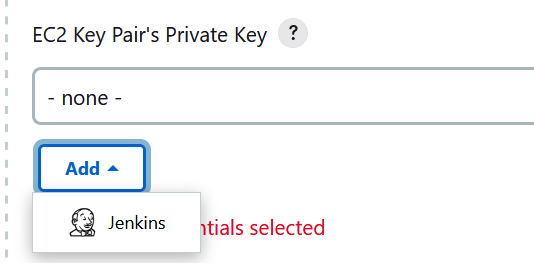
8. Next, we need to create a Jenkins credential that holds the private key of the key pair we created earlier. These credentials will be attached to the EC2 instance launched by this plugin. Click on Add and select Jenkins
9. Make sure that you are creating a “SSH Username with private key” credential.
Name the credential and give it a description.
Make sure that the Username is the name of the user we will be using on the Agent machines.
For our Windows AMIs, we will be signing in as Administrator.
Then lastly, copy your private key and paste it into the Private Key section. You can see your private key value that you need to copy if you open your .pem file using Notepad.
Alternatively, you can run the following PowerShell command and copy the output.
cat .\jenkins-controller-key-pair.pem 
- We can leave the advanced section blank and Test the connection at the bottom.This should finish with a Success. You can then click Save.
We now need to create some AMIs to use with the EC2 plugin.
We will go through setting up a base Windows image in detail, on top of which, any additional software can be installed and new images can be created that are more specialised.
P4 Plugin
Since we host our UE5 project files on a Perforce server, we also need to install the P4 Plugin. This will make it easier to call Perforce commands like syncing our files and more.
In the Available Plugins, search for the P4 plugin, select it and click the “Install” button.

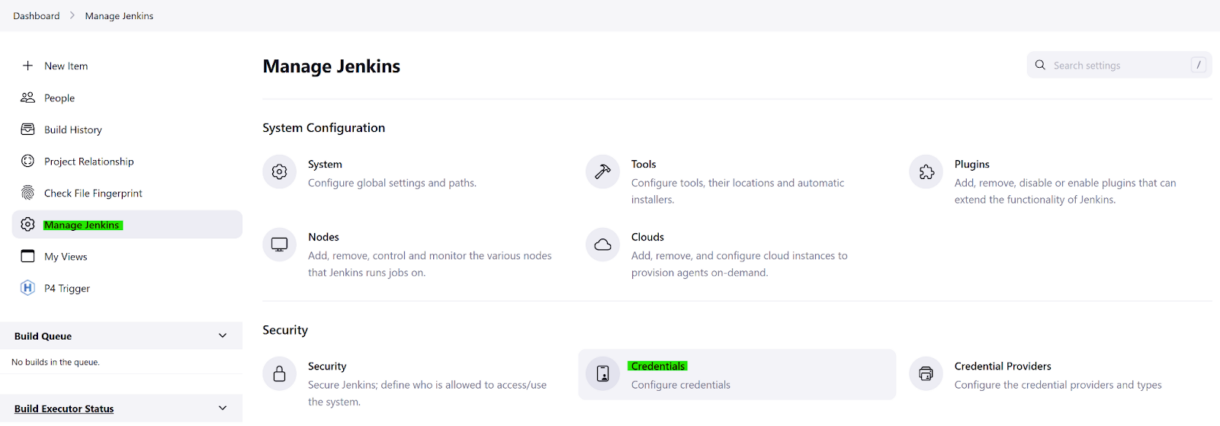
Let now also quickly configure the P4 Credentials we will use to sync our project files. In the Dashboard head to Manage Jenkins and click on Credentials icon.
- Click on any of the (global) domain links.

4. In the top right, select “Add Credentials”.

6. We will be using a Perforce Password Credential. Give it an ID and Description.
The P4Port field needs to be in the format “<server-ip>:<server-port>”.
If the server uses SSL make sure to tick the box and provide the server’s fingerprint.
Lastly, provide the Username and Password. Then click the “Create” button.

NoteIf you are unsure of your server’s fingerprint, you can use the command:p4 trust -lThis will list all of the computer’s trusted Perforce servers and their fingerprints. Make sure that this command is run on a computer that already has connected to the Perforce server in the past
Additional Software
Since Amazon Linux comes preinstalled with Python and the AWS CLI, we already have all of our required software installed.
However, if you do need to add anything specific to your instance, make sure to restart your Jenkins server after editing any system configurations. This will ensure it refreshes its cached values.
You can restart the controller by going to: “http://<your ip>:8080/restart” or using the console command below.
sudo systemctl restart jenkinsSummary
Now our Jenkins instance has been set up and all the necessary plugins have been installed.
The next step is to configure our Jenkins environment with all the software and packages it needs in order to start building UE5 projects.
