Personal License Pipeline Setup
The main difference between the professional and personal license build steps is that the personal license has some extra components that allows us to contact Unity and get our build environment and Unity license file so we can complete our builds.
This will require one additional component in our pipeline, a new Source, and some extra components in our buildspec file where we validate and download the ulf file.
Additional Source
The first thing we need to do is add a new source to our pipeline.
This will be another GitHub repository, specifically the unity-license-activate repository.
We will need a new connection set up for this repository. This can be done the way we did previously but in order for the repo to be part of your account you will need to fork it so it appears in the connection you previously created.
In the CodePipeline dashboard of your AWS account, navigate to the “Settings” option on the left-hand-side menu and click on “Connections”. Click on the “Create connection”. Set up a new connection as we have done before for your project repository.
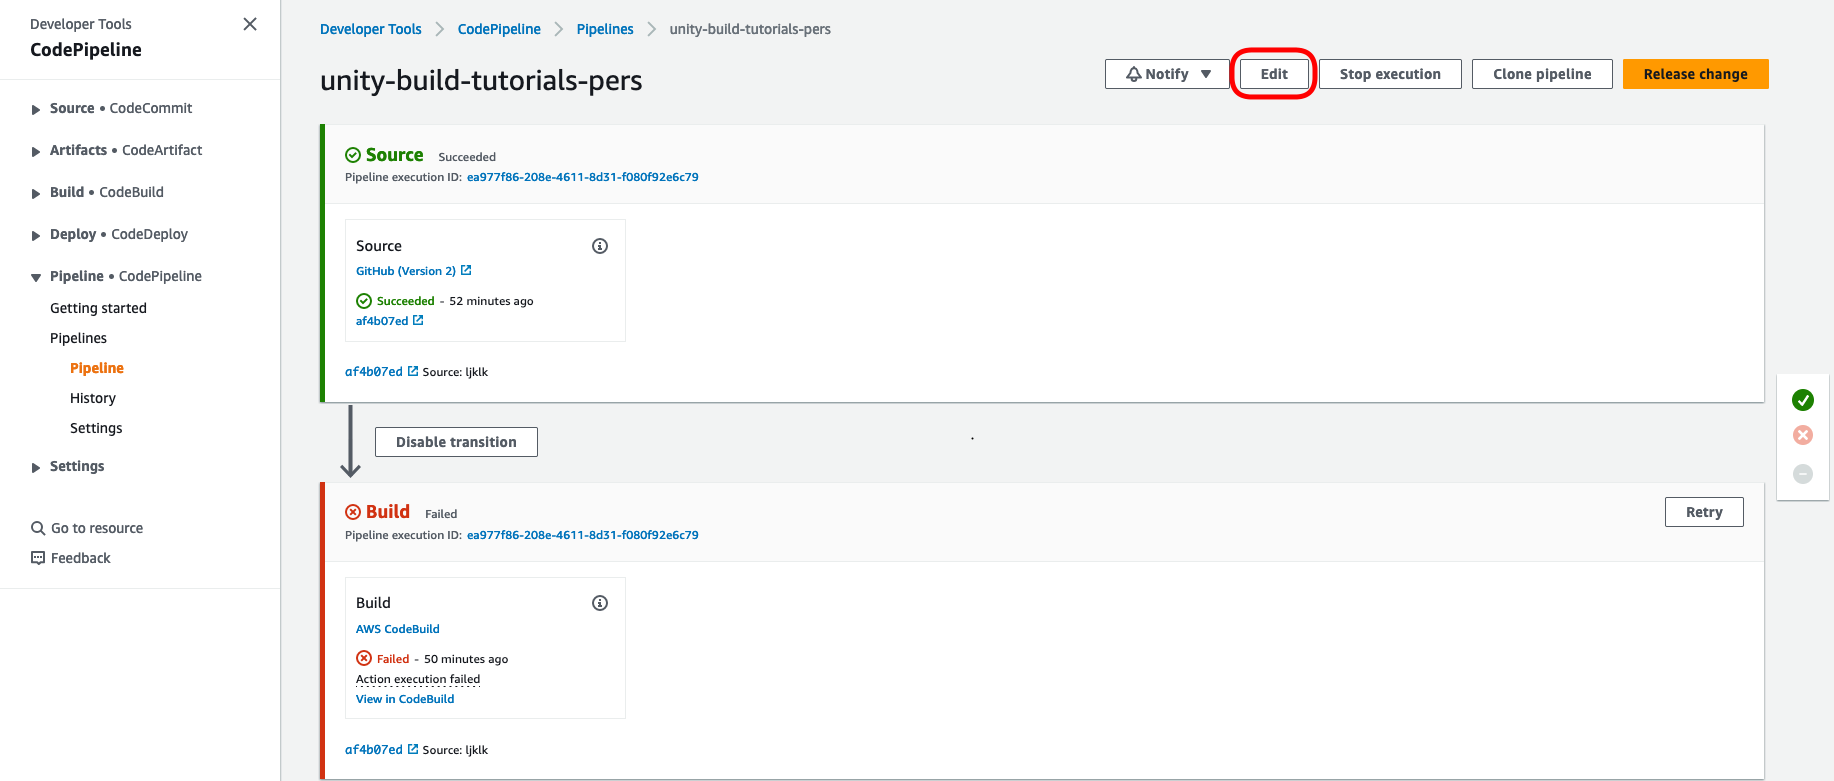
Once your connection is set up, go to your pipeline and click on the “Edit” button on the top menu.
Next, click on the “Edit Stage” button on the Source.
Click on “Add action”.

Configure the source as you did when setting up your own repository.
This time give the “Output artifacts” field a new name.
This field will be referenced in the buildspec file later to remember what name you give.
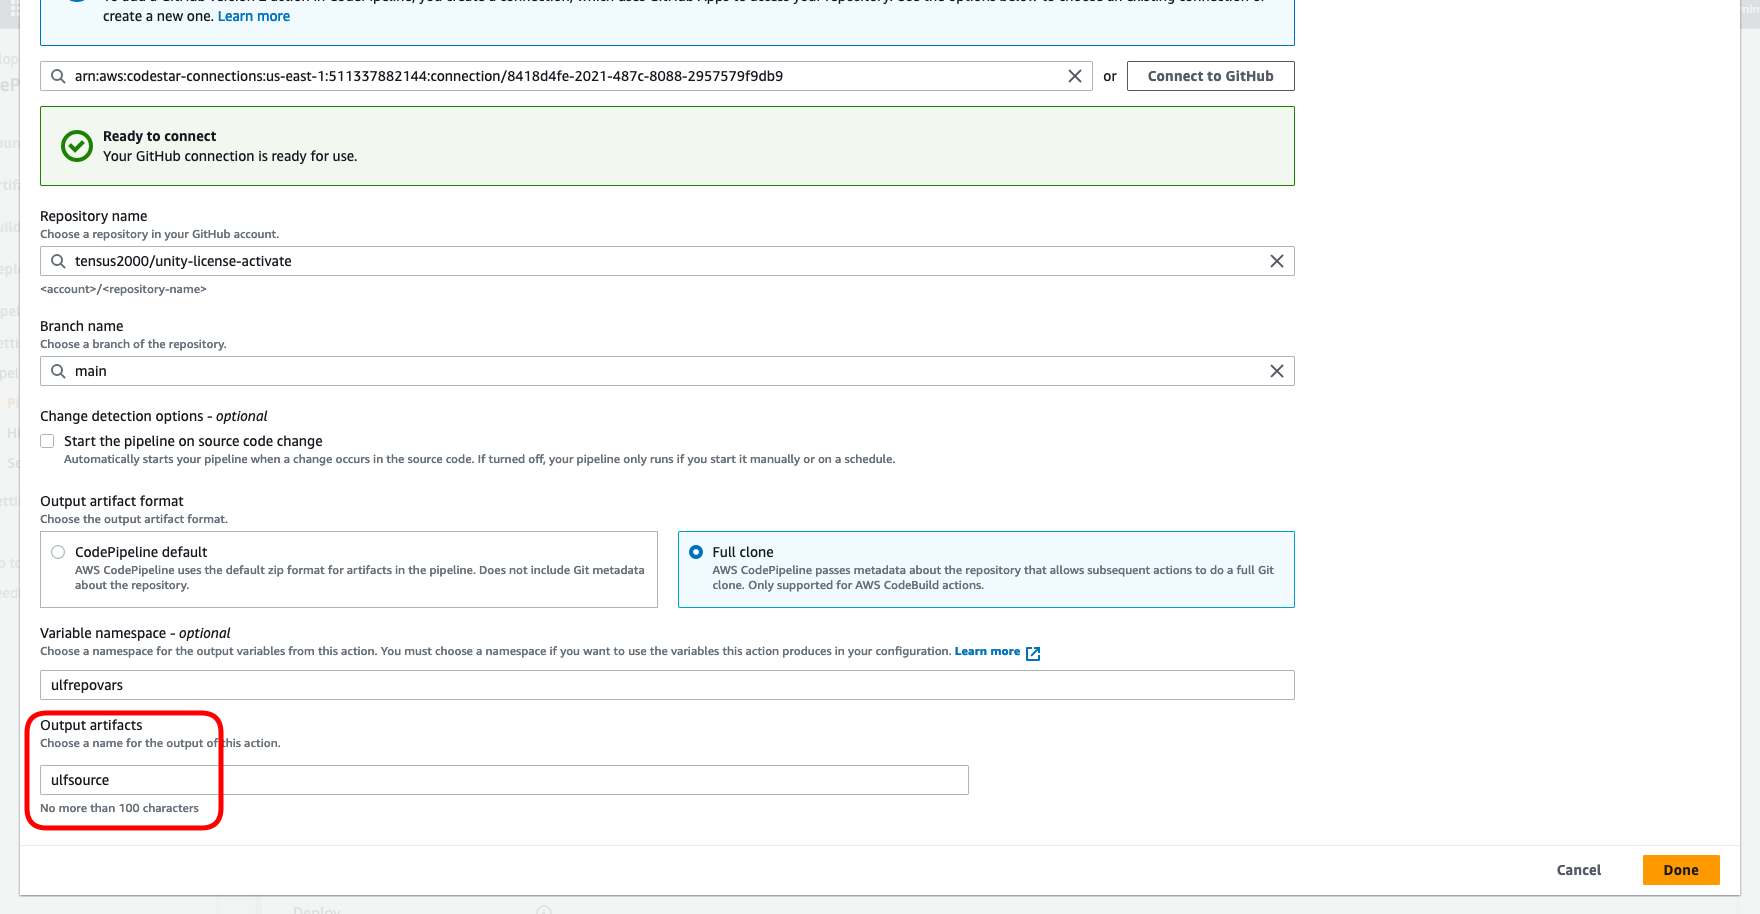
I also like to rename the sources at this stage so we can differentiate the two sources.

Once your connection is set up, click on the “Done”.
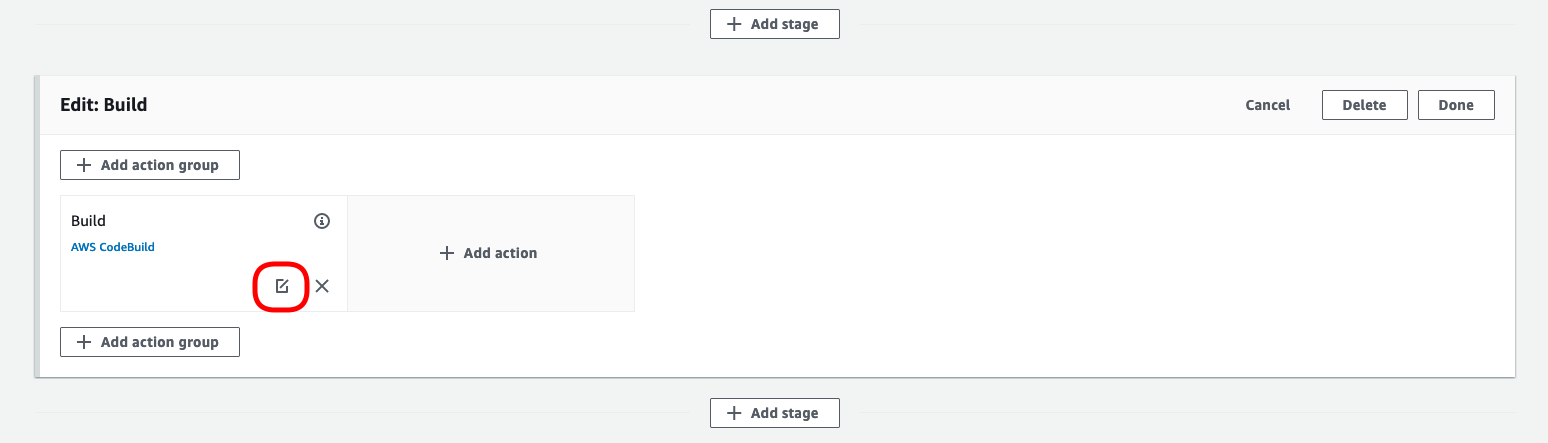
Next we need to edit the build stage.
Click on the “Edit stage” button and then click on the edit icon on the current build action.
Here we want to add a new source under the “Input artifacts” section.
We also want to make sure that the “Primary source” field is set to whatever your project repo is.
In this example we remained the original source “project-repo” before this step.
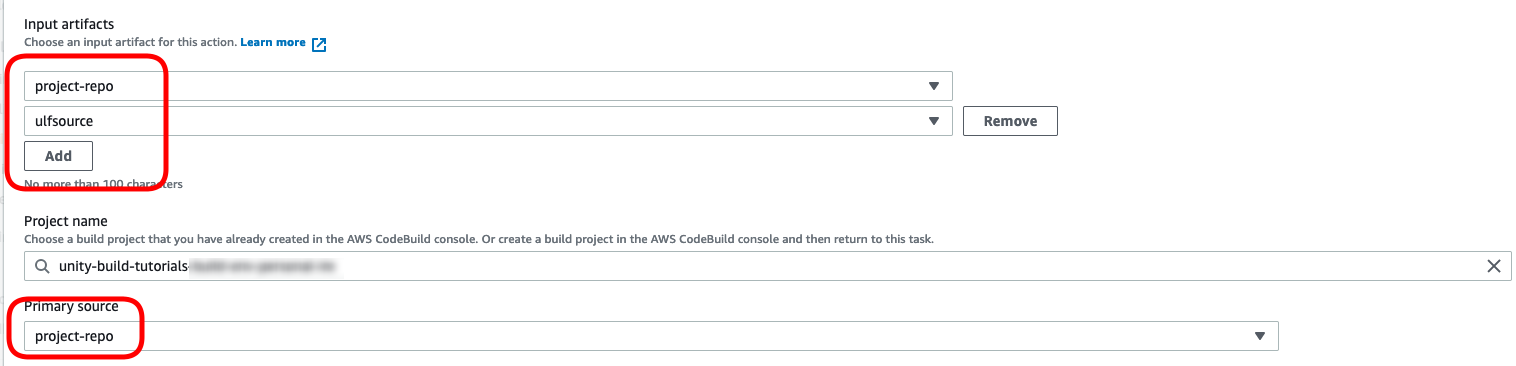
Save your build configuration and then click on the “done” button.
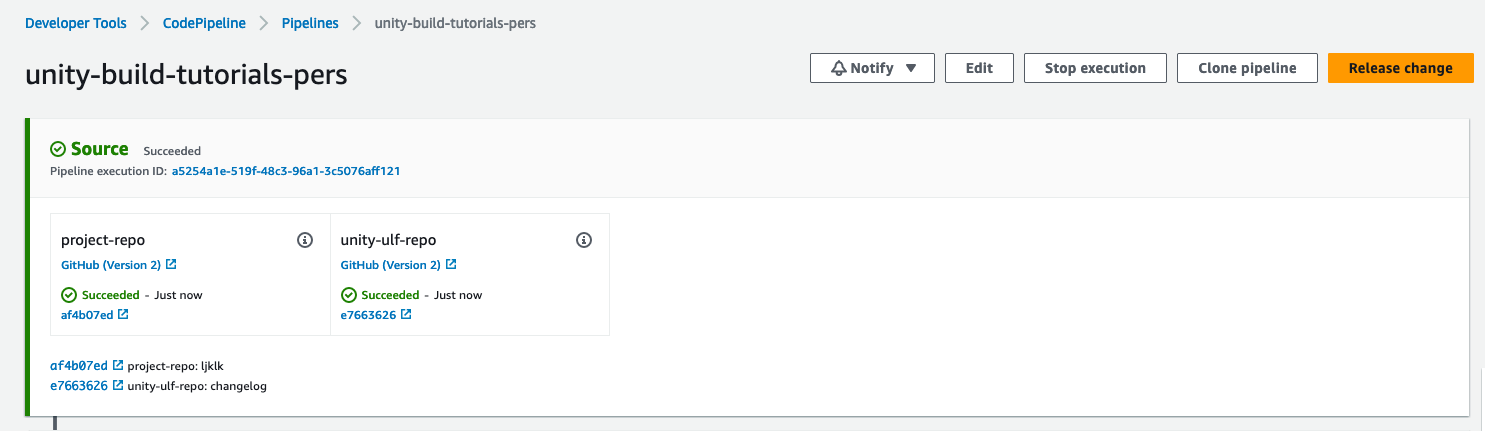
Click on the “Save” button at the top of your pipeline and then click on “Release change” now just to check if the source can be pulled correctly.
If everything is set up correctly you should see both Source actions complete successfully.
Adding BuildSpec File
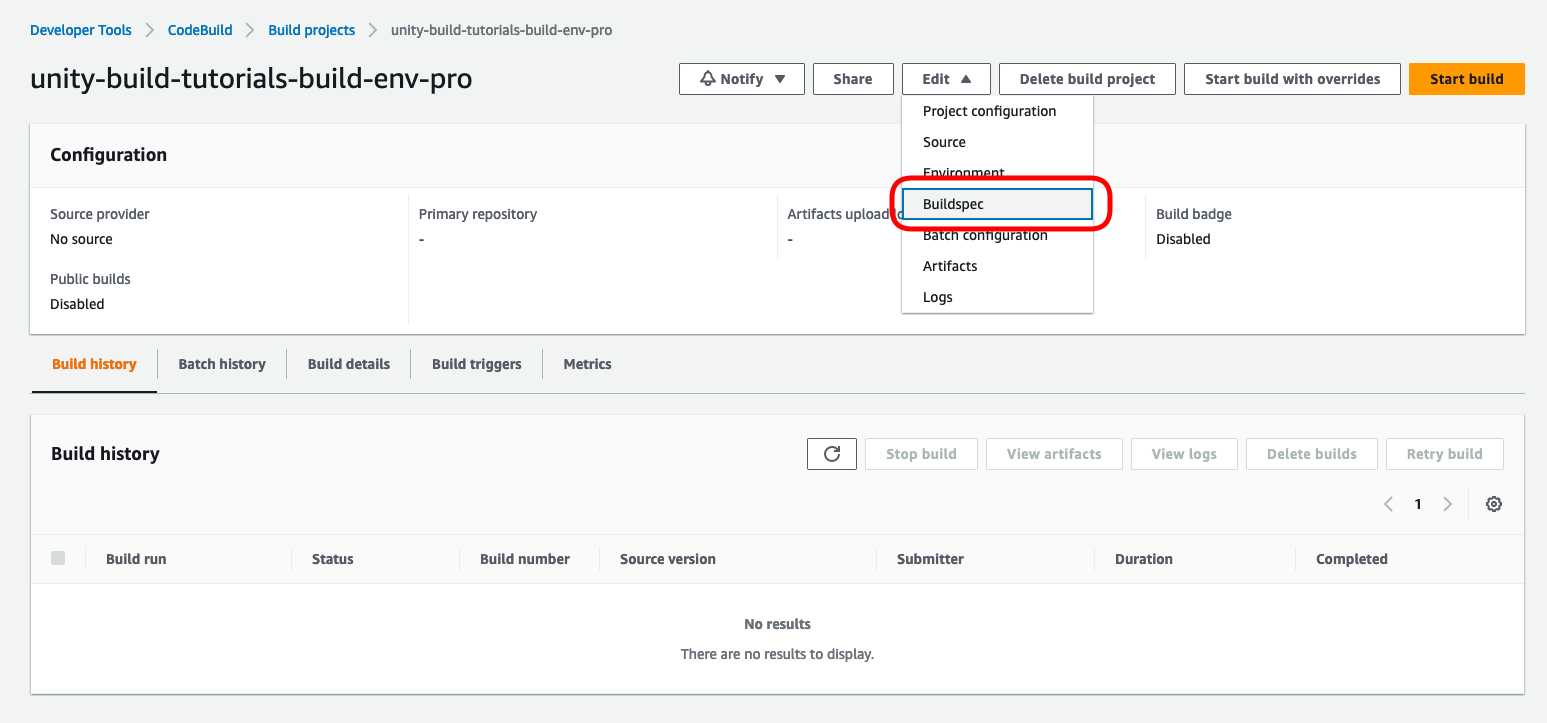
Navigate to your build-environment project in the CodeBuild menu and select it.
This should bring up the details of your project.
In order to add or edit the buildspec you can click on the “Edit” dropdown menu and then the “Buildspec” option.
Insert the following buildspec file and click on “Update buildspec”.
version: 0.2
env:
  variables:
 UNITY_COMMAND: "xvfb-run --auto-servernum --server-args='-screen 0 640x480x24' unity-editor -batchmode -nographics -logfile /dev/stdout -quit"
 ACTIVATION_COMMAND: "xvfb-run unity-editor -batchmode -logfile /dev/stdout -quit"
 BUILD_OUTPUT_FOLDER: "Builds/Win64"
 BUILD_OUTPUT_NAME: "unity-demo-project"
 MAJOR_VERSION: "0"
 MINOR_VERSION: "0"
 PATCH_VERSION: "1"
  exported-variables:
 - CODEBUILD_BUILD_NUMBER
 - BUILD_OUTPUT_NAME
 - SEM_VERSION
phases:
  pre_build:
 commands:
   - eval ${UNITY_COMMAND} -createManualActivationFile || true
   - |
     WantedFile=$( find . -name "*.alf")
     ALF_FILENAME=$(basename $WantedFile)
   - mv ${CODEBUILD_SRC_DIR}/${ALF_FILENAME} ${CODEBUILD_SRC_DIR_ulfsource}
   - cd ${CODEBUILD_SRC_DIR_ulfsource}
   - apt-get update && apt-get install -y curl
   - apt-get install -y nodejs
   - apt-get install -y npm
   - npm i puppeteer
   - node lib/cli ${UNITY_EMAIL} ${UNITY_PASSWORD} ${ALF_FILENAME}
   - |
     WantedFile=$( find . -name "*.ulf")
     ULF_FILENAME=$(basename $WantedFile)
   - mv ${CODEBUILD_SRC_DIR_ulfsource}/${ULF_FILENAME} ${CODEBUILD_SRC_DIR}
   - cd ${CODEBUILD_SRC_DIR}
  build:
 commands:
   - eval ${UNITY_COMMAND} -manualLicenseFile ${ULF_FILENAME} || true
   - eval ${UNITY_COMMAND} -projectPath='.' -buildWindows64Player '${BUILD_OUTPUT_FOLDER}/${BUILD_OUTPUT_NAME}'
  post_build:
 commands:
artifacts:
  files:
 - "**/*"
  base-directory: ${BUILD_OUTPUT_FOLDER}
cache:
  paths:
 - "Library/**/*"
Note
YAML files can be tricky when you copy/paste directly.Indentation and new-lines can cause problems if they are not correct. If you get issues building later on or you see that some commands are not being executed, just use a yaml validator to clean up the file and then submit it again.
Breaking Down The Buildspec
While you don’t need to know what this buildspec is doing in order to get your build to work, you might want to modify or augment this buildspec yourself for future projects.
To begin with, AWS provides a very good reference doc on creating and editing buildspecs.
We will go through what is happening in our buildspec now step-by-step:
env
The “env” section is where environmental variables are assigned. In this case we have variables for the Unity build command, the Unity activation command, the output directory, build name, and some versioning information.
pre-build phase
Builds have 3 phases, pre-build, build and post-build. The pre-build phase, as it implies, runs before the main build command. This is usually for additional environments or file prep. In our case we are activating the license file in this step.
We use puppeteer to submit the form in our build environment. Puppeteer allows us to fill out manual forms programmatically.
You can also see some commands for “WantedFile”. This is getting the name of the alf and ulf files and storing them as variables so we can use them later. The alternative would be to hard-code the filenames in the buildspec which would mean extra work if you needed to change your Unity version.
build phase
Here we execute the license activation and then our build command.
Adding Unity Credentials
The next thing we need to do is update the Unity credentials we added to the build project.
To do this select the “Edit” dropdown and choose “Environment”.
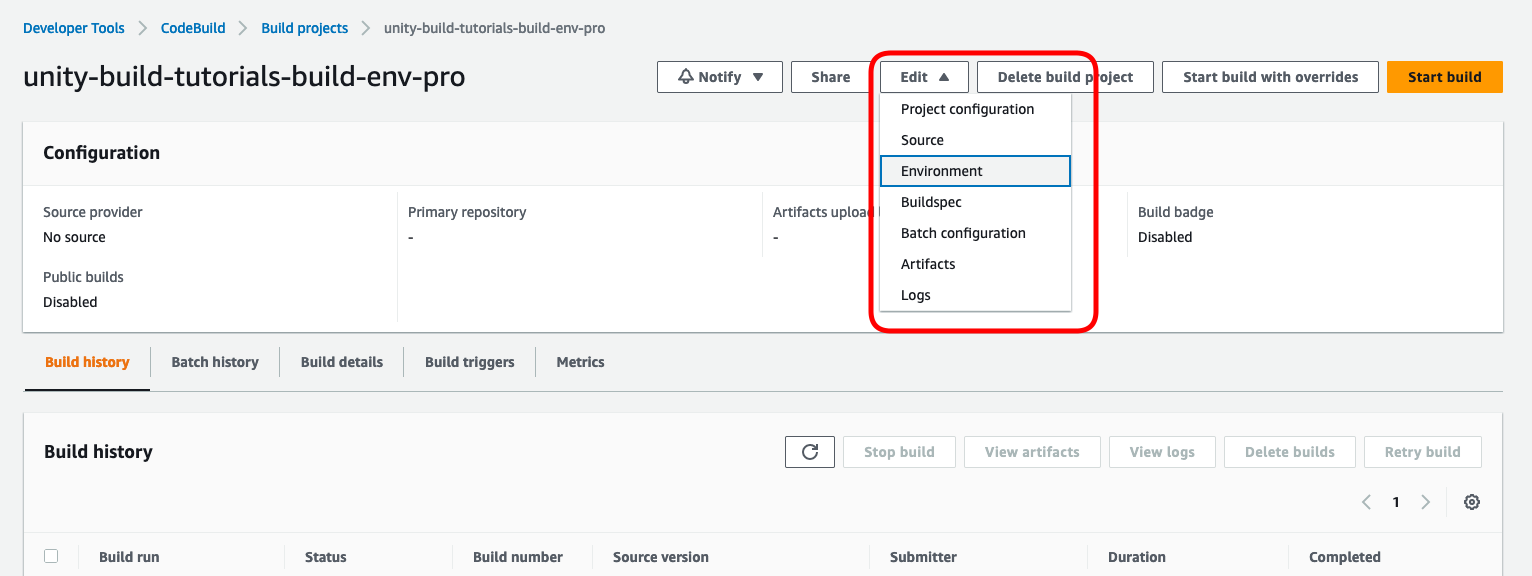
Click on the “Additional configuration” menu to get the environment variables option.
In the previous setup you should have added the UNITY_EMAIL, UNITY_PASSWORD variables. You now need to add the correct details for your Unity professional license account.
Click on the “Update environment” button at the bottom of the page.
If you go back to your pipeline now and click on the “Release changes” button you should see each stage of your build trigger and your build successfully deploy.
Summary
Now we have everything we need to be able to run out automated builds using Unity3D personal licenses using AWS CodePipeline.
In the next section we are going to briefly look at what we can do with these build artifacts and how we can distribute them to your team or to testers.