Building Unity3D Games With AWS Code Pipeline
Introduction
In this guide we are going to look at how we can use AWS services to build your Unity3D games in the cloud.
The advantage of building in the cloud is that it frees up resources on your local machine so that builds can be executed while you get on with work in the Unity3D editor. You can also set up your build pipeline to execute builds on commit to the repo, or schedule them for certain times of the day so that you always have up-to-date builds available for testing and deployment.
This guide allows you to build pipelines using both personal licenses and pro-licenses.
The major components for each pipeline will be split into their own sections but we will start with a basic setup required for both pipelines.
Docker Images
In this guide we are going to be using Docker images as our build environments.
Docker images are like packaged environments that can be easily installed and quickly booted up to execute specific tasks. In this case our image is going to have a version of Unity3D installed which can execute builds for us.
This guide will go through setting up the build environment with these images so you don’t need to be familiar with Docker to complete your build pipeline.
However, you will need an account with Dockerhub in order for your pipeline to fetch images on your behalf.
GitHub Integration
In this guide we are going to use a GitHub repository as the project source however, there are other sources which can be configured.
We won’t cover them all in this guide but you will see where they can be integrated as we go through the setup.
Professional Vs Personal Builds
This guide is going to go through two pipeline setups. If you hold a professional Unity3D license, set up steps are much simpler.
However, you do not need a professional Unity3D license to set up your build pipeline.
The steps for setting up a pipeline with a personal license are more complicated as it requires us to generate license activation and Unity license files each time to execute the build.
This is generally done through the Unity3D editor, in the background, when you execute a build on your own machine.
In this guide we are going to include the manual activation steps into the automated pipeline thereby replicating the steps that the Unity editor takes on your behalf when working with the editor on your own machine.
These extra steps do add significant complexity to the pipeline, however, the benefit is that you can execute your cloud builds without a Professional license using this method.
Personal License – Disable MFA
There is one thing you have to be aware of before proceeding with the personal license pipeline; if your account is using multi-factor authentication (MFA) you will need to disable it in order to get this pipeline to work.
Our build environment is automated, so if you need a code from your email account in order to authenticate, the flow will not work.
If you would like to be able to keep MFA on your account while also using this build pipeline flow you can check out this repo which will allow you to automatically grab the code from your email account and complete the authentication step.
We will not cover that in this guide but perhaps we will update it to include this in future.
Also note that getting this flow set up for personal licenses is a workaround and we encourage developers to purchase a professional license from Unity3D.
Initial Setup
While there are two separate pipelines covered in this guide, there are some components that are common to both. This section will cover the setup of these common components.
In some cases this setup might not make sense until things come together at the end, but we will do our best to make things as clear as possible.
We will provide links to any AWS services we are using so you can learn more about these services and how you can modify them or use them for your own projects in future.
Select Region
Before we start to create any resources we want to make sure we specify the AWS region we want everything to be deployed in.
For our build pipeline we want to make sure all our resources are deployed in the same region, and that this region is close to your team’s location.
In the case of a build-pipeline we do not need to be strict about this, as the “end-user” will generally only be a few members of your dev-team and perhaps some internal or external testers.
However, if you need this pipeline to be integrated with other cloud-components in your AWS account or have future plans to add cloud resources for your game or application, this will be an important choice to make early on.
To change the region click on the drop-down menu at the top right-hand-side of your AWS dashboard.

You can select the region for most AWS services so while setting up new components double-check that you are deploying into the correct region.
Personal License – Regional Login
For the personal license set up, the region is actually very important.
Unity3D will track the location of your last login and if the new login location does not match, it will send a confirmation code to your email address.
We briefly discussed how to get around this before, but for basic setup we can avoid this by making sure your last login is in the same AWS region as you are deploying into.
Remember that each time you login on your local machine, the authentication location will be updated ,so it would be best to create an email address or a Unity3D account solely for these builds.
That would ensure builds don’t fail in future if you login while traveling or a member of the team working remotely use the same account.
If you login from a different region you will be emailed an activation code in the same way you would from MFA.
You can solve this problem using the repo we linked above.
Inappropriate Regions
If you cannot find a region close to your location you could try a VPN to ensure authentication works.
Setup Dockerhub Credentials
The first thing we are going to do is add our Dockerhub credentials to AWS Secrets Manager.
This is done to ensure we are not hard-coding these credentials directly in the pipeline setup.
Open up AWS Secrets Manager in the AWS dashboard and click on the “Store a new Secret” button.
Choose the “Other type of secret” as the secret type and add the username and password of your Dockerhub account.
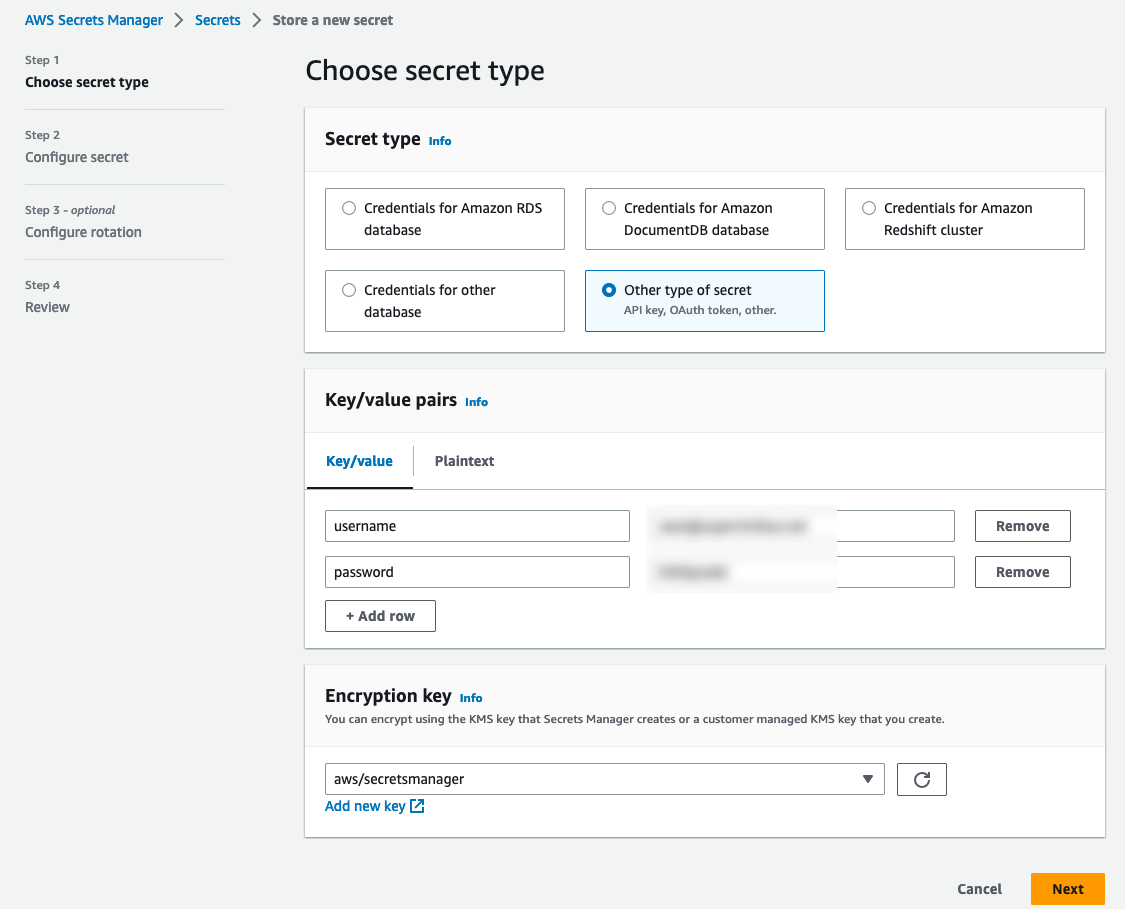
On the next page, give your new secret a name and proceed to the next set of options.
Note
It is good practice to add tags to all your AWS resources in order to track projects, developers and AWS costs. At SuperNimbus we enforce a minimum standard of tags for “developer”, “project” and “stage”.
You will not need to change the “rotation” options so proceed again to see a summary of your new secret details before it is created.
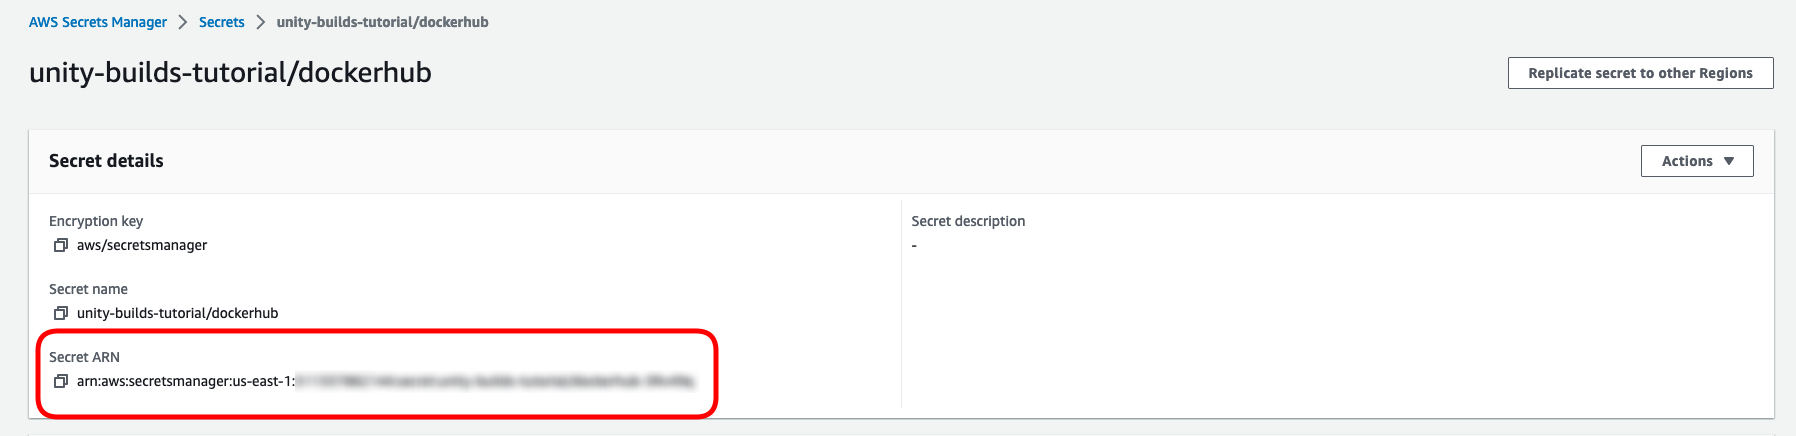
Click on the “Store” button at the bottom of this page to create your secret. Your new secret will now show up in your secrets list.

Click on your secret to view its settings.
We will need the “Secret ARN” later on when we set up our environment so take note of that ARN now.
GitHub Connection Setup
Next we will need to set up a GitHub connection.
We are going to use this connection in our pipeline so that the pipeline can pull from our project repository.
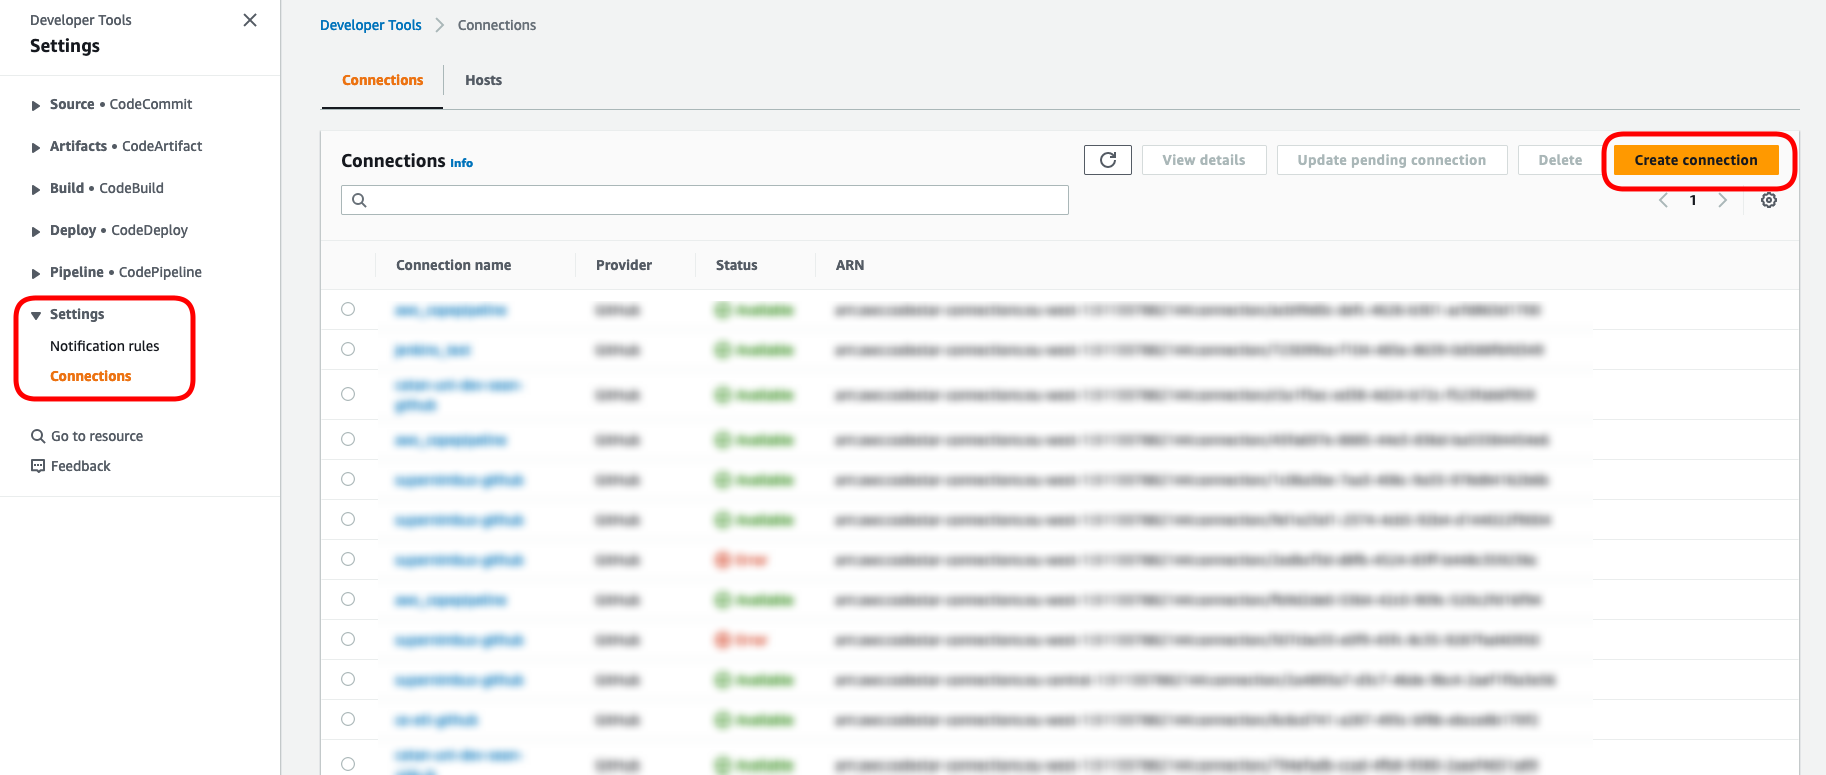
Navigate to the AWS CodePipeline dashboard and click on the “Settings” drop-down menu on the left-hand-side.
Then click on the “Connections” option.
Click on the “Create connection” button.
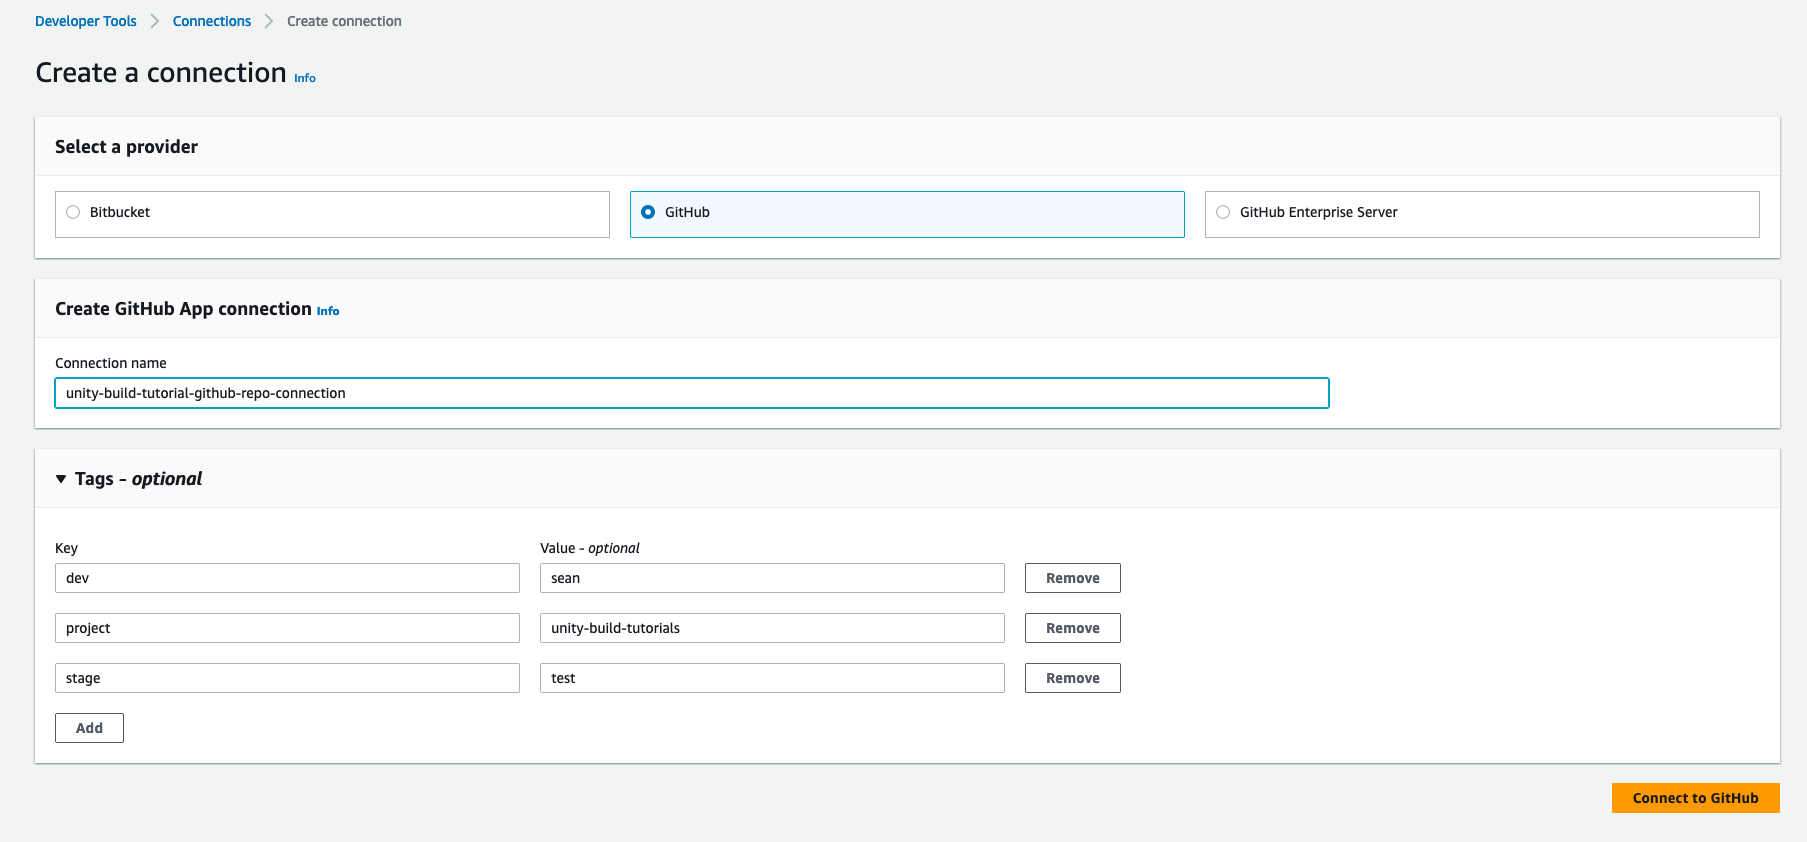
Choose “GitHub” as the provider and give your connection a name. Remember to add tags if appropriate.
Click on the “Connect to GitHub” button.
This will redirect you to a GitHub authorization page which will ask you to grant access to AWS.
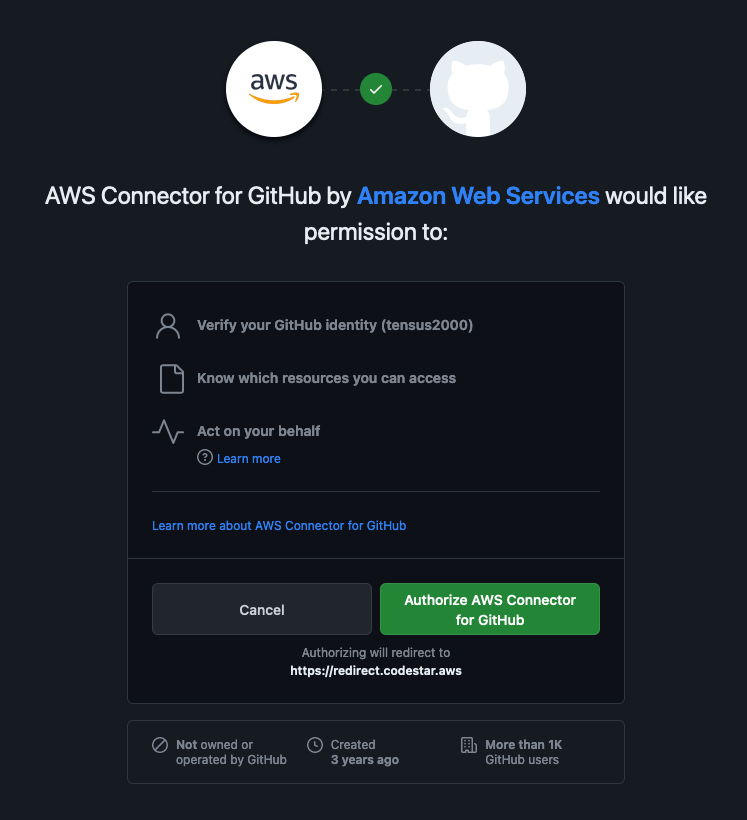
Once you have granted authorization for AWS you will be brought back to the connection setup page.
Click on “Install a new app”.
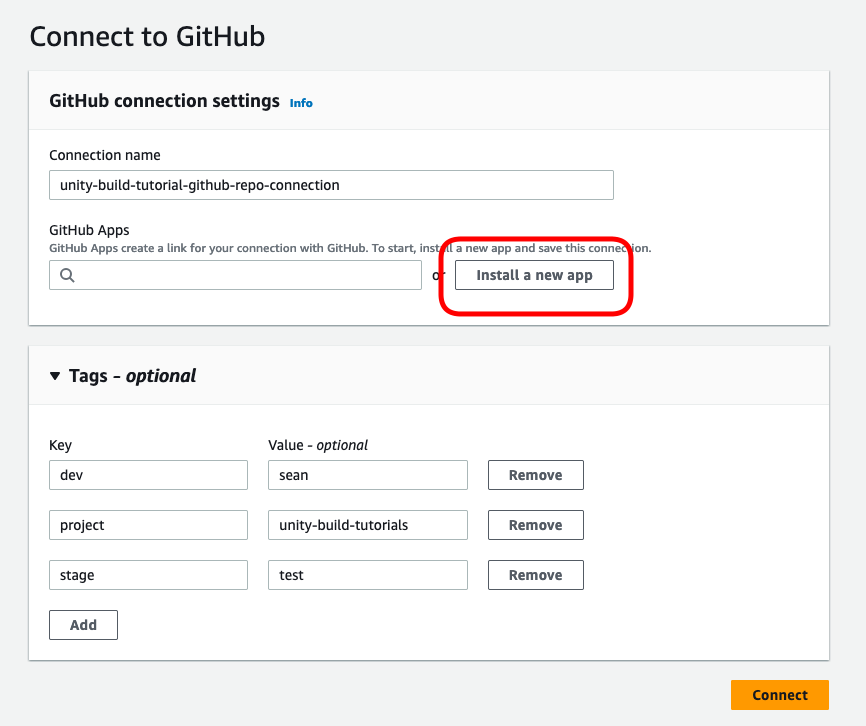
Follow the set up steps to allow this connection access to the repo you are using for this guide.
Once you are redirected back to the connection form, click on the “Connect” button to complete the setup.
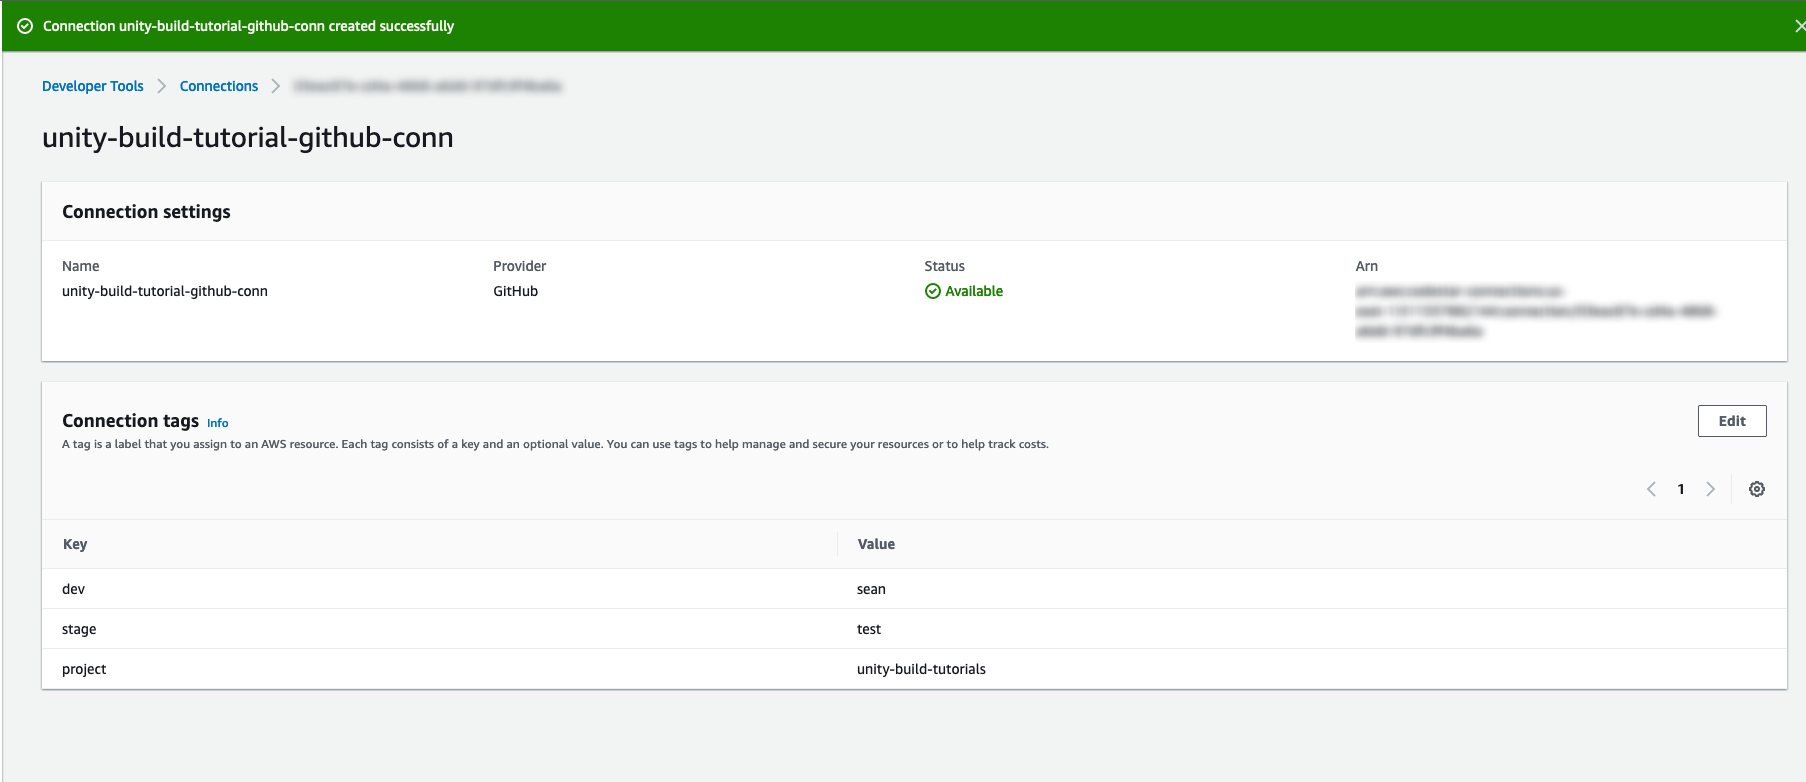
Later in this guide we will use this connection to create a source in our pipeline.
Create New IAM Permission Policy
When we create the build-environment for our builds later on in this guide, AWS will automatically create an IAM Role for the environment.
The AWS Identity & Access Management (IAM) service allows you to create roles and policies which control how services and resources you have created can communicate with each other.
Example
If you create a database resource in AWS you might want to create a role which has read-only access to that database. In this example, you would use an IAM policy which dictates read-only access to the database and attach it to a role. You can then attach that role to another service, or a user so they can access the database securely and with limited permissions.
In the case of this tutorial, we are going to create a policy which will allow the build environment to access the GitHub connection we just created.
It will then be able to pull the files from your project repo.
Navigate to the IAM service dashboard of your AWS account and select the “Policies” option from the left-hand-side menu.
Next click on “Create policy”.

In the new menu that shows up, click on the “Create policy” button. This will open up a new window where you can create a new policy.
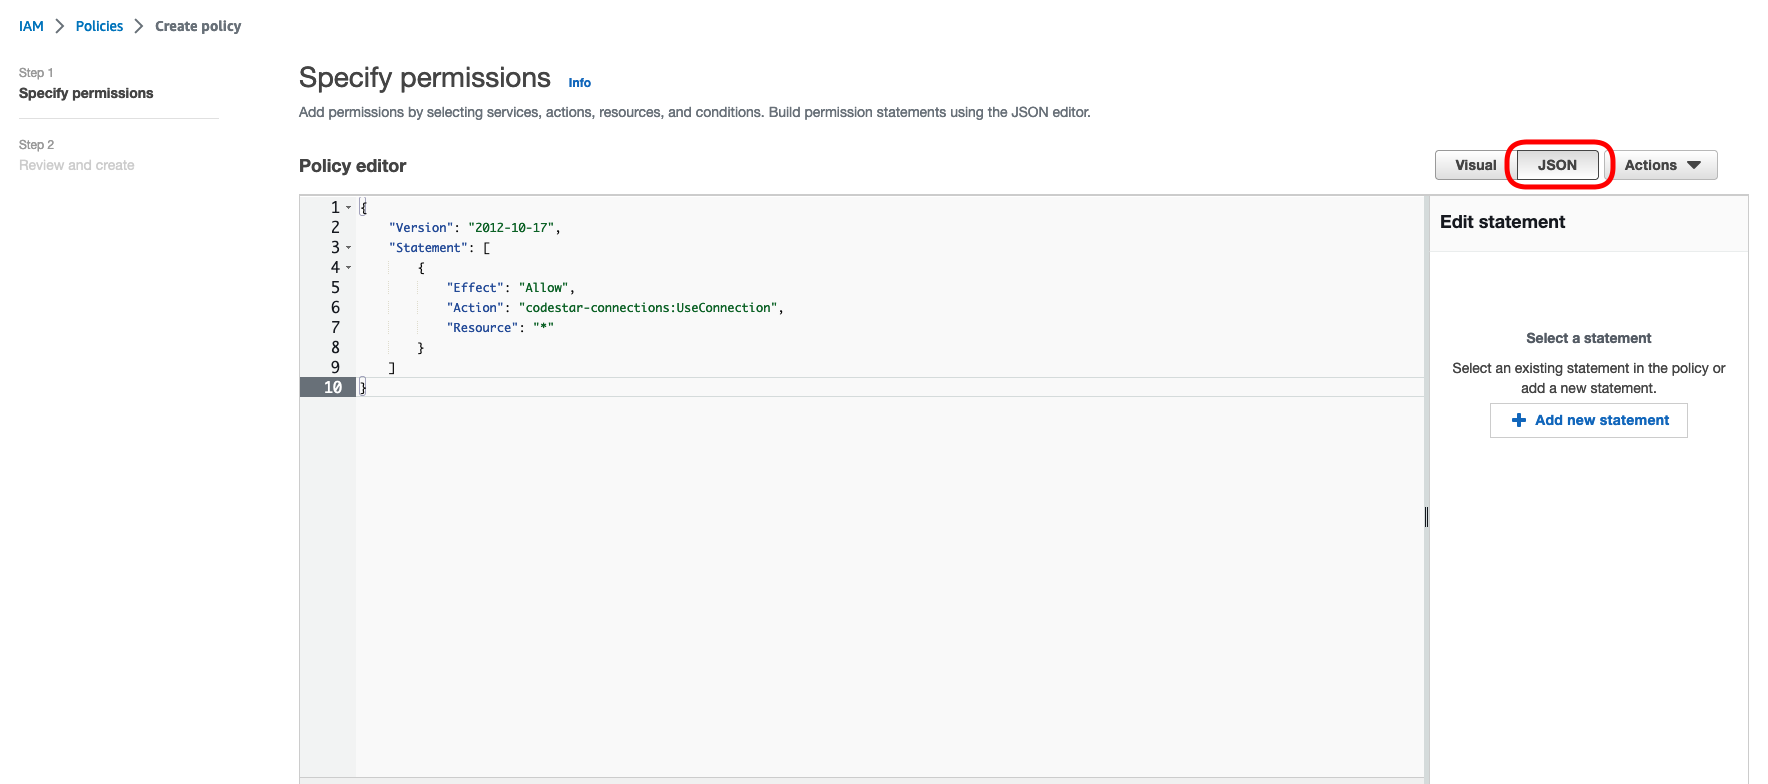
Click on the JSON tab and paste the following policy JSON.
{
  "Version": "2012-10-17",
  "Statement": [
    {
      "Effect": "Allow",
      "Action": "codestar-connections:UseConnection",
      "Resource": "*"
    }
  ]
}
Click on the “Next” button at the bottom of the page and create your policy (remember to add tags where appropriate).
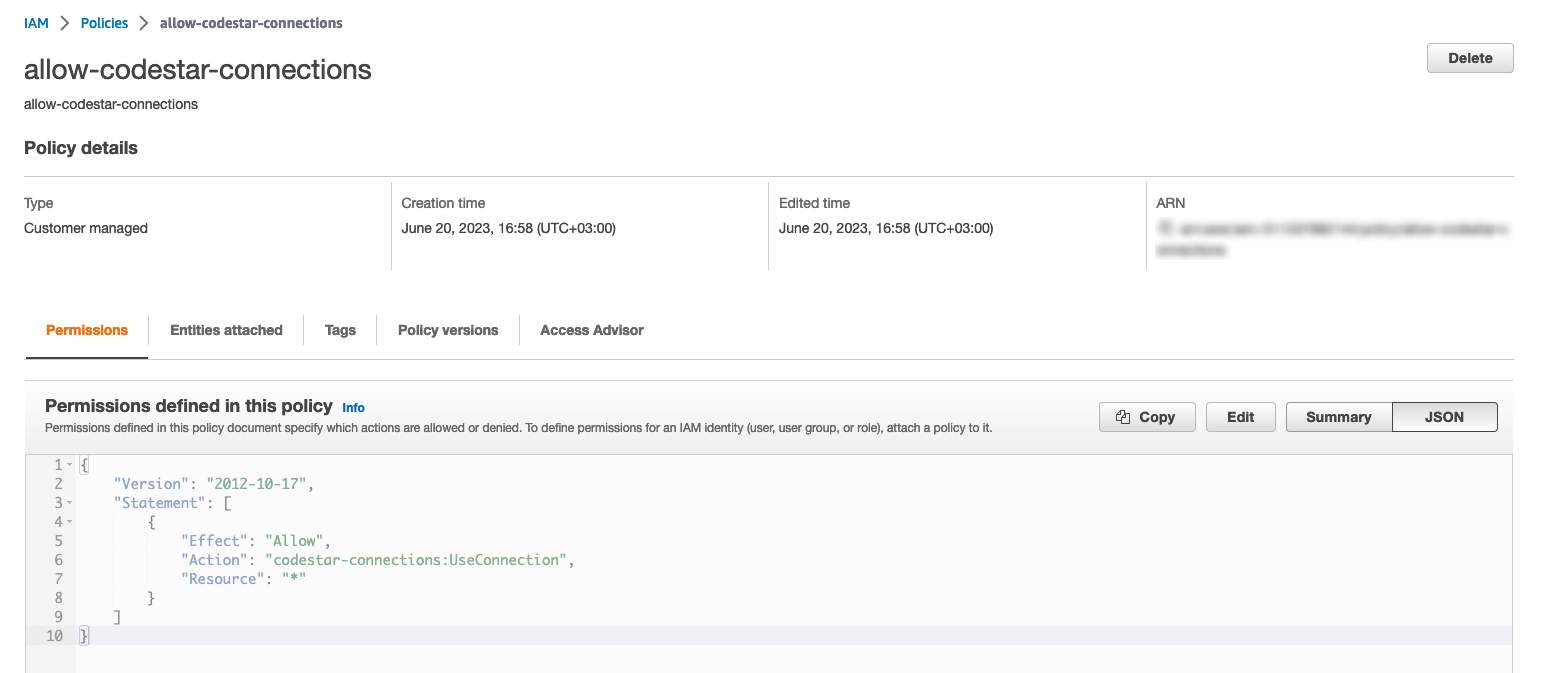
Your policy is now ready to go.
We will use it later to complete the initial setup of our pipeline.
Build Project / Environment Setup
The next step is to set up your build environment.
As mentioned in the introduction this is going to be a Dockerhub image.
We will link this in a AWS CodeBuild project. We will explore this more in-depth later on but for the moment you just need to know that this component will be added as the “build-stage” of our pipeline later on.
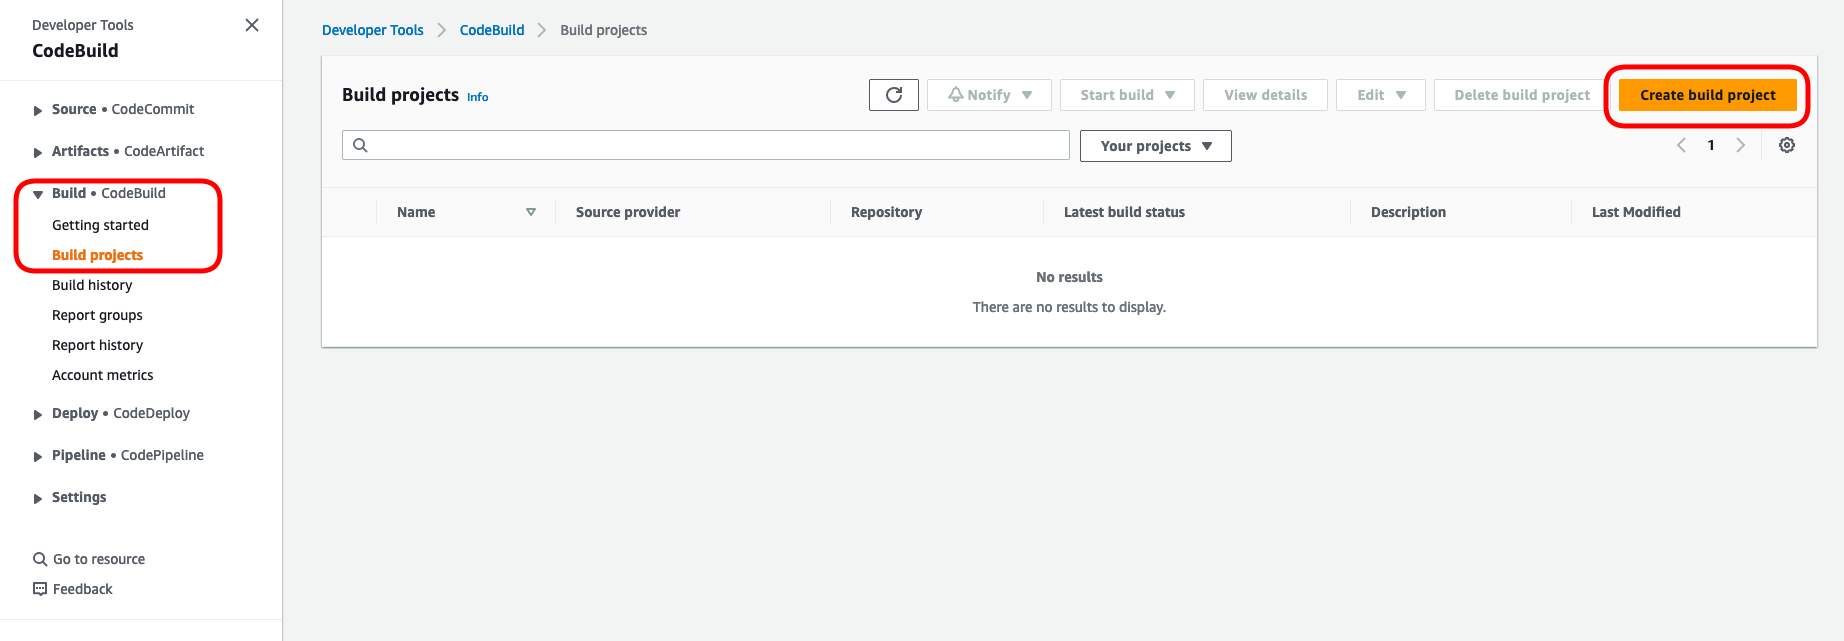
Navigate to the CodePipeline dashboard of your AWS account.
Click on the “Build” drop-down menu on the left-hand-side and select the “Build projects” option. C
lick on the “Create build project” button.
Give your project a name.
Select “No source” from the drop-down menu in the “Source” section. We will set this up later when we create our pipeline.
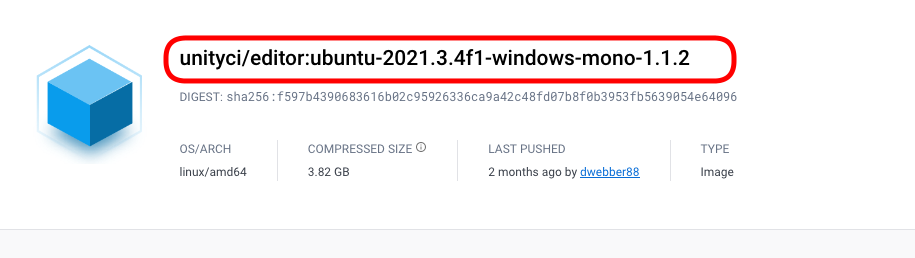
Scroll down to the Environment section so we can set up the Environment image.
You can find a link to the image we are using here. Or you can go to the full list of images here if you would like to search for other options or upgrade your pipeline to a more recent image.
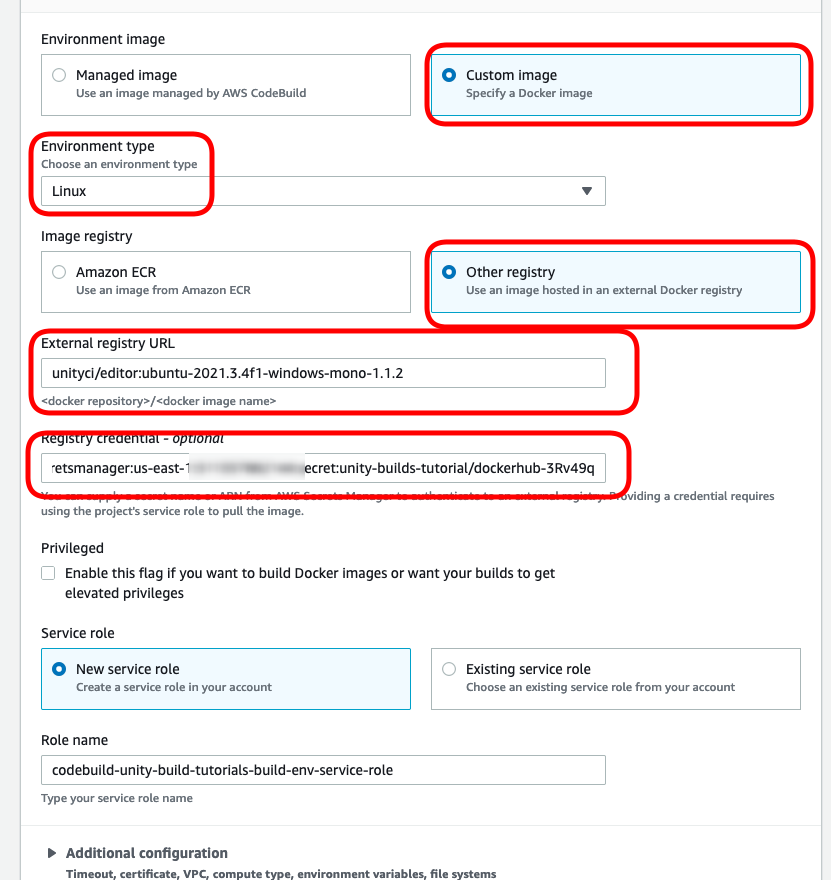
For the environment settings, select the following options:
- Select “Custom Image”
- Select “Linux” from the “Environment type” drop-down menu.
- Select “Other registry”
- Enter the registry URL for the unity docker image
- Enter the ARN for your Dockerhub AWS Secrets Manager credentials
- Select “New Service Role” and give your new role a name.
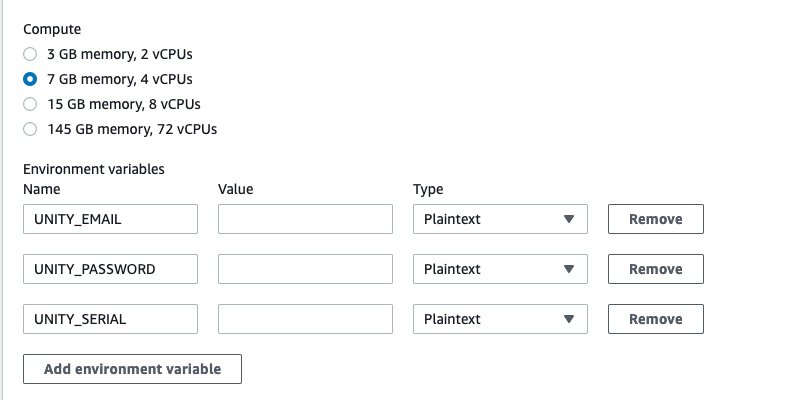
Click on the “Additional Configuration” option as we will need to change some settings and add environment details.
Firstly we are going to add some more compute power and memory.
This may depend on your project but 7GB, 4 vCPU should be enough for this example.
We are almost ready for the basic pipeline setup now. You can skip the “Artifacts” option and leave the “Logs” option as it is.
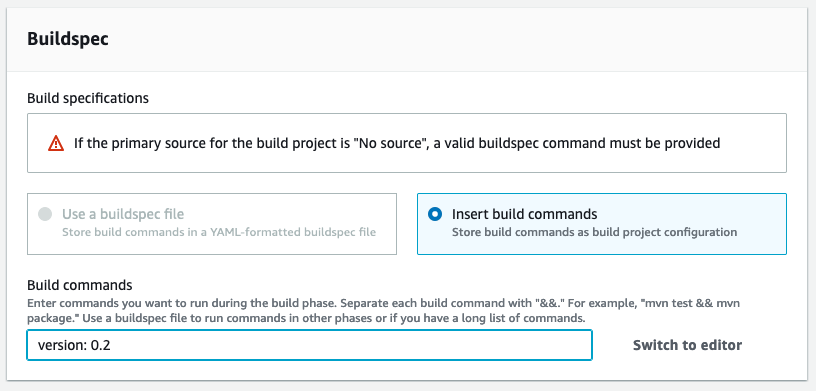
For the BuildSpec section we need to supply a buildspec file.
Note
A Common way we would supply this would be as a file in the root of our repository, but in this example our repo is going to be brought in as a step in our pipeline and then the build project (we are currently setting up) will be executed as the next step. The buildspec file is going to be different in our pro or personal license pipelines anyway, so for now we are going to fake the buildspec and come back to it later.
Put in “meh” in the field for now, it doesn’t matter what you put in, so long as it’s not blank.
Click on the “Create build project”.
This will create the project resources and bring you to a page similar to below.
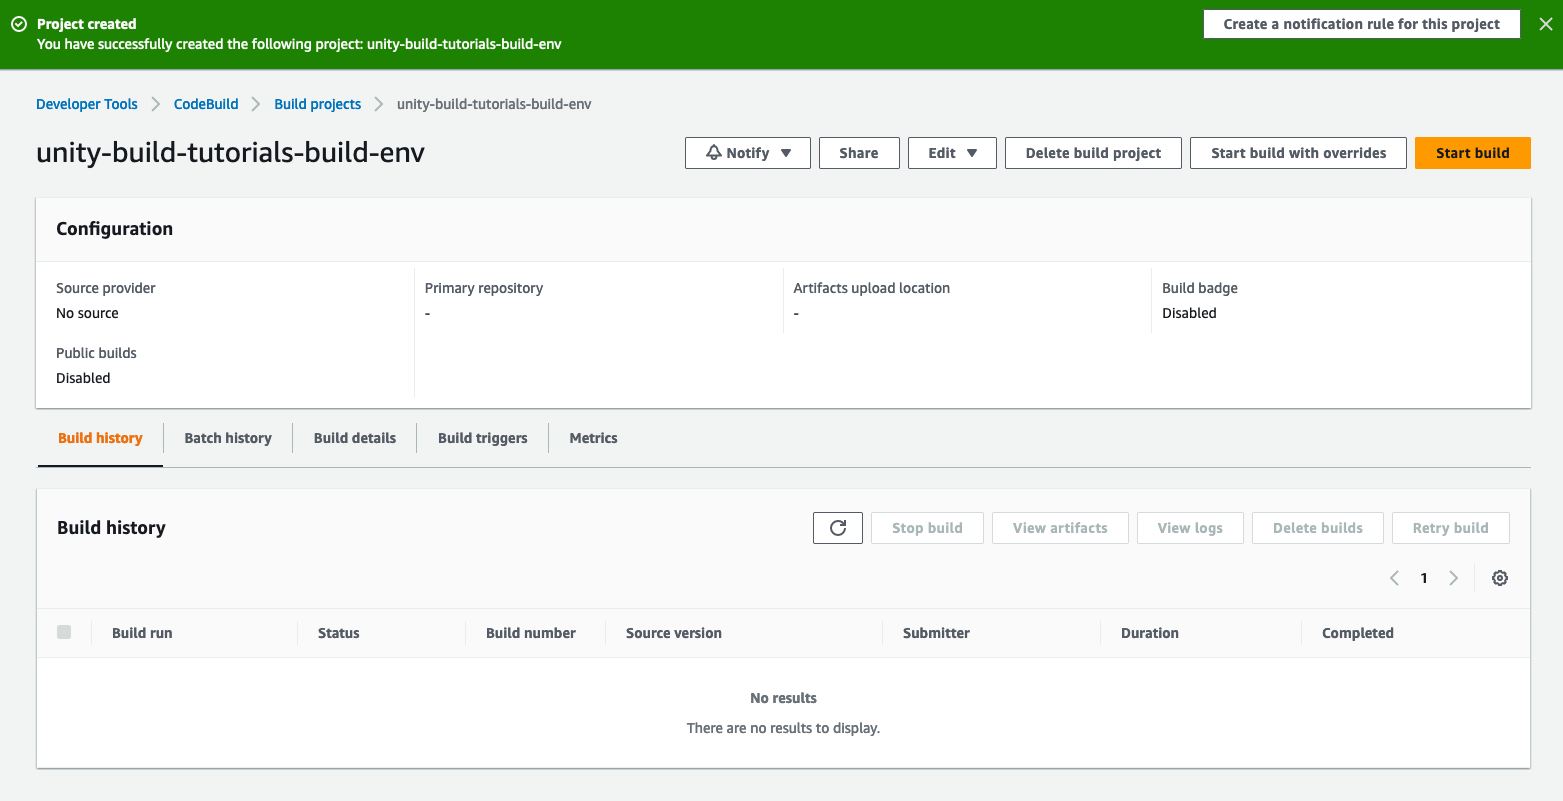
For now we don’t need anything else from this build project.
We will be able to find it later as a build project we can add to our pipeline.
Build Output Destination
The next thing we need to do is create a destination for our builds to be sent to once they are completed.
In our case we are going to use AWS Simple Storage Service (S3).
S3 is a very easy to use file storage solution.
Once our builds are finished, they will be sent to your S3 “bucket” automatically by the pipeline, and from there you can download them as you wish.
S3 has a number of other very useful settings, as well as event notifications which can be integrated with other AWS services.
To begin with, navigate to the S3 dashboard in your AWS account.
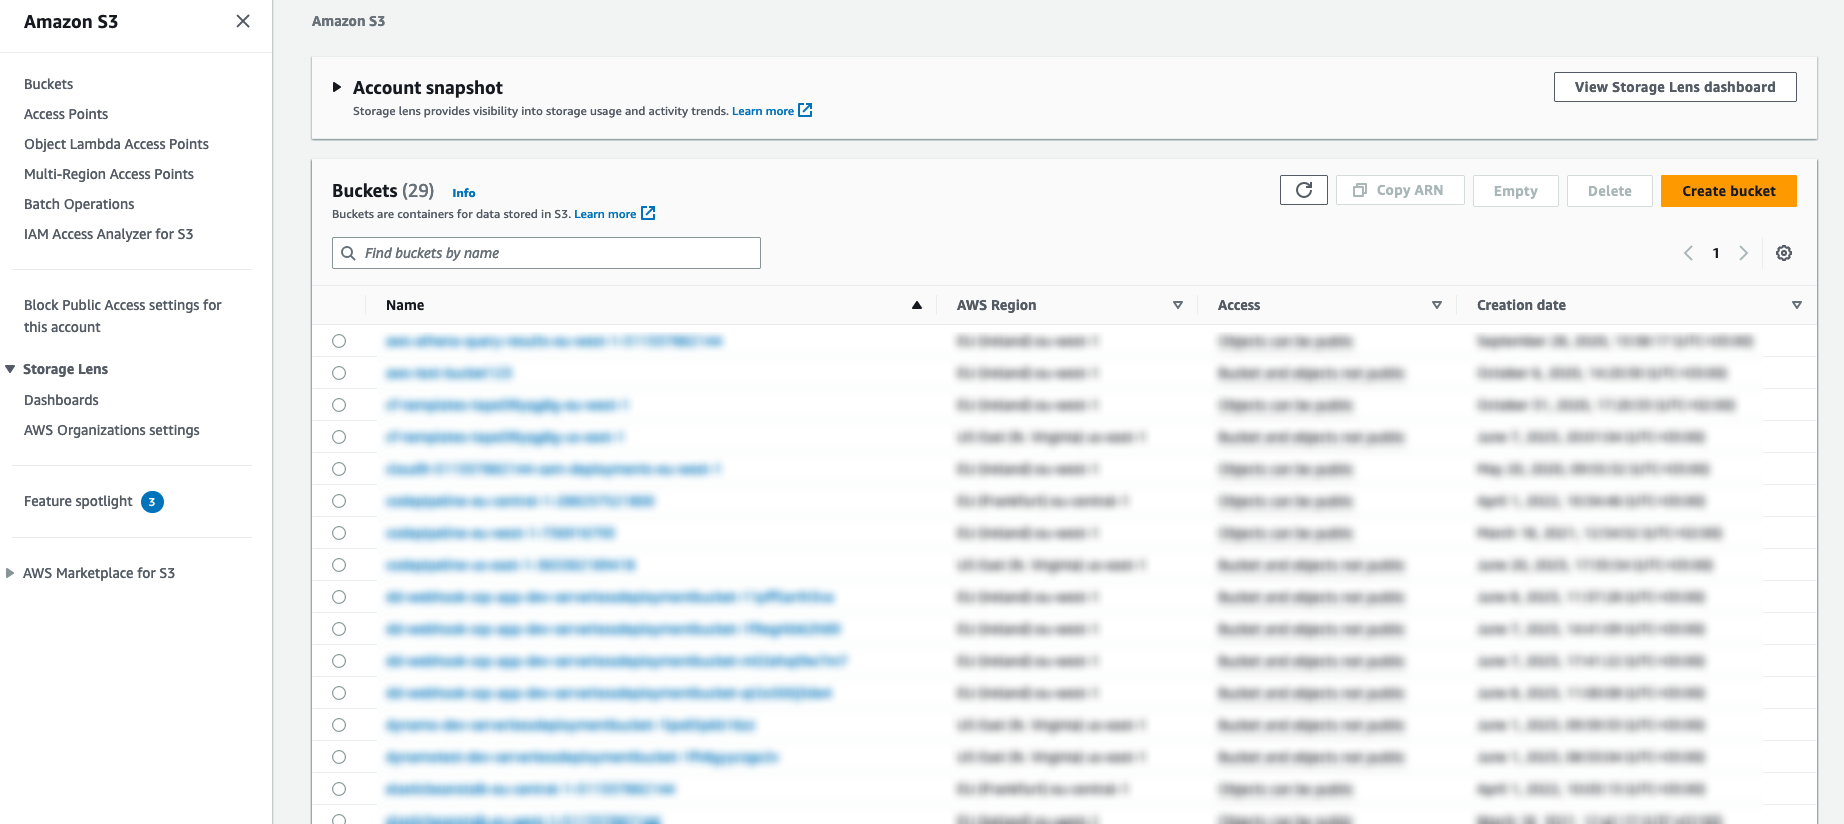
Click on the “Create Bucket” button.
For this example you can leave all default settings as they are and just give your bucket a name.
This means that no two buckets across any AWS account can have the same name. Therefore make sure your bucket is unique by putting your company or project name as prefix and making sure the name is descriptive.
IMPORTANT
S3 Bucket names must be globally unique! This means that no two buckets across any AWS account can have the same name. Therefore make sure your bucket is unique by putting your company or project name as prefix and making sure the name is descriptive.
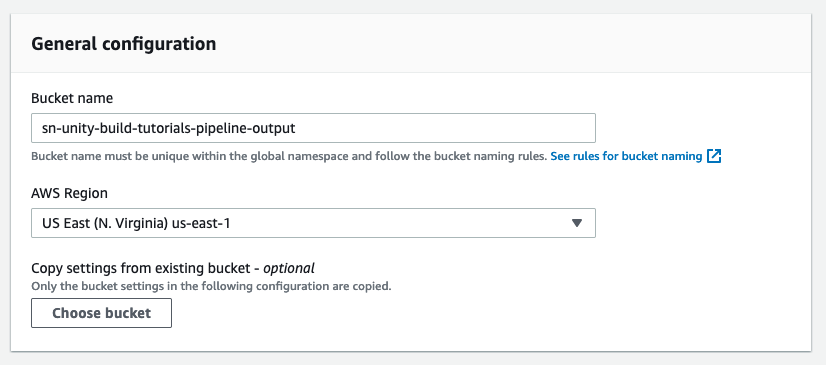
Remember to add tags to your bucket where applicable.
Once you have created your bucket you will be brought back to the list of your buckets and you will see a notification indicating that the bucket has been created.
In the next section of this tutorial we will explore the pipeline setup and how we can start building Unity3D games on AWS.