UE5 Project Pipeline
Introduction
In this section of the tutorial series we will be setting up the Unreal Engine on the base-Windows image we created in the a tutorial.
Note
This tutorial is part of a series of tutorials on building UE5 projects using Jenkins and AWS CodePipline.You can see Part 4 of this tutorial below.
Before we being it is important to know the reason for running a build pipeline and the benefits it can provide.
The project we are going to set up build-jobs for is a basic UE5 project.
It is a multiplayer game that needs both a client and a dedicated server to be built.
The project’s server is hosted on AWS GameLift.
At the moment we are only building Windows clients and servers (though you could also build for linux).
The project files are hosted on a perforce server.
Note
We will be providing documentation for Github and Bitbucket pipelines in the future.
Let’s imagine that this is a project that is worked on during weekdays by a team of developers.
There might be 5-10 changes that are pushed to the project’s Main source control Stream (or equivalent branch if you are using another repository service).
It is important for us to know that the project still builds, cooks and packages correctly after each commit. To achieve this, we will set up a build job that runs after every commit made to Main.
Our incremental build will keep build-files on the remote agent disk which results in quicker builds. The packaged client and server will be uploaded to an S3 bucket for storage and delivery to tester or devs
Lastly, we also want to make sure that a “Clean Nightly” build can run without issues. This Clean build will always download files and build from scratch. It will therefore take longer to complete. With this build, we will also upload our server to GameLift and check that the GameLift fleet is activated successfully. If successfully activated, our Nightly alias will switch its target and point to the latest fleet. This means the servers will be ready to test in the morning.
We have written our build scripts in Python which makes them easier to work on and will mean they are platform-agnostic. We have scripts for building the project, uploading the packaged zips, launching GameLift fleets and polling GameLift fleets for any activation errors.
Additional Resources
Perforce Server
To store both our project and our build scripts, we use a Perforce server.
The setup and hosting of a Perforce server are beyond the scope of this tutorial. However, the folks at Perforce provide excellent resources to get you up and running with a Perforce server. You can find a tutorial on how to set up the server on AWS here, and a tutorial on how to configure your Perforce server to host Unreal Engine projects here.
If your project is hosted on a different type of version control, you can still make use of most of the following information. Jenkins has built-in support for most version control software but we will be focusing on Perforce for this tutorial.
AWS S3 Bucket – Our Build Destination
We store our build zips in an S3 object storage bucket.
S3 is great for storing build artifacts. It makes it easy to control access and optimize storage costs using object lifecycle configurations.
Let’s create a new bucket step-by-step and configure it.
Streams
We have two separate Stream Depos to configure that we will be using for our builds.
GameLiftTutorial
This is our project stream. It holds our UE5 project and some additional files related to GameLift.
We will be syncing from the Main branch for both our incremental and nightly builds.
BuildScripts
These are our build scripts.
Creating The Bucket
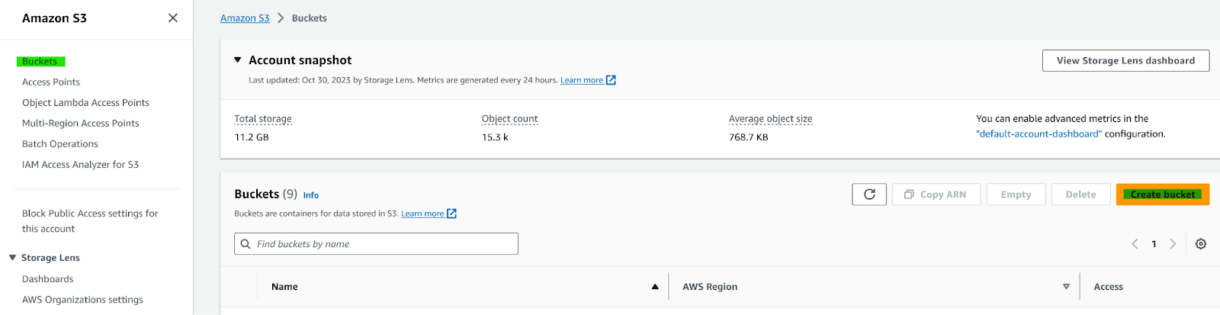
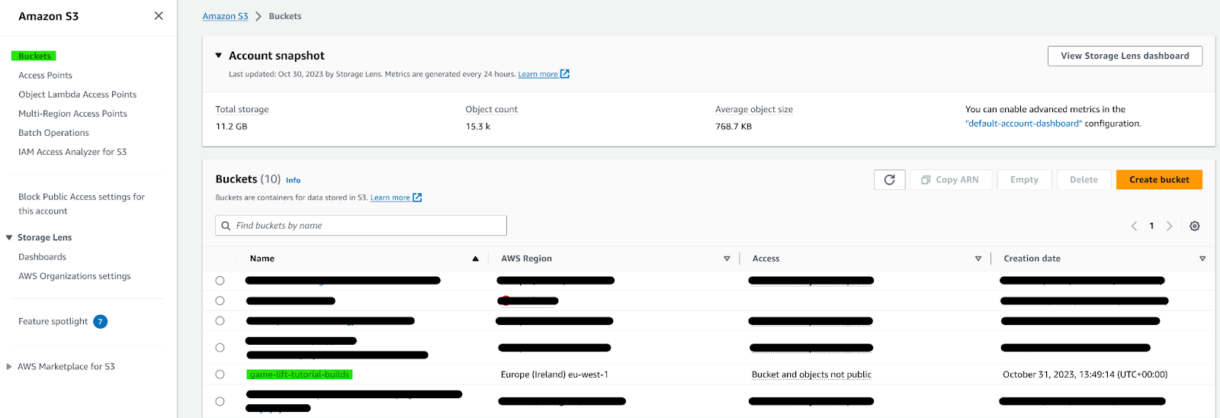
1. In the AWS portal, head to the S3 services, select “Buckets” on the sidebar and click on “Create Bucket”.
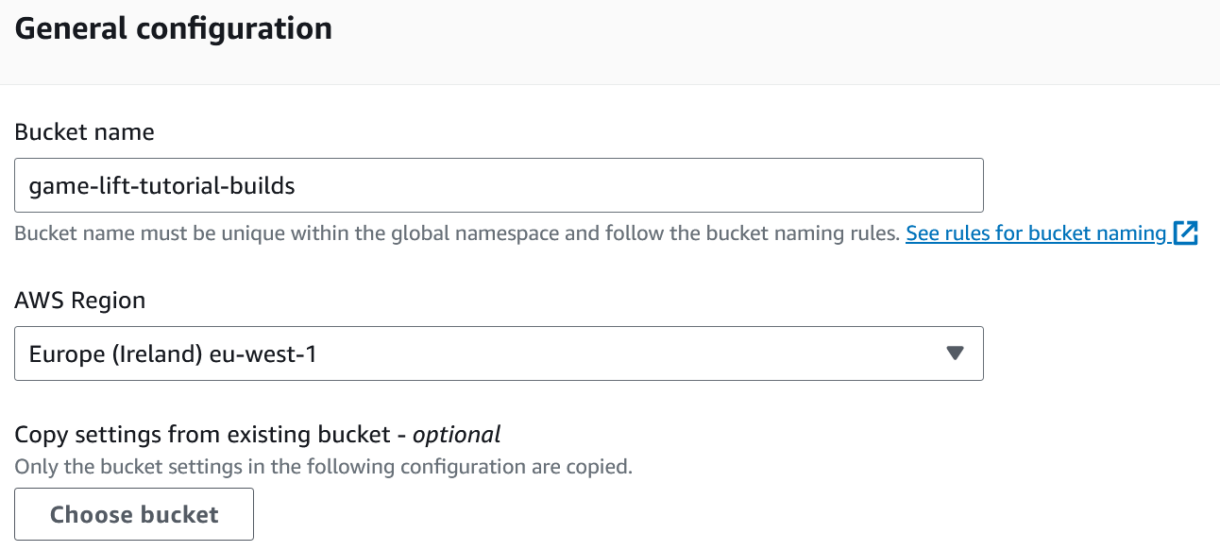
2. Name your new bucket and choose the region you wish to deploy it in.
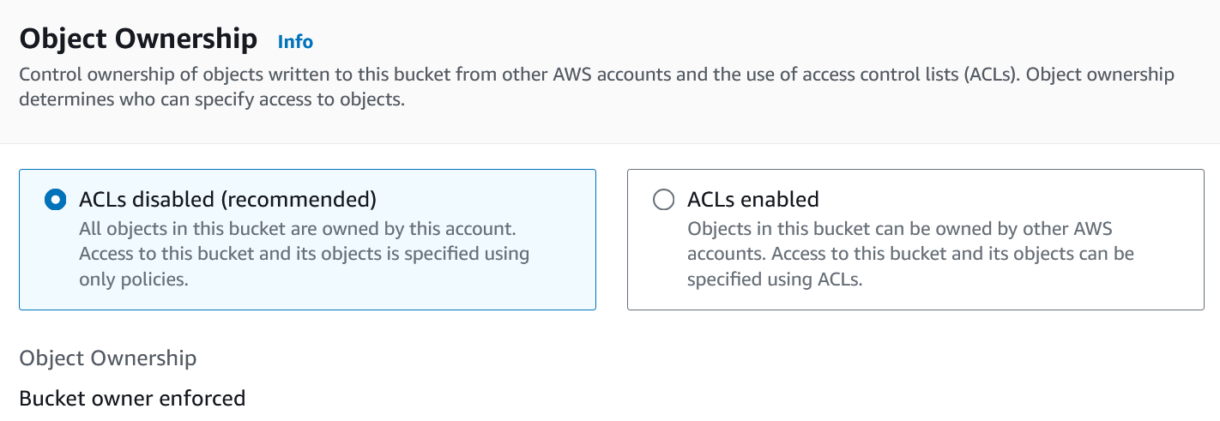
3. Decide on the bucket’s object ownership. In our case we want all objects in the bucket to be owned by our organisation.
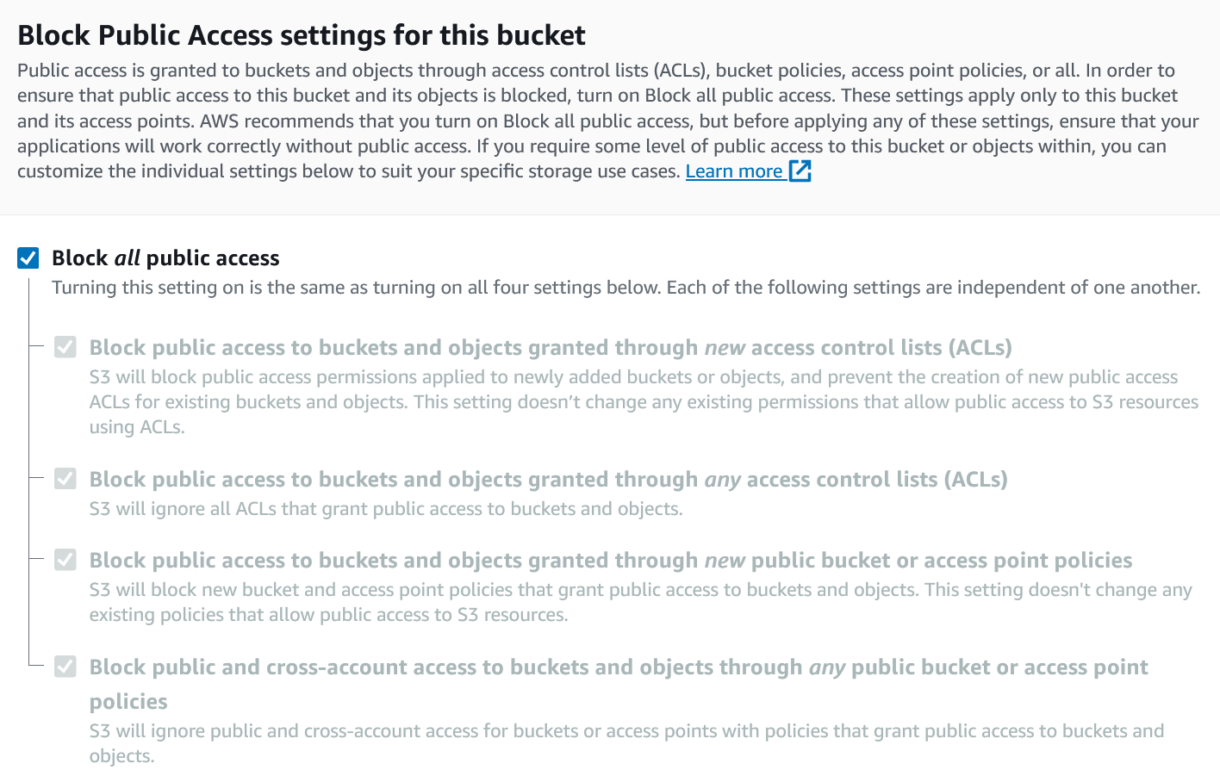
4. Make sure that the bucket is completely private.
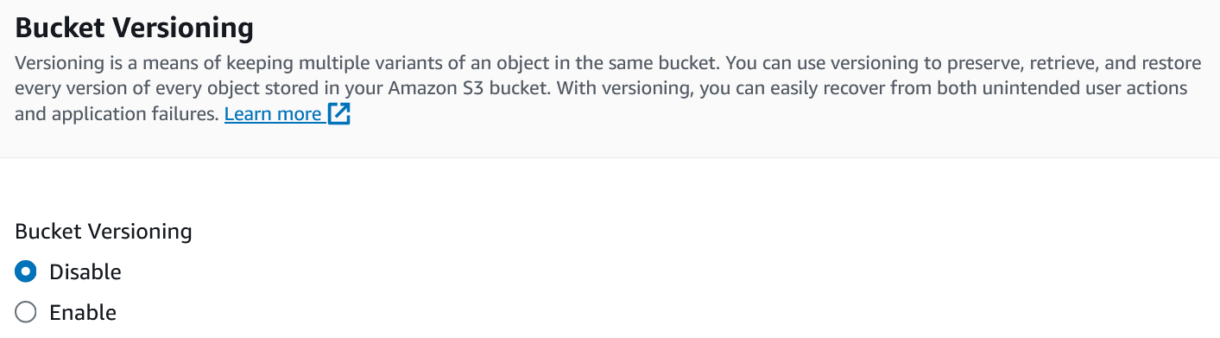
5. We will leave versioning disabled.
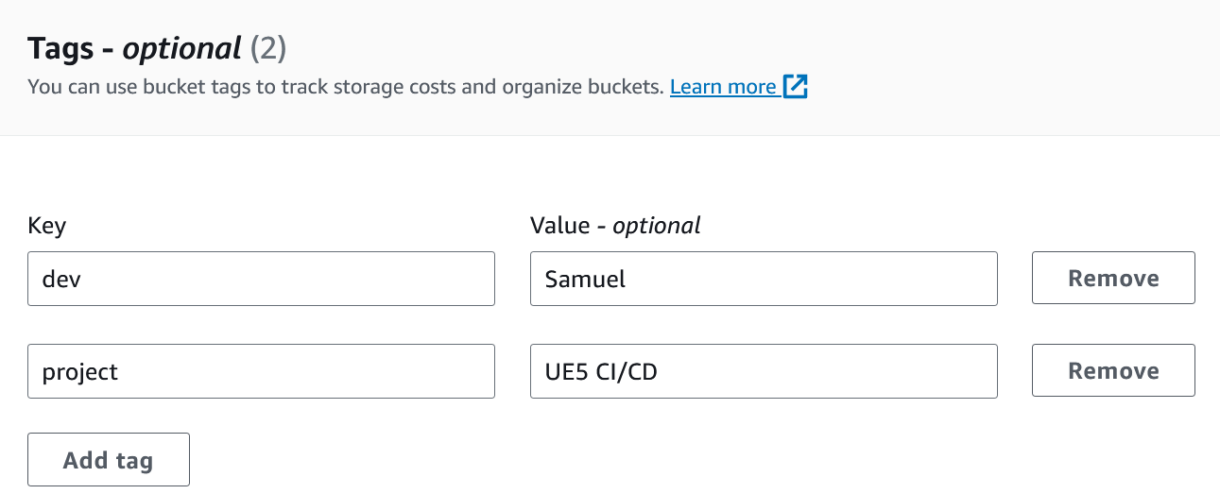
6. Provide some tags if required.
7. To make set up easier, keep the server-side encryption the default values. You can then click “Create bucket” at the bottom of the wizard.

S3 – Creating A Lifecycle Rule
We will utilise S3 Lifecycle rules with both our incremental and nightly build artefacts.
1. Head to the S3, select Buckets in the sidebar and click on the bucket we just created.
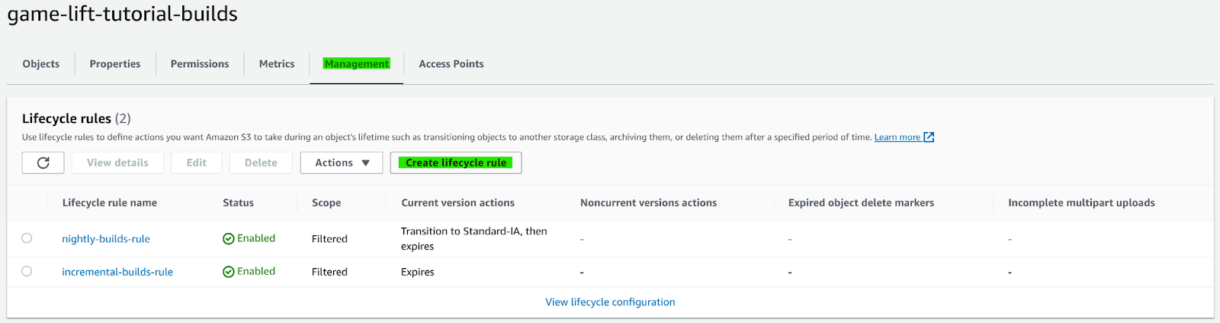
2. Head to the Management tab and click on “Create lifecycle rule”.
3. Name your rule.

4. Our rules use prefixes. The “nightly-builds/” prefix will apply the rule to all objects whose key matches.

5. Since our bucket is not versioned we only have to worry about the current versions of the objects.
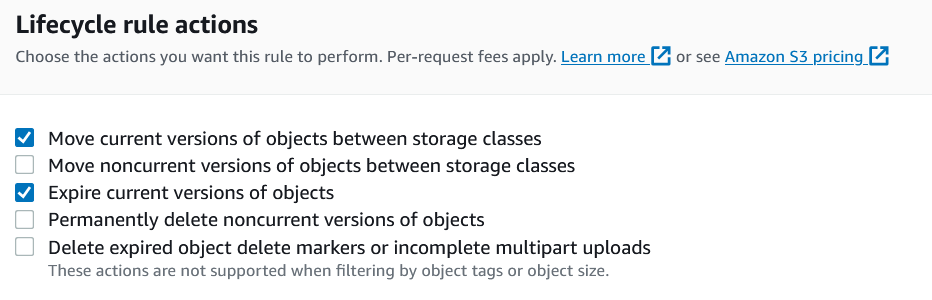
6. Set up your object class transitions and expirations.
7. You can then click “Create Rule”.
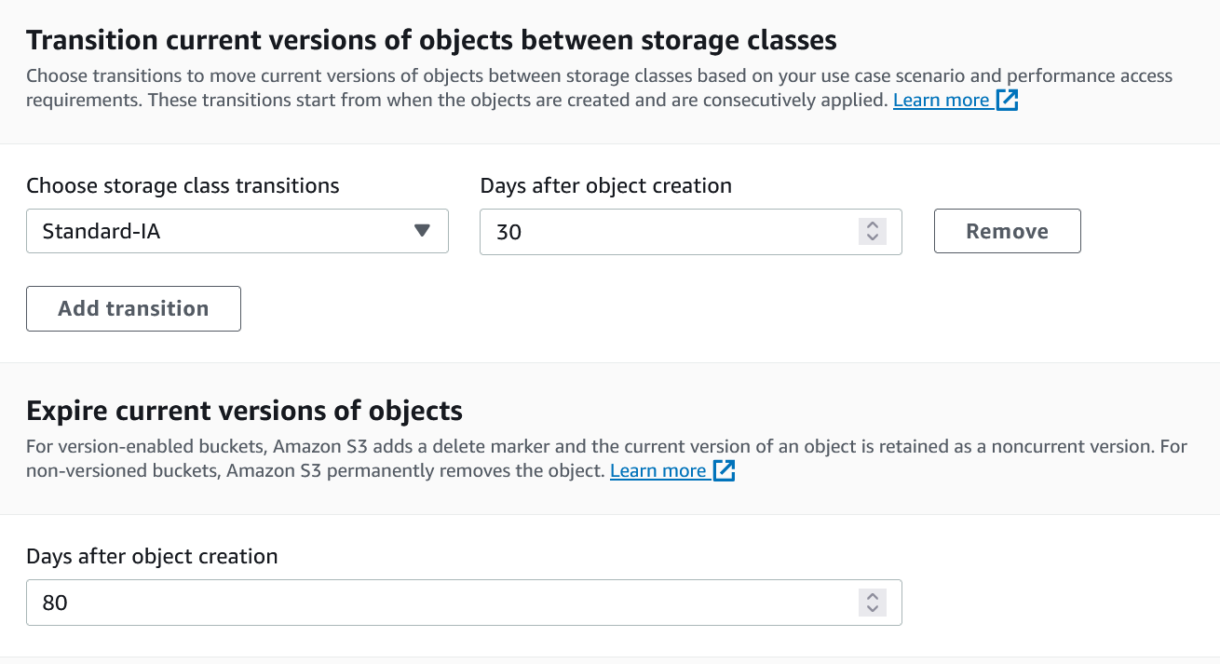
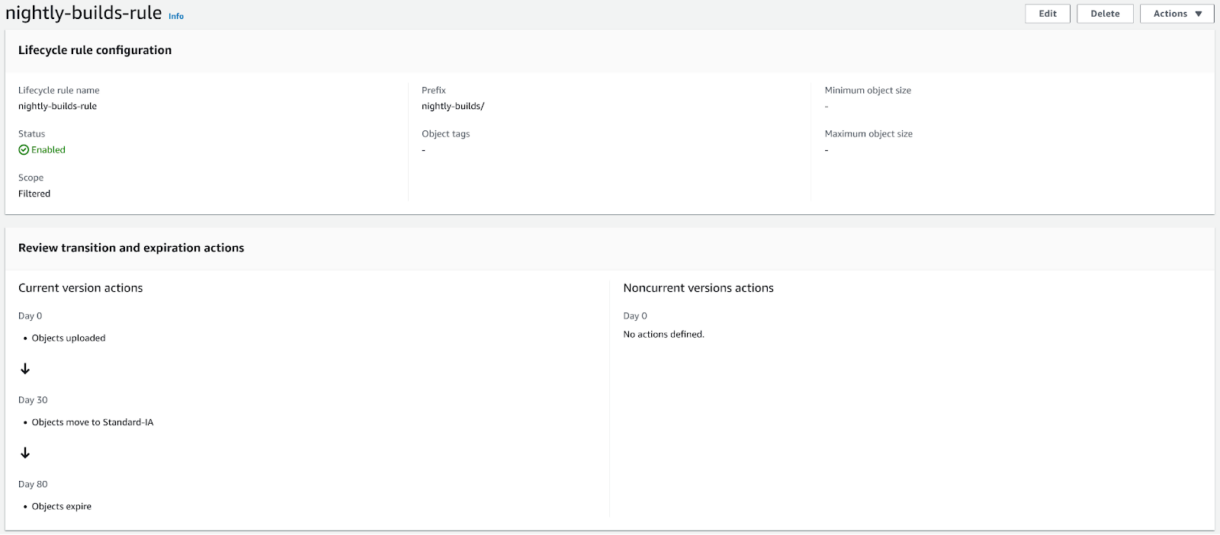
Nightly Builds Lifecycle
Our nightly builds live in the “nightly-builds/” directory in our storage bucket. These builds will be uploaded in the Standard storage class.
After 30 days, we know that the builds are not likely to be used again. We can therefore move them into a cheaper storage class (Standard-IA).
Lastly, builds that are older than 80 days will likely never be needed again. We therefore expire them, which marks them for deletion.
In the case we do want to keep certain builds for longer, we will manually move them to a permanent location.
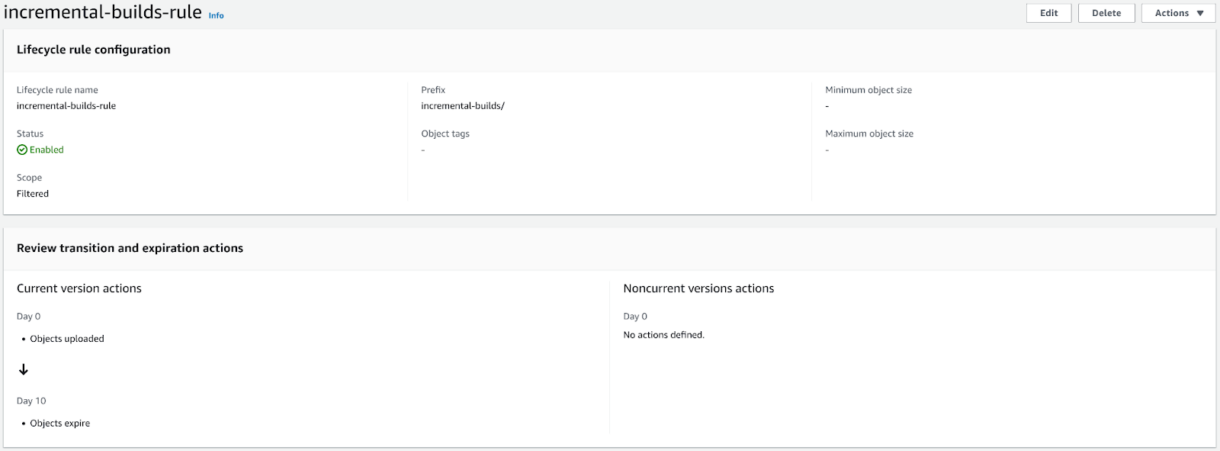
Incremental Builds Lifecycle
Our incremental builds will have a very simple lifecycle. After 10 days, our builds will expire.
There will be several incremental builds per day, so it is important to keep only recent builds to save on excessive storage costs.
Configuring SES
To send email notifications from our Jenkins pipelines, we need to configure both SES and Jenkins.
The goal is to use the Jenkins native email plugin in combination with SES.
First we need to set up SES in the AWS web dashboard. This means creating SMTP credentials that we can use in Jenkins and verifying various email addresses that we plan on using.
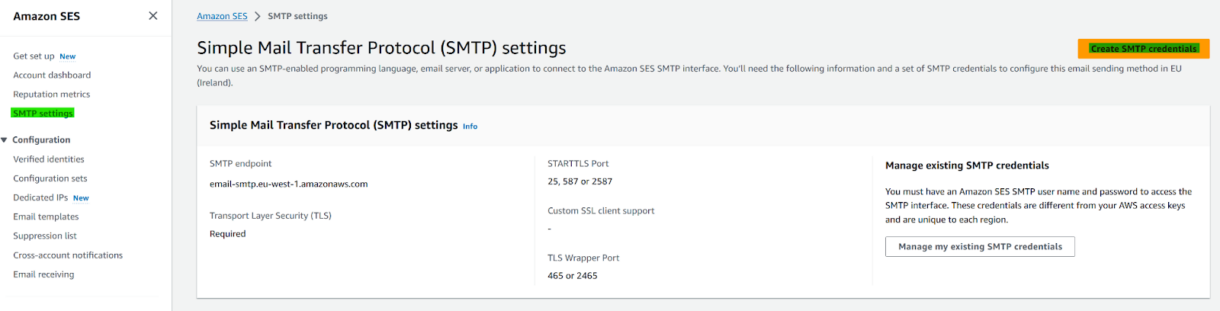
Creating SES Credentials
1. Navigate to the SES service and select SMTP settings in the sidebar.
Then click on Create SMTP.
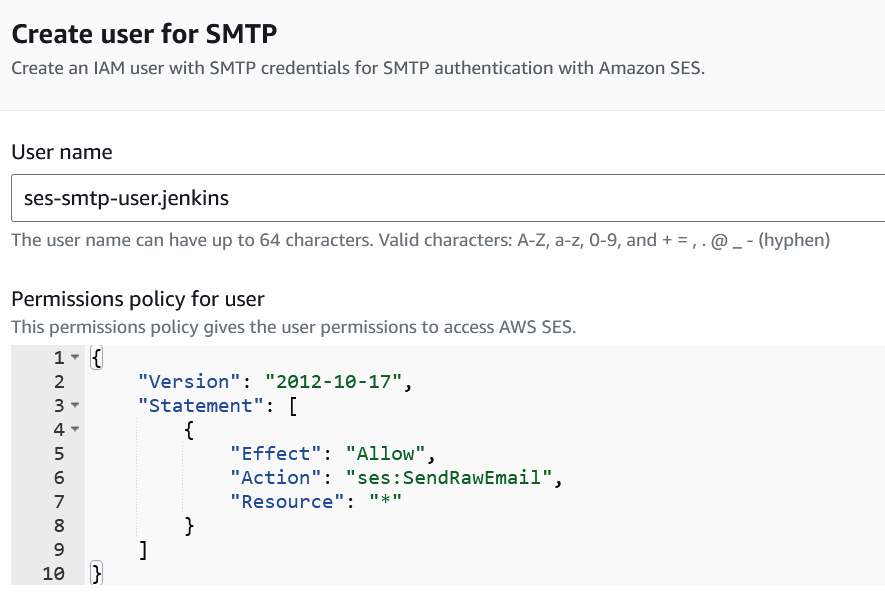
2. Name your new credential. The policy statement should look the same as the one below.
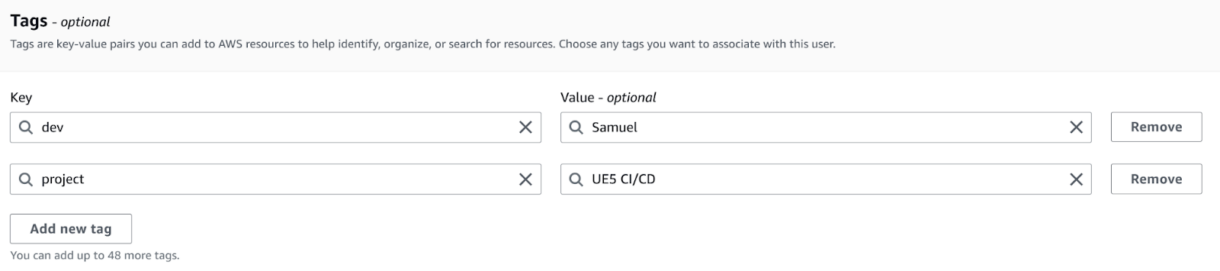
3. Add your meta-data tags to the credential and click on “Create user” in the bottom right.
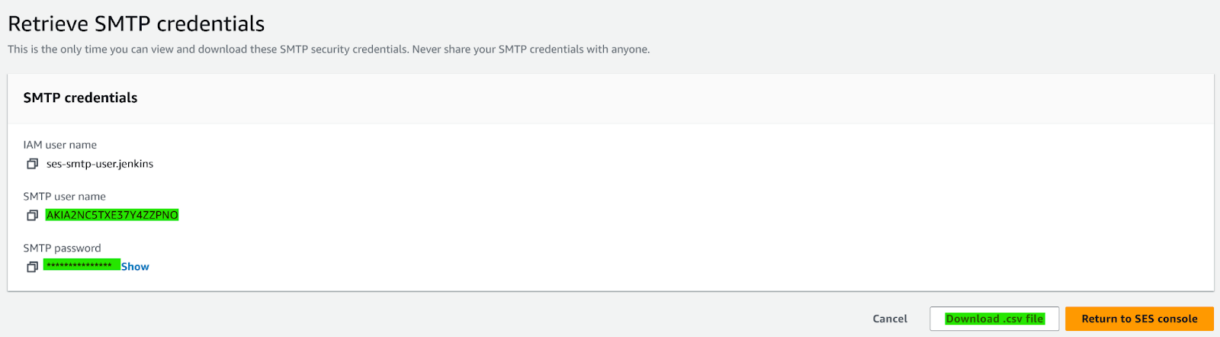
4. You will now be shown your newly created SMTP credentials. Make sure to save these, since you will not be able to retrieve them again.
We will only need the SMTP user name and password. The IAM user name will not be needed in Jenkins.
You can download the credential in a .csv file if you want to save them somewhere permanently.
Verifying Email Addresses
By default, your AWS account will be in SES Sandbox mode. This restricts various things. You will only be able to send 200 emails per day. You will also only be able to send emails to and from email addresses that have been verified with SES. If these limitations are too strict for your use case, you can always move SES out of the sandbox into production.
To do this, follow the steps outlined here. We won’t need this for this example so we’ll cover how to verify addresses instead.
- In SES, click on Verified identities in the sidebar. You can then click on Create identity.
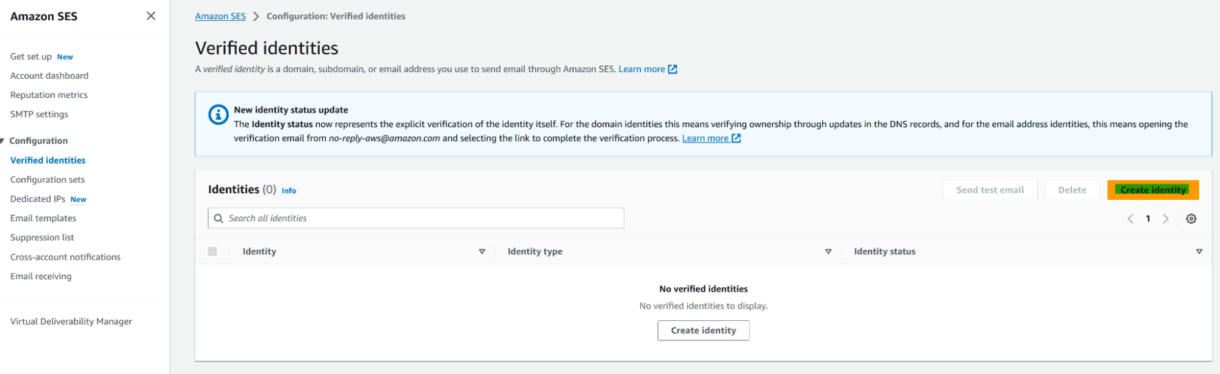
2. Select Email address and enter the address you want to verify.

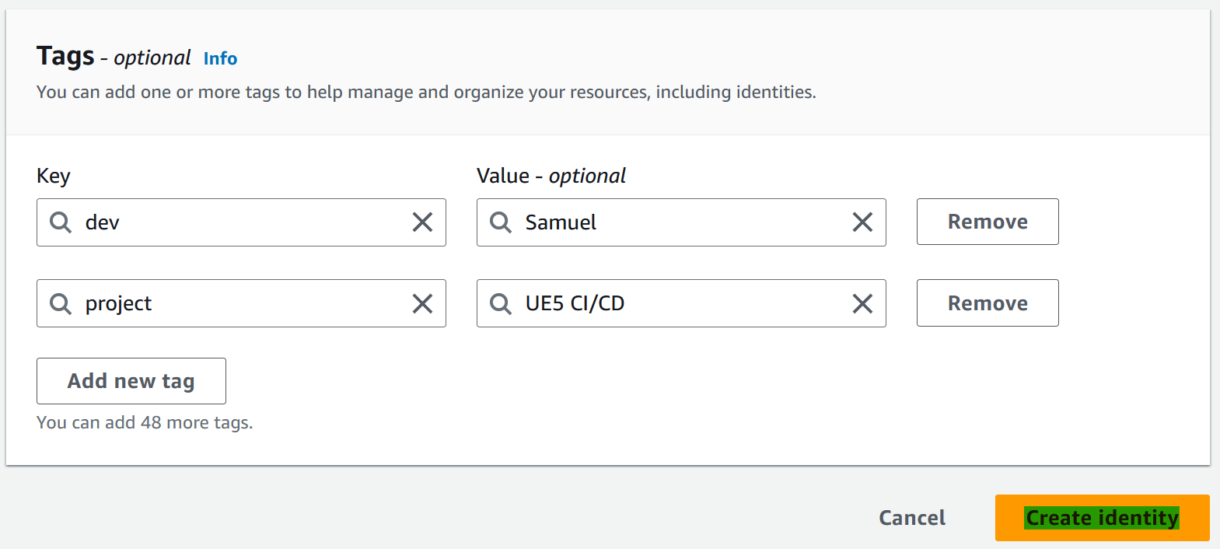
3. Provide tags if needed and click on Create identity.
At the provided email address, you’ll now receive a verification email. Follow the provided link and instructions and you are ready to send emails to or from that address.
You will have to do this for every address that will be used.
Configuring Email in Jenkins
Now we need to add the credentials and the SES information to our Jenkins server.
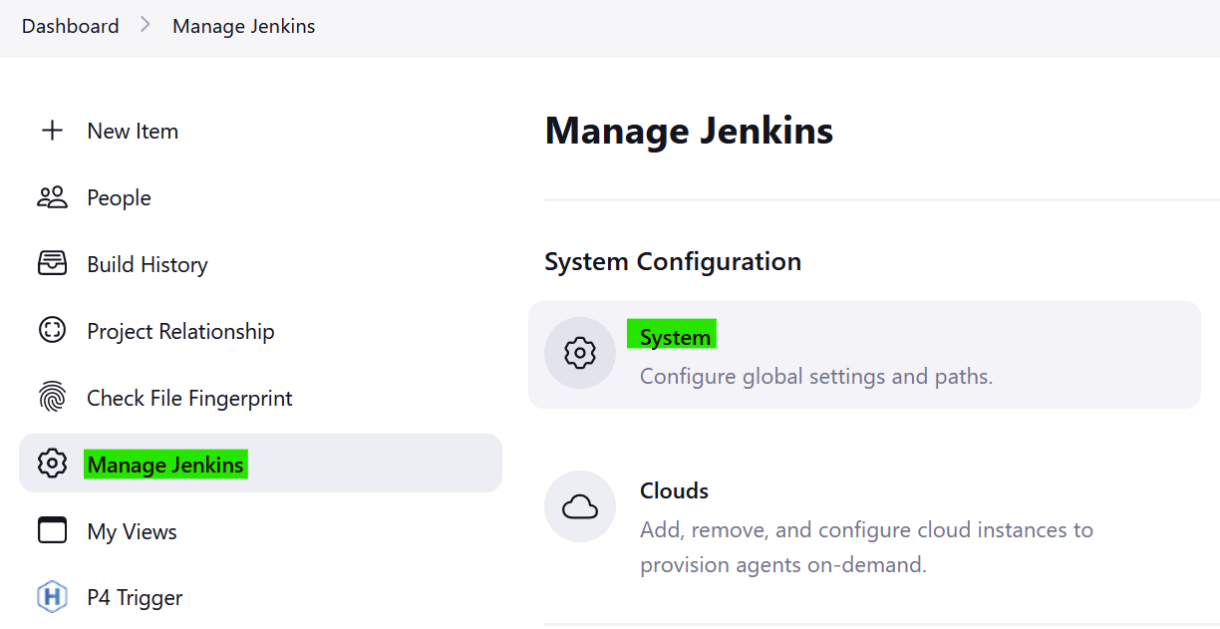
- Head to Manage Jenkins and click on System.
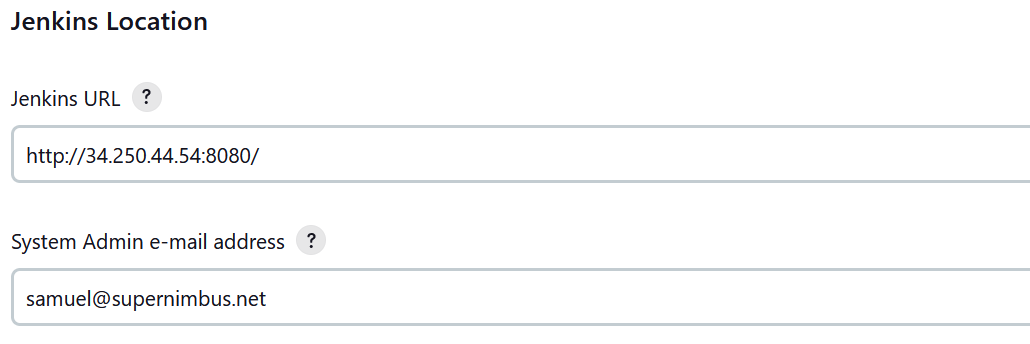
2. In the Jenkins Location section, you will need to set the System Admin e-mail address. This is where all of the emails sent from Jenkins will originate from.
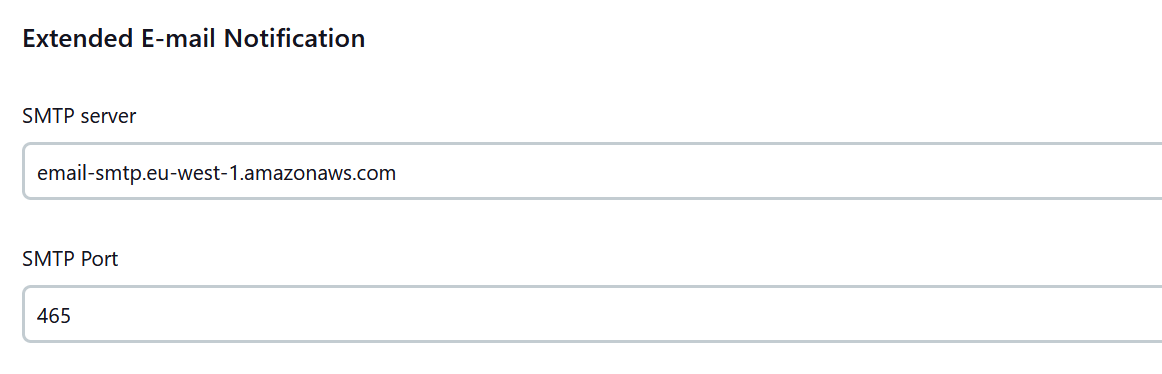
3. In the Extended E-mail Notification section we need to set both the SMTP server address and its port.
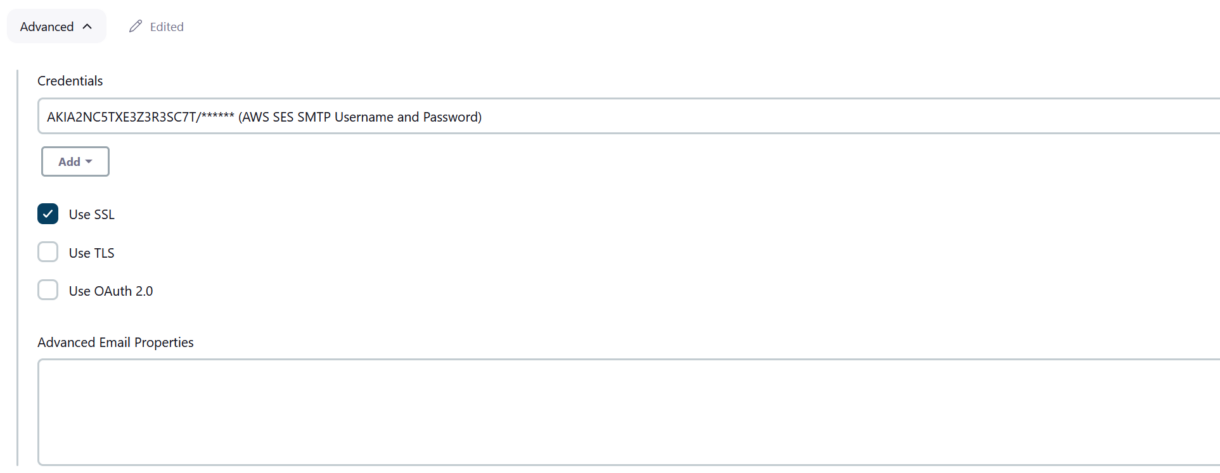
4. Open the Advanced section and add your AWS credentials we created earlier. Make sure that you tick the “Use SSL” box.
We can now use the emailext() function in our pipelines to send emails. You can read up on this plugin here.
Our Python Build Scripts
We use 4 custom Python scripts across our project build jobs. I will provide them below and give some general explanations on each of their roles and what they implement. If you have additional features you want to implement in your build pipeline that are not covered in our build scripts, Python makes it easy to add features to our existing functionality or write new scripts and add them to your pipeline flow.
We won’t be covering the scripts line by line, but you can grab the full scripts from the repository here.
Our Jenkins Pipeline Scripts
All of our build-jobs use Jenkins declarative pipeline scripts. This section covers our pipeline scripts in detail but will not cover the basics of writing pipeline scripts. If you want to learn more about Jenkins pipelines, you can read up on them here. We will also only cover the changed steps in the incremental build, since the pipeline scripts from the Nightly and the Incremental builds are very similar. To see and copy the full pipeline script, you can grab them from here.
Nightly Pipeline
Our nightly build triggers exclusively from a Jenkins cron job expression. This specific cron job will trigger builds at midnight every Monday – Friday. Since work will generally not happen over the weekend, we can skip building on Saturday and Sunday and save on cost.
triggers {
    cron('H(0-10) 0 * * 1-5')
}
These Options are settings that you can set on a Pipeline job which will customise its default behavior.
In this example, we make sure that only 10 builds are kept on the controller. Keep in mind that this does not affect the build artifacts we uploaded to both GameLift and S3. This solely affects the build artifacts on the Jenkins controller.
Next, we disable concurrent builds. We only want to build one nightly build at a time.
With the final option we enable timestamps, which will make our build-logs more useful. It will help in keeping track of how long certain build-actions take.
options {
   buildDiscarder(logRotator(numToKeepStr: '10'))
   disableConcurrentBuilds()
   timestamps()
}
Build parameters are variables that can be set before starting a build. They are then accessible in the pipeline script on any build agent.
We have a lot of them configured here and they are self explanatory so we will not go through each one here.
Our nightly builds will use the provided defaults, but if you need to trigger a custom build manually, you can set these to whatever values you need. You can view these directly in the repository linked above.
The following section of the script selects which build agent will be used throughout the whole pipeline. You can specify different agents for different sections, but we will only need our Unreal Engine 5 build agent. This agent will be spun up dynamically when starting the pipeline.
agent {
   label 'windows-UE5.2'
}
Stages are separate sections of our build. We will run our steps chronologically, but you can also parallelise them if you need to.
stage('Sync Build Scripts') {
   steps {

       echo 'STAGE - Sync Build Scripts'

       dir('build-scripts'){

           p4sync(
                charset: 'none',
                credential: 'perforce-credentials-Samuel',
                format: "${params.BUILD_SCRIPTS_WS}",
                populate: autoClean(
                    delete: true,
                    modtime: false,
                    parallel: [
                        enable: false,
                        minbytes: '1024',
                        minfiles: '1',
                        threads: '4'
                    ],
                    pin: '',
                    quiet: true,
                    replace: true,
                    tidy: false
                ),
                source: streamSource('//BuildScripts/Main')
           )

           stash(name: 'build', includes: 'build.py')
           stash(name: 'upload', includes: 'upload.py')
           stash(name: 'fleet', includes: 'launch-gamelift-fleet.py')
       }
   }
}
This step creates a new directory called “build-scripts” in the jenkins workspace and syncs our Build scripts into it using a p4sync command.
We then use the stash feature provided by Jenkins to zip up individual scripts, which will make them easier to unzip later wherever they are needed.
stage('Set Build Name') {
   steps {

       echo 'STAGE - Set Build Name'

       script {
           def currentDate = new Date().format("dd-MM-yyyy")
           currentBuild.displayName = "Nightly_${currentDate}_${env.BUILD_TAG}"
           env.BUILD_NAME = currentBuild.displayName
       }

       echo "Build will be called: ${env.BUILD_NAME}"
   }
}
This stage is responsible for setting the display name of the build and setting an env variable to cache the generated name for the duration of the pipeline.
The name is generated using date and the current build tag. We do this in a script section, which allows us to run custom logic written in Groovy script. This name will be used in later stages of the build.
stage('Sync Project Files') {
   steps {

       echo 'STAGE - Sync Project Files'

       dir('project') {
           p4sync(
                charset: 'none',
                credential: 'perforce-credentials-Samuel',
                format: "${params.PROJECT_WS}",
                populate: autoClean(
                    delete: true,
                    modtime: false,
                    parallel: [
                        enable: false,
                        minbytes: '1024',
                        minfiles: '1',
                        threads: '4'
                    ],
                    pin: '',
                    quiet: true,
                    replace: true,
                    tidy: false
                ),
                source: streamSource('//GameLiftTutorial/Main')
           )
       }
   }
}
Next, we need to sync the project. We first create a project directory in the workspace and then force-sync the project files into it. This means that the full project is downloaded at the start of every build. In this case it is necessary since we clean (delete) the workspace after every build.
stage('Build Pre-Requisites') {
   steps {

       echo 'STAGE - Build Pre-Requisites'

       dir('project') {
           unstash 'build'
           powershell "python -u Build.py --pre_reqs --configuration=${params.CONFIGURATION}"
       }
   }
}
Now we can build our project. The first build step builds the prerequisites (Engine, Engine components, Project editor).
To do so, we first “unstash” the build script we stashed earlier in the project directory. We then call it using Powershell with a specific configuration we set up using build parameters.
stage('Build Project') {
   steps {

       echo 'STAGE - Build Project'

       dir('project') {
           unstash 'build'
           powershell "python -u build.py --mode=client --client_target=Win64 --server --server_target=Win64 --configuration=${params.CONFIGURATION}"
       }
   }
}
This stage will build and package the project into both a client and a server. Here we provide different parameters, but it is essentially the same as the previous example.
stage('Include GameLift Files in Server') {
   steps {

       echo 'STAGE - Include GameLift Files in Server'

       dir('project\\GameLiftFiles') {
           stash(name: 'gl_install', includes: 'install.bat')
           stash(name: 'gl_redist', includes: 'VC_redist.x64.exe')
       }

       dir('project\\Packaged\\WindowsServer') {
           unstash 'gl_install'
           unstash 'gl_redist'
       }
   }
}
In order to activate successfully on GameLift, our server build needs to have both an install.bat and the VC_redist.x64.exe in the root of the server directory.
We have these files included in the folder “\GameLiftFiles” in our Perforce server at the root of the project files, so we simply need to copy them over into the new WindowsServer folder.
stage('Launch GameLift Fleet') {
    steps {
        dir('project\\server-build') {
            unstash 'launch-gamelift-fleet'
            powershell "python -u launch-gamelift-fleet.py --build-name='${params.BUILD_NAME}' ...'"
        }
    }
}
Now that all of the files are built, packaged and set up, we can launch our new fleet.
We do so using our “launch-gamelift-fleet.py” python script. This will write the newly launched fleet to file. We retrieve the id in a custom script using the readFile() function and store it in a variable named FLEET_ID.
Lastly, we start a new build-job to poll the fleet. This will launch a separate job, which will execute independently on the controller instance. We make sure to set wait to false. This allows us to continue on with additional stages, without awaiting the polling jobs result. Please see the repository for the full command used.
stage('Upload Build to S3') {
   when {
       expression { return params.UPLOAD_TO_S3 }
   }
   steps {

       echo 'STAGE - Upload Build to S3'

       dir('project') {
           unstash 'upload'
           powershell "python -u upload.py --local_folder='${params.ZIP_DIR}' ..."

           script {
               env.BUILD_URLS = readFile('urls.txt').trim()
           }
       }
   }
}
Our final build stage will upload both the client and server zip to S3 based on a boolean build parameter.
Since we also generated presigned links for all of the uploaded zips, we can read the urls from the file into an env variable. This will be used later when sending out email notifications. Please see the repository for the full command used.
post {
   success {
       echo "Build completed: SUCCESS"

       emailext (
            attachLog: true,
            body: """Successful - Jenkins Build - ${env.JOB_NAME}
--------------------------------------------------------------------------------------
${env.JOB_NAME} built successfully.
You can find links to download the builds below.
Logs are attached

Build Links:
${env.BUILD_URLS}
--------------------------------------------------------------------------------------
""",
            compressLog: true,
            replyTo: 'samuel@supernimbus',
            subject: "Successful - Jenkins Build- ${env.JOB_NAME}",
            to: "${params.EMAIL_LIST}"
       )
   }

   failure {
       echo "Build completed: FAILURE"

       emailext (
            attachLog: true,
            body: """Failure - Jenkins Build- ${env.JOB_NAME}
--------------------------------------------------------------------------------------
${env.JOB_NAME} built with errors.
Logs are attached
--------------------------------------------------------------------------------------
""",
            compressLog: true,
            replyTo: 'samuel@supernimbus',
            subject: "Failure - Jenkins Build - ${env.JOB_NAME}",
            to: "${params.EMAIL_LIST}"
       )
   }

   cleanup {
       script {
           if (params.CLEAN_WORKSPACE) {
               cleanWs()
           }
       }
   }
}
After a build completes, we have separate logic for handling successful and unsuccessful builds.
On successful builds, we email the provided addresses a success email that includes the build urls we generated earlier. On failures we simply notify them of failure. Both emails will also include the build logs as an attachment.
Lastly, we also have a clean-up section which deletes the workspace regardless of build outcome.
Incremental Pipeline
Builds for this job will be triggered externally by our Perforce server. We have configured a Perforce trigger set up that looks like this:
start-incremental-build change-commit \
//GameLiftTutorial/Main/... \
"%//GameLiftTutorial/Main/triggers/change-commit-trigger-incremental.sh% %change% %user%"
This trigger runs a change-commit-trigger-incremental.sh script that is hosted in the UE5 project’s stream repository. The shell starts the Jenkins build using a curl command.
This is the shell script:
#!/bin/sh
changelist="$1"
user="$2"
jenkinsUrl="http://<jenkins-ip>:8080"
jobName="GameLiftTutorial_Incremental_Main"

curl -X POST "$jenkinsUrl/job/$jobName/buildWithParameters" \
--user <jenkins-username>:<jenkins-user-token> \
--data CHANGELIST=$changelist \
--data USER=$user
This also provides the author of the commit and the changelist to the Job using parameters. Importantly, in order to authenticate the request to the Jenkins server, we provide a Jenkins user and a token that must be generated for it.
You can generate a token in the following way:
- In the top right in the Jenkins portal, click on your user options drop-down menu.
- Click on Configure in the sidebar and click on Add new Token. You can see that we already created a token. You can and should create multiple for different uses. This allows you to incrementally revoke API access when needed.
- Name the token and then click on Generate.
- Like the warning message tells us, the token won’t be recoverable after this one-time viewing. Make sure you save it somewhere safe!
- The way of authenticating the external requests will be <userName>:<token>.
Again, we can disable concurrentBuilds. To save on EC2 costs, we restrict this job to one machine which will keep files from previous builds on disk. If you want to ensure the builds are quick, you could also run the builds concurrently with multiple EC2 agents.
options {
   buildDiscarder(logRotator(numToKeepStr: '15'))
   disableConcurrentBuilds()
   timestamps()
}
We use the same AMI as the nightly build, but we have a separate cloud-agent set up for it. This means that the incremental and the nightly builds don’t run on the same agent.
agent {
   label 'windows-UE5.2-incremental'
}
This first build stage is purely for outputting information. It will inform us who triggered the build with a commit and what changelist to pin the build at.
stage('Set Build Name') {
   steps {

       echo 'STAGE - Set Build Name'

       script {
           currentBuild.displayName = "Incremental_${env.BUILD_TAG}@${params.CHANGELIST}_${params.USER}"
           env.BUILD_NAME = currentBuild.displayName
       }

       echo "Build will be called: ${env.BUILD_NAME}"
   }
}
This stage differs slightly. It generates the build name from the Perforce commit metadata.
stage('Sync Project Files') {
   steps {

       echo 'STAGE - Sync Project Files'

       dir('project') {

           dir('Zips') {
               deleteDir()
           }

           dir('Packaged') {
               deleteDir()
           }

           p4sync(
                charset: 'none',
                credential: 'perforce-credentials-Samuel',
                format: "${params.PROJECT_WS}",
                populate: autoClean(
                        delete: false,
                        modtime: false,
                        parallel: [enable: true, minbytes: '1024', minfiles: '1', threads: '4'],
                        pin: "${params.CHANGELIST}",
                        quiet: true,
                        replace: true,
                        tidy: false
                   ),
                source: streamSource('//GameLiftTutorial/Main')
           )
       }
   }
}
Syncing the project files for incremental builds will vary slightly. We first delete previous Zip and Packaged directories. These are the only things we want to create fresh every build. Next, you can see that the populate command pins the sync at the specific changelist number that we provide when triggering the build
Other than that, all other stages are the same. We leave out any of the GameLift stages from the Nightly build. Uploading a GameLift fleet on every commit is excessive. However, it would be easy to add if needed.
Again, the post build actions are the same as the nightly builds. However, we do not clean the workspace. This keeps generated files on the EC2’s EBS volume, which speeds up subsequent builds.