Basic UE5 Multiplayer Project Setup

Introduction
In this section we will be showing how to set up the most basic multiplayer UE5 project possible.
For this, we will make use of the Third Person template project provided by Epic Games.
Note
This tutorial is part of a series of tutorials on deploying UE5 multiplayer builds with AWS GameLift.You can see Part 1 of this tutorial below.
Project Creation
Open the Editor and wait for the shaders to compile. This can take quite some time depending on how powerful your PC is.
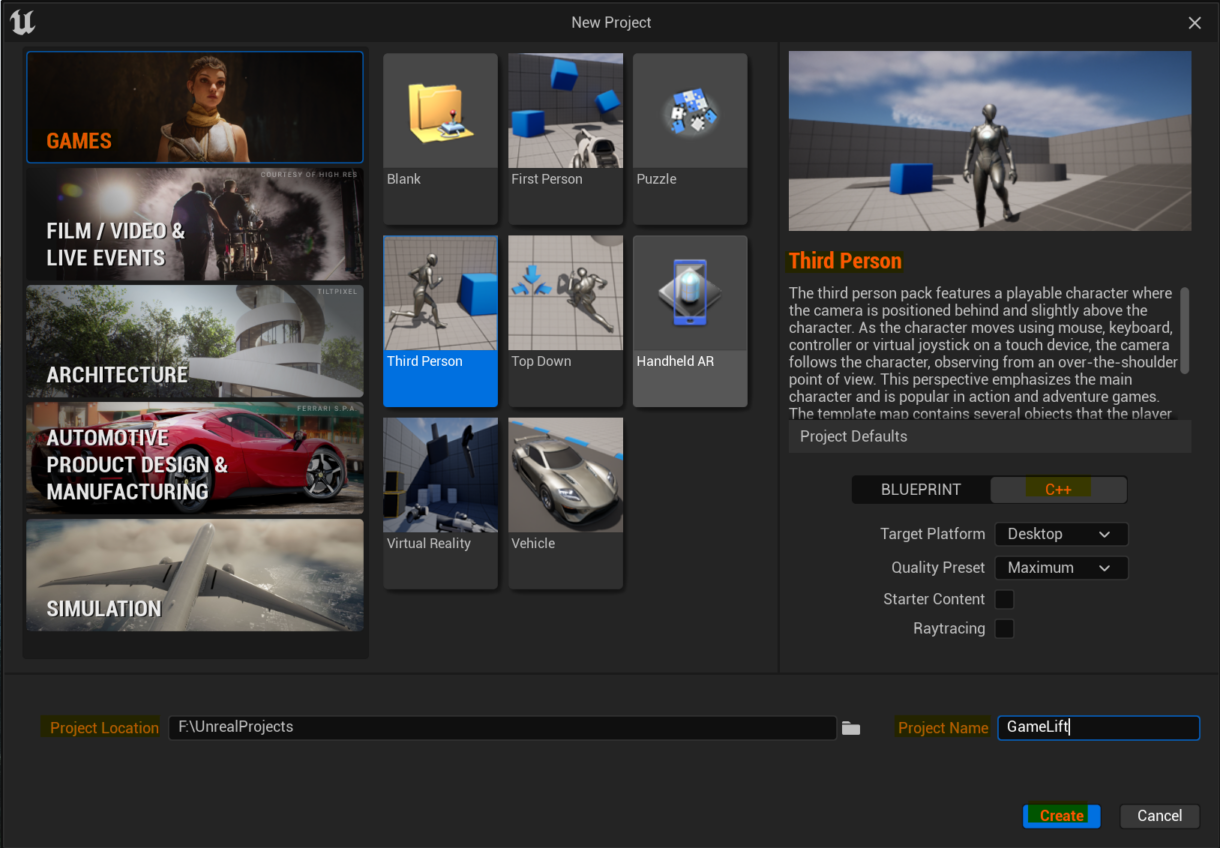
When the initial setup steps are complete, you will be greeted with the Unreal Project Browser.
Click on the Games tab and select the “Third Person” project.
Select C++, and Desktop for your target platform and then set the project location and name.
Then click the Create button.
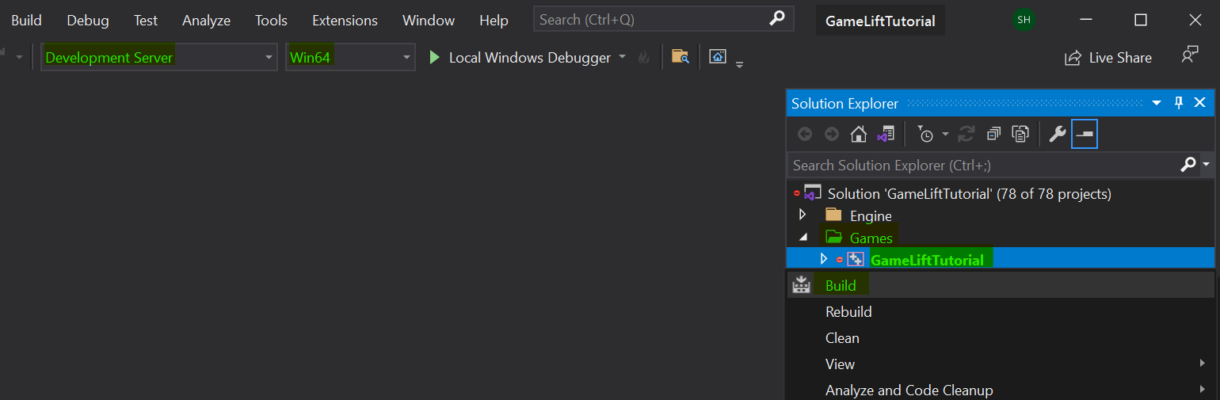
This will open the project in Visual Studio
In the games folder of the solution explorer, right-click on your project and build the Development Editor.
Once this has been completed we can open the Uproject file in the project directory.
Note
From this point we only need to build using the
Creating The Server Target
We will need to create an additional server target file to build and package dedicated server builds.
To do this, go to the project location in the file explorer and open the source folder.
In there, you should see a file named <YourGame>.Target.cs
Duplicate this file and rename it to <YourGame>Server.Target.cs, then open the file in your code editor of choice.
We now need to alter some lines of this newly created target file. First, make sure you rename the class from <YourGame>Target to <YourGame>ServerTarget.
Next, the constructor needs to match the class name.
Lastly, change the TargetType from TargetType.Game to TargetType.Server.
Your file should now match the code example below, but where we use “GameLiftTutorial” you should use the name of your Unreal project.
using UnrealBuildTool;
using System.Collections.Generic;

[SupportedPlatforms(UnrealPlatformClass.Server)]
public class GameLiftTutorialServerTarget : TargetRules
{
    public GameLiftTutorialServerTarget(TargetInfo Target) : base(Target)
    {
   	 Type = TargetType.Server;
   	 DefaultBuildSettings = BuildSettingsVersion.V2;
   	 IncludeOrderVersion = EngineIncludeOrderVersion.Unreal5_1;
   	 ExtraModuleNames.Add("GameLiftTutorial");
    }
}
Save and close the file.
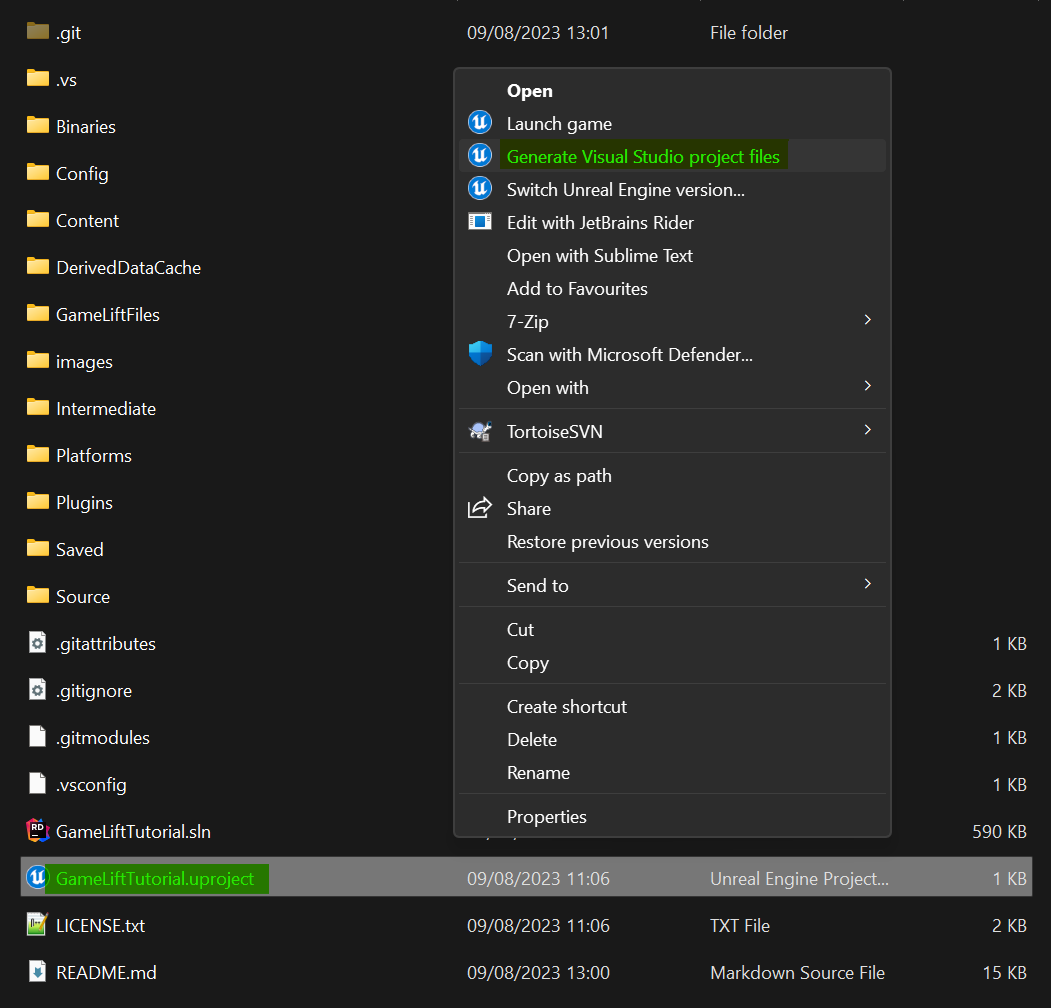
Now we need to regenerate the Visual Studio project files using the Uproject file.
To do this, right click on the .uproject file in your file explorer and select Generate Visual Studio project files.
This will update the VS solution to show our new file.
Open the solution file in Visual Studio.
We can now build the server target.
Select “Development Server” as the configuration and Win64 as the target platform.
Then right-click on the Game in the solution explorer and select Build.
This will take some time to complete.
Project Setup
At this point, we can build both the client and server for Windows.
Let’s open the project to verify this and set up the basics of what we will be building.
When you first launch the editor, it will open the ThirdPersonMap. This map is stored in the “Content/ThirdPerson/Maps” folder. We will want to duplicate this map and move it to a new directory in Content.
For this example we called this directory “Content/Maps”.
You will need to rename the duplicated “map” to “Main”.
Now duplicate the “Main” map and rename it “Entry”. You should now have two .umap files in your “Content/Maps” directory:
- Entry.umap
- Main.umap

Next, we will set the project’s default maps to these newly created maps.
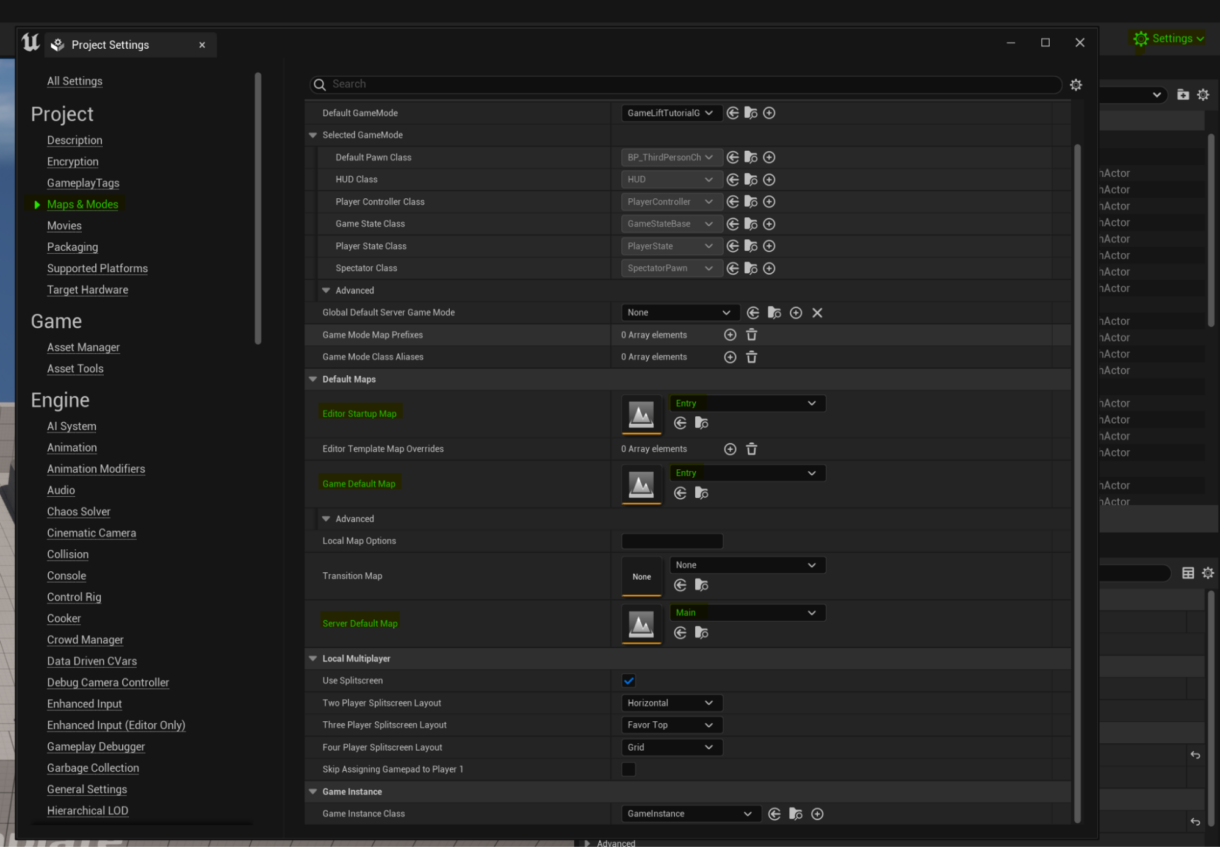
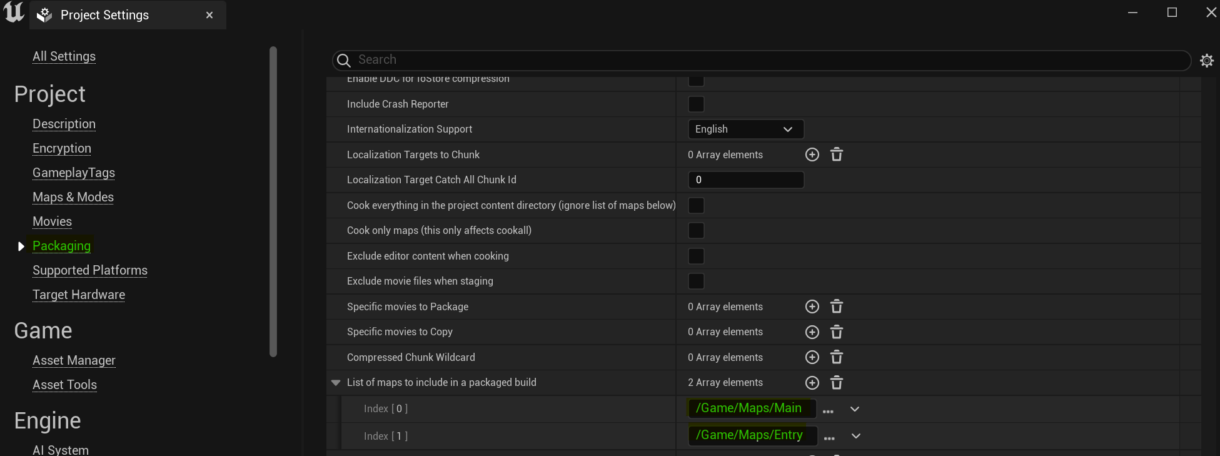
Open up the Edit menu in the top right, and click Project Settings.
In the Project Settings window, click on Maps & Modes in the sidebar. Here you will see the Default Maps settings.
Set both the Editor Startup Map and the Game Default Map to the Entry.umap we just created.
In the Advanced section of the Default Maps section, set the Server Default Map to be the Main.umap we just created
You can see where these settings are in the Project Settings menu in the image below.
Next, we will click on the Packaging section in the Project Settings sidebar.
In the Packaging section, expand the Advanced section and scroll down to the List of Maps to include in a packaged build setting.
Here you want to add both the Entry and the Main map to the list.
We can now close the Project Settings window.
Test Builds
Now let’s run out some test builds to make sure both our client and server work correctly.
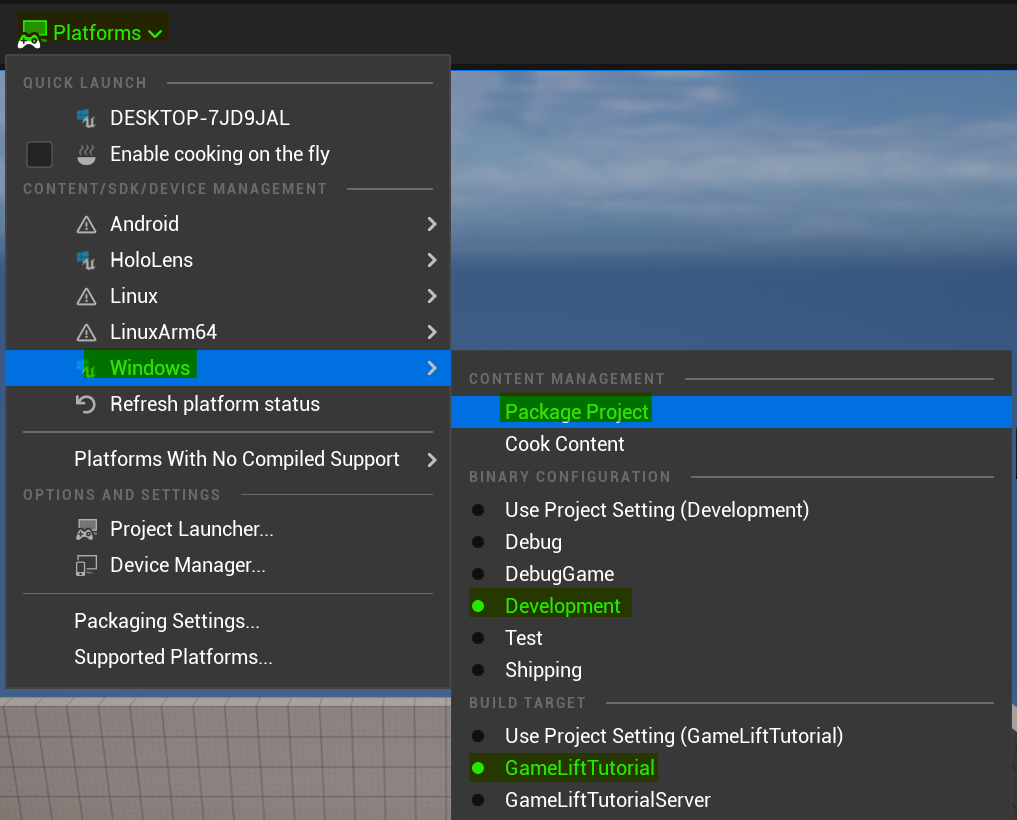
Click on Platforms in the toolbar, hover over Windows, make sure the Build Target is set to <Your Project Name> and the Binary Configuration is set to Development and then click Package Project.
You can see these options in the image below.
Select where this build should be saved on your disk (in our case, we package our projects in a folder at the project root called “Packaged”).
This will start the build and open the Output Log to show you the progress. Once the build is complete, you should be able to open the executable we just built and run around in the Entry map as the third-person controller pawn.
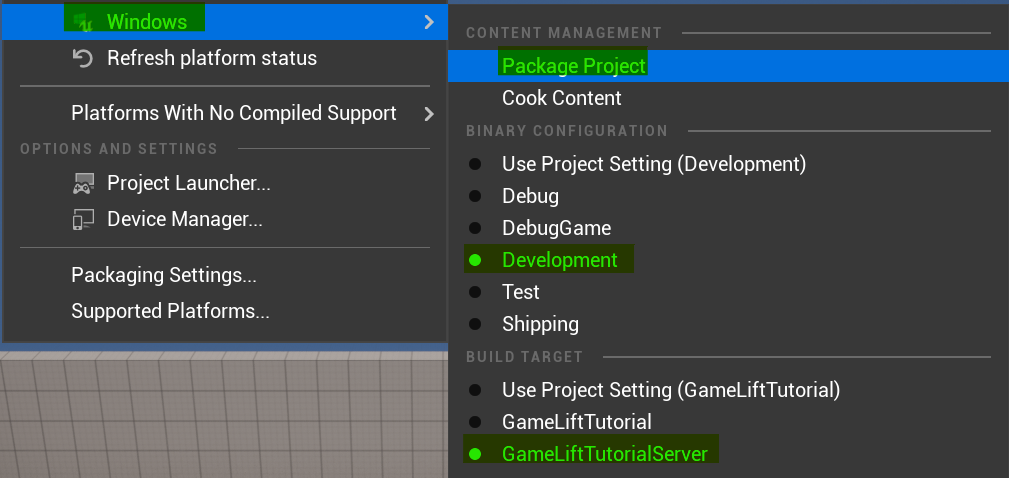
Next, we will build the server. Follow the steps as before, but switch the Build Target to <Your Project Name>Server. Then click Package Project.
If you do not see the <Your Project Name>Server build target as an option, try rebuilding the Development Editor from Visual Studio.
Once the Server build is complete, you can launch the server using the .exe file in the build directory.
By default, this will launch the server in the background, so we won’t be able to see it running.
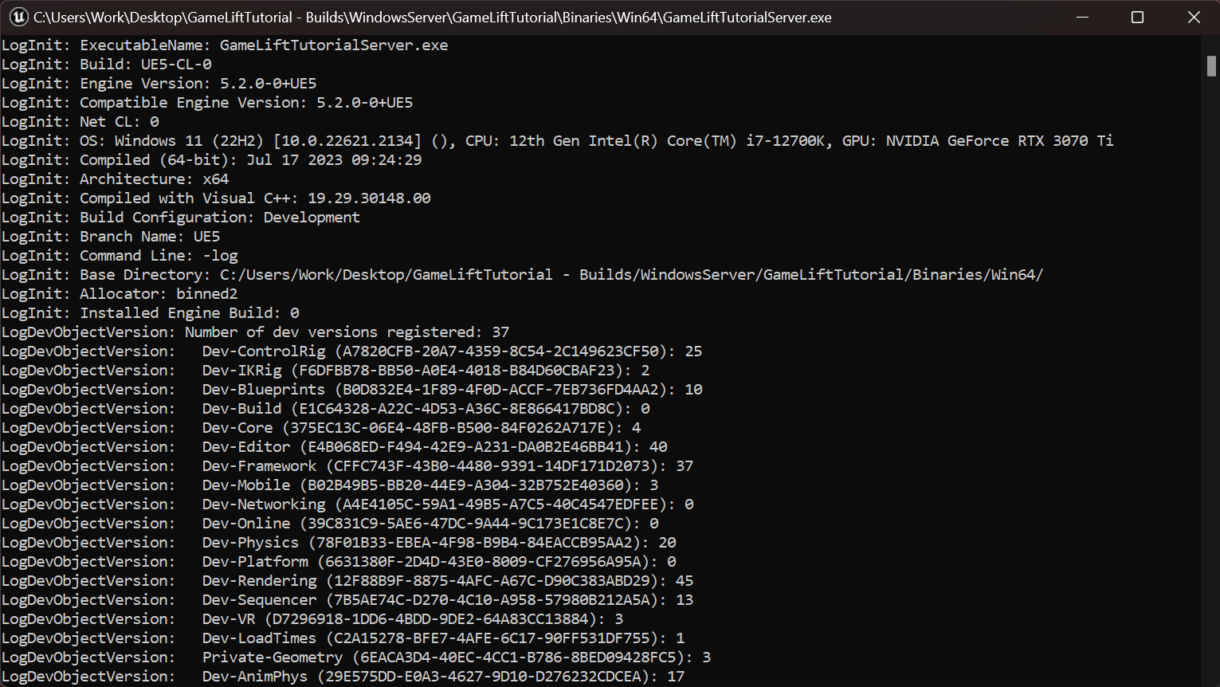
To open the server with a logging window, we can start the server executable from the command line and use the -log flag.
./GameLiftTutorialServer.exe -logAn alternative would be to create a shortcut of the server executable, right-click on it and click properties.
Then, under the Target field, add “ -log” and click ok.
When the server is launched through this shortcut, it will open the log output window by default.
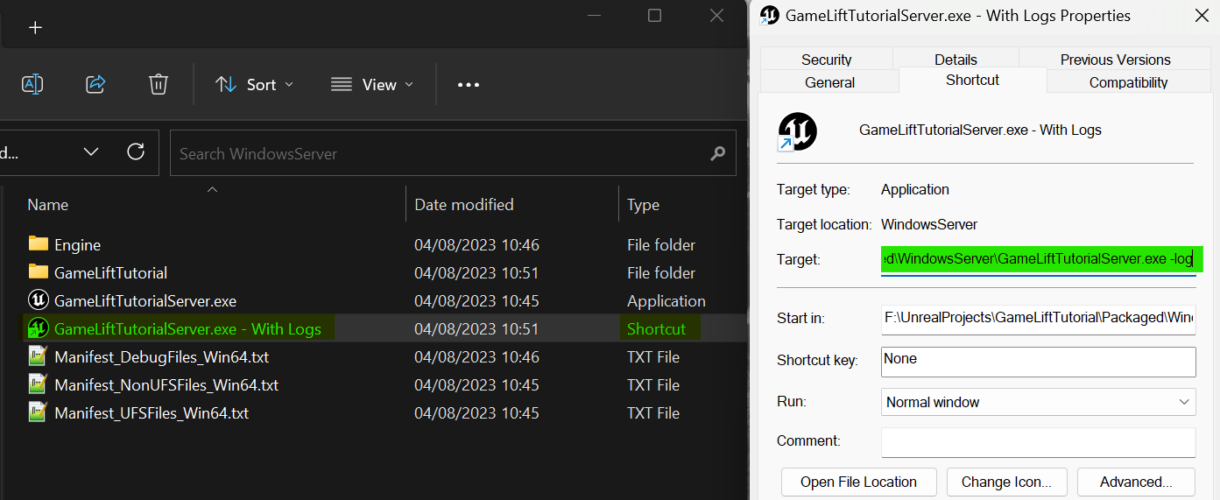
When you run your server with logs, you will see a window that looks like the image below.
Here you will see all of the logs your server produces as it is running.
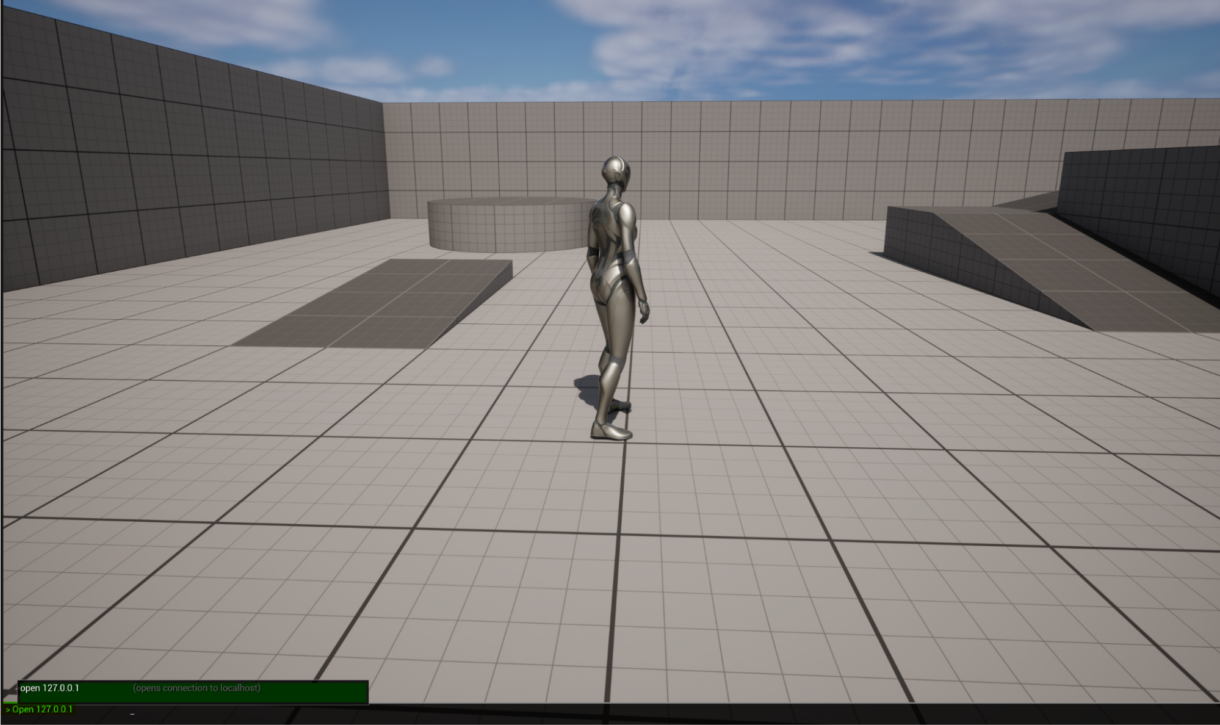
To test that the dedicated server is running correctly, we can connect to it using the Unreal Editor or the Client build we made.
When playing either of those and having the dedicated server running locally, you can press the tilde (‘~’) key on your keyboard to open the developer console.
Enter the command “Open 127.0.0.1” and you should connect to the dedicated server running on localhost.
You will see your client connecting to the server in the server logs.
Congratulations!
You have just built your Client and Dedicated server and you were able to connect the two.
Summary
In this section we have shown how to put together a simple multiplayer project and run out some test build we can connect to locally.
In the next section we will integrate the GameLift SDK into our project and look at building it for deployment.